Last Friday was Web Teaching Day, hosted at the University of Greenwich. The event is organised so that those who teach Web Design (or variations of that discipline) can get together and discuss their approach to teaching/learning.
During the morning session we heard from a number of great speakers who described how they introduce their undergraduate students to HTML and CSS and there were some interesting ideas.
Inspired by what I’d heard, I prefixed my talk at the start of the afternoon session (on staff/student communication) with a short explanation of an approach to teaching HTML that I have developed this year. The session was unscheduled and I didn’t have time to go into detail, so this article is an attempt to expand on what I said.
Background
I’ve been teaching web design to postgraduate students for more than 10 years and I have developed what I believe is a successful approach which seems to work for them. Although I have worked with undergraduate students a lot in the past, in recent years I have taught only postgraduate students and I hadn’t done any undergraduate Web teaching at all.
That changed in this academic year (2014-15). I had to deliver an introduction to web design for 2 groups of year 2 undergraduate students, one in Graphic Design and another in Media & Communication. I knew the approach I was taking with my MA students wouldn’t translate to BA, so I had to come up with an alternative.
I began by thinking about the students, what they already knew and how they might relate to the subject. Not all of them were likely to become web designers but they all needed to develop a fundamental understanding of the Web as a platform.
It struck me that what the students had in common was a good understanding of content. The Graphic Design students were content creators and the Media & Communication students were content curators. This fitted very nicely with the “content out” approach to Web Design that I like to use with my MA students and it reminded me of an approach to teaching HTML that Aral Balkan had used some years ago (sadly, I’ve lost the URL for that resource).
We often describe HTML as being the “core” experience of the Web. That is true in terms of technology, it’s the base layer upon which the other layers (CSS and JavaScript) could be considered enhancements. But if we forget about technology for a moment, we could consider the raw content (without markup) to be the core experience.
The following describes a 2 hour session with Media & Communication students. It was the first of ten sessions designed to give them an introduction to web design.
Session 1, an introduction to HTML
At the start of this session I give a general introduction to the course and explain what we are hoping to achieve and why this will be useful for them. I then explain the structure of the sessions by introducing the concept of the three layer web. I describe the relationship between HTML and structure, CSS and presentation and JavaScript and behaviour. I explain the principle of separation between the layers. At this stage they have little or no context for this and don’t really understand, but I’ll repeat this at the start of subsequent sessions and they will gradually develop a good mental model for what we are doing.
I introduce the first session by telling students that today we are looking only at the first of those three layers.
Content
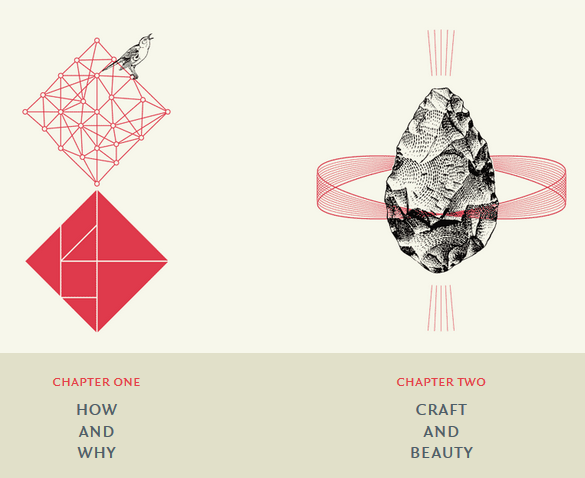
We (the students and I) begin by looking at some content that is already published – it doesn’t have to be on the Web. In fact, I chose two books. For the Graphic Design students, we used Jason Santa-Maria’s On Web Typography and for the Media & Communication students, we used Frank Chimero’s The Shape of Design. It helps that both books are beautifully designed and printed.
As it turned out, the Frank Chimero book was the better choice because it is available in a number of formats/platforms, most importantly, there is a HTML version freely available. This enabled us to discuss the differences in the quality of the experience between paper and screen and it demonstrated how the same content could be successfully delivered using different platforms.
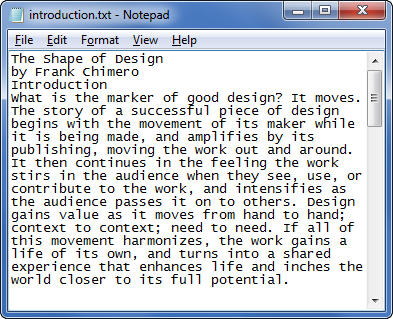
We get to the point where we agree that the only common element of the different experiences is the content itself (the words and pictures) and so I begin by giving them those essential elements only and start by considering the words. I have prepared a plain-text version of an extract from the book and give this to the students as a simple .TXT file.
We open the .TXT file in Notepad and I ask them if this is a Web page; they tell me it’s not. I tell them it is and ask them to save the file with a .HTML extension. I then ask them to double-click the saved file. It opens in a browser and the text is displayed. They are surprised and I joke that we need do no more, they have learned how to build Web pages.
We return to the .TXT file in Notepad and I ask them to look at the words. I ask them which words form the book title, which the chapter headings and which the various paragraphs. This they are able to do easily but then I ask how they know these things because they are all just words. We discover that they can infer document structure from the minimal formatting of the text file and from the meaning of the words.
Once we have established this, I ask them “could a blind person do what you have just done?”. Blank faces. I ask them “do blind people use the Web?”. They don’t know. “Should blind people have access to web content?”. They agree that they should. I then ask how we can facilitate this and introduce them to the concept of assistive technologies. They discover that software can be used to read content to blind people.
We then have a discussion about whether the Web is a visual medium. Initially, they believe that it is but I remind them what we have just talked about and we eventually agree that the essence of the Web is just content and that content can be conveyed in a number of ways.
I then ask whether Web content is for humans. They tell me it is and I say “but what about non-human user agents?”. They have no idea what I’m talking about. I remind them about the software screen readers used by blind people. They tell me that’s true but it’s an edge case. So I ask them “how do search engines know where to find stuff on the Web?” They have a vague notion of how this works so we put some meat on the bones and talk about bots and spiders crawling the Web. I then ask how many visits a webpage may get from bots. They’re not sure, so we look at some stats and discover that in some cases, there are at least as many non-human visitors as there are human visitors. We discuss the importance and advantages of allowing non-human users easy access to and interpretation of our content (SEO).
We are now in a position where we have established that web content needs to be accessible to non-human (software) agents and humans. I suggest that software has to be able to interpret the meaning of the content in the .TXT file in the same way that they were able to do this intuitively and with a few visual hints.
At this point, we’ve already come a long way but have yet to see a single HTML tag.
Markup
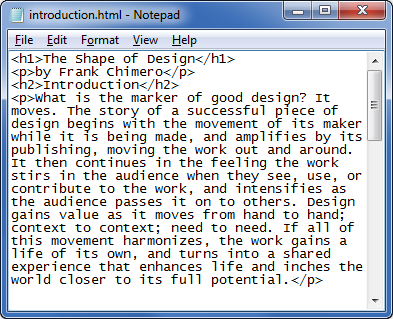
I ask the students how we can help software to understand the plain text content and because they already know this lesson is supposed to be about HTML, they suggest that might be a good way of doing this. I agree and we start to interpret the different text elements in the .TXT file (now saved as .HTML) and add some simple markup. <h1> for the main heading, <h2> for chapter heading and <p> for paragraphs.
I now ask them to save the file and refresh the browser. They are delighted to see that the content now makes better visual sense. I ask them what they have done. They tell me they have used HTML to make the title bigger and bolder and to add space between the paragraphs so it can more easily be read. I disappoint them by telling them that is incorrect. There follows a discussion about semantics, browser default styles and why many designers use a reset style to avoid the confusion between meaning and visual representation.
Slowly but surely they begin to understand what HTML is for and how it should be used. The discussion continues with me asking where HTML comes from and who decides what tags can be used and what their meaning is. I introduce the W3C and we consider the importance of standards.
At this point I explain the edit/refresh process and the relationship between what they see in the text editor and what they see in the browser window. I tell them, for example, that whitespace in our text editor does not translate into the same whitespace in the browser.
Initially, some students are confused that they can be looking at the same file but seeing it in different ways (editor and browser), so I get them to make a small edit and then refresh and to repeat this a number of times until the relationship between the two things is established in their minds.
Document structure
We continue the reverse onion-skinning by moving our attention out from the markup to the document. I point out that everything written in our .HTML file now appears in the browser window. I ask the students, “what if we wanted to add some information to the file and we didn’t want that information to appear in the browser window?” They aren’t sure what I mean, so I point to the browser tab and they notice that it displays a rather ugly path to the file that they’re looking at whereas other tabs display nice page titles. I explain that the text that appears on the tab has to be part of the HTML file but we don’t want to see it in the browser window – I introduce the <head> and <body> elements and we add the tags. We also add a <title>, they refresh the browser and are happy to see their tab now displays some title text.
We move out another layer and add the <html> tags around everything. I explain that this will make no obvious difference to the way our document behaves but it’s best practice. I reiterate the importance of standards and emphasise that just because the browser displays our document correctly without <html> tags doesn’t mean we should leave them out. I point out that taking a best practice approach to building for the Web is also a professional approach (I resist the temptation to talk about the document object model).
Finally, I ask the students what version of HTML we are using. Some of them tell me “HTML5”, others have no idea. I ask them how they know we’re using HTML5. They shrug their shoulders or tell me we must be because it’s the latest version. I explain that we need a doctype to tell everyone how the HTML in this document should be interpreted. I show them examples of the long, unwieldy doctypes of HTML4 and XHTML and emphasise the version numbering. I then show them the HTML5 doctype and ask them if there’s anything missing. “There’s no 5”, they tell me. I explain that HTML is now a living standard and that there will be no HTML6. I point out the benefits of this new mode of development and tell them the Web can evolve more quickly.
<!DOCTYPE html>
We finish the session by considering what we have done. We started with some raw content and we used HTML to add meaning to that content and to add structure to the document.
Summary and homework
At the end of the session, we’ve covered a lot of ground and have done very little coding but my students now have a deep understanding of the purpose of HTML. Now, when they markup content, they will know what they are doing and understand why they are doing it. Perhaps most importantly, they know who they are doing it for and this sets the foundations for the user-centred approach to design I will introduce in later sessions.
For homework, I ask them to work through the first 2 chapters of Shay Howe’s excellent Learn to Code HTML & CSS. They can do this using the online version or they can take out one of the many copies of this book we have in the library. I also suggest it would be a good idea for them to work through the Introduction to HTML lessons at Code Academy. These tasks will help to balance the taught sessions (which are weighted towards principle) with a better understanding of process.
Improvements
Although the lesson described above takes just a few minutes to read, it actually takes a couple of hours to deliver. In fact, I discovered that 2 hours wasn’t quite enough time and that we could have benefited from more time for discussion. For next academic year, I have requested that the timetable be changed in order to allow for a 3 hour session, this will give more time for discussion and more time to develop our process. I have also requested a room change. This year we were timetabled in a traditional “computer lab” with rows of benches and fixed desktop computers. This is not an ideal environment for the discursive approach I prefer. Next year we will use a seminar room and laptops.
Moving on
The lesson described above is just the first of 10 sessions but I take a similar approach as the course continues. In session 2 I’ll introduce CSS and we will begin (perhaps controversially) by introducing the CSS reset. I do this to reinforce what we have learned in session 1, which is to remind ourselves that HTML is for meaning and structure. We don’t want to be fooled into thinking that the HTML is causing our content to look different because the browser is using some default styling. I’ll ask the students whether they would let some software decide how their content should be designed. They think this would be a bad idea and so we add a CSS reset. The content (h1, h2 and p) now all looks the same in the browser window and this becomes the start point for a discussion about typography and visual hierarchy.
In session 3 I introduce the box model and this leads to a discussion about column width, typographic measure and readability.
My aim in all of this is to provide a design rationale for each technical component that students are introduced to so that they begin to understand that design for the Web is a single, integrated process and that code is a tool for design.
I was recently asked at the university whether it would be a good idea for us to train up our technicians to teach coding to students, leaving me free to do the “interesting bits”. If you’ve read this article from the beginning, you’ll know my answer to that question but it demonstrates that even those with an otherwise good understanding of design and technology do not understand how designing for the Web actually works. In some respects, we have the doubly difficult job of explaining web design to our students and to our colleagues.∗
If you are a teacher in web design, I hope you have found some useful ideas in this article. Get in touch and let me know what you think. At the very least, come along to next years Web Teaching Day.
Tagged: HTML, teaching practice, web design


Really nice article outlining a great method to help students to understanding designing for the web platform, your closing paragraph is fantastic and indeed we must be careful not to introduce the old Demonstrator model into the web as the design process is in fact lead by the technology and both are interwoven.
Thanks Adam, totally agree about getting as far as possible away from the demonstrator model. Also agree that the design and technology processes should be interwoven (as I hope I have illustrated above) but I’d put it the other way round. I believe that technology should be led by design since design is the thing we want to achieve and technology is the means to achieve it.
Really interesting article David – thanks for expanding on your presentation prefix!
I totally agree that code (process) shouldn’t be taught as separate from the principles. Your article demonstrates how perfectly to transition back and forth between the two, giving students a deeper level understanding that is essential to fully understand what they are doing.