
So I’d completed the Wainwrights and you might think that would be that. However, despite a final tick in the 214th box, it didn’t really feel like a completion. I didn’t have a complete photographic record of all the summits, and since this challenge had become mildly obsessive, that bugged me. During my early walks I wasn’t particularly focussed on photographing summits because I didn’t even know that I might be attempting a completion. And then there was the time I lost two days worth of photographs when the SD card in my camera failed. In short, I needed to return to the Lakes to complete the set.
Earlier this year, over supper at YHA Eskdale, I was asked whether I was an incrementalist or a completist. At the time, I answered that I was a completist – completing “the set” has been a big motivator for me. However, the more I think about this question, the more I realise that it’s a false dichotomy. In truth, everyone is an incrementalist until the set is completed. Furthermore, the joy of completion is sometimes exceeded by the attainment of a particularly hard-won incremental step. Nonetheless, I still wanted (needed?) a full set of summit photographs.
I’d revisited some of the missing tops in July but I was still short of 16 summit photos, mostly from the Eastern Fells, and on this visit, I was determined to fill those gaps as this would most likely be my last visit to the Lakes this year. The only problem was that the weather forecast was not good and it looked pretty wet for the week ahead.
This visit was also late in the planning. In truth, I hadn’t planned for it at all and when it came to booking the stay, it became clear that I’d missed my chance of finding a suitable room at a convenient YHA hostel. I toyed with the idea of camping but the weather forecast put paid to that notion.
I wasn’t sure what to do until Hannah, using her deep-search skills, found a perfectly located B&B in Patterdale that turned out to be even cheaper than a hostel – so I booked it and a week later, on Saturday, 17th August, I was driving up to Southport in the rain.
Sunday
I set off early from Southport with my fingers crossed that the mist would not be too low over the tops and that my cheap B&B would, at least, be comfortable.
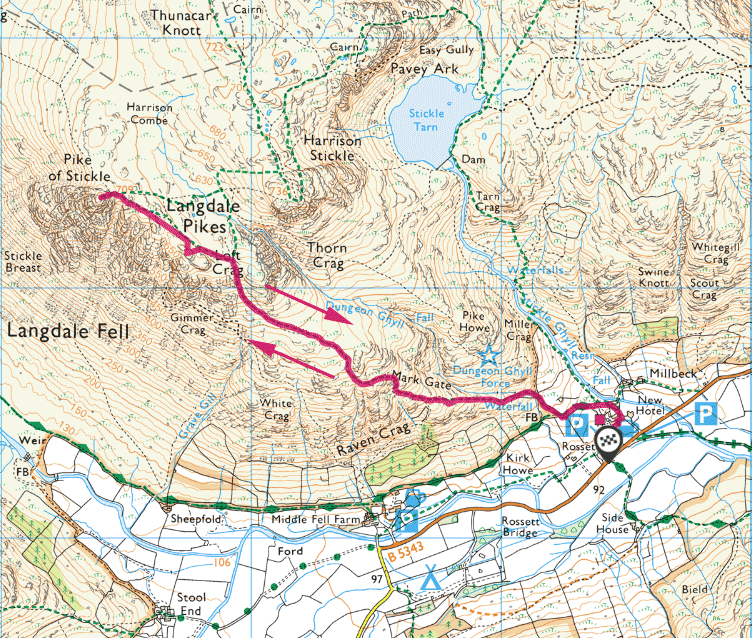
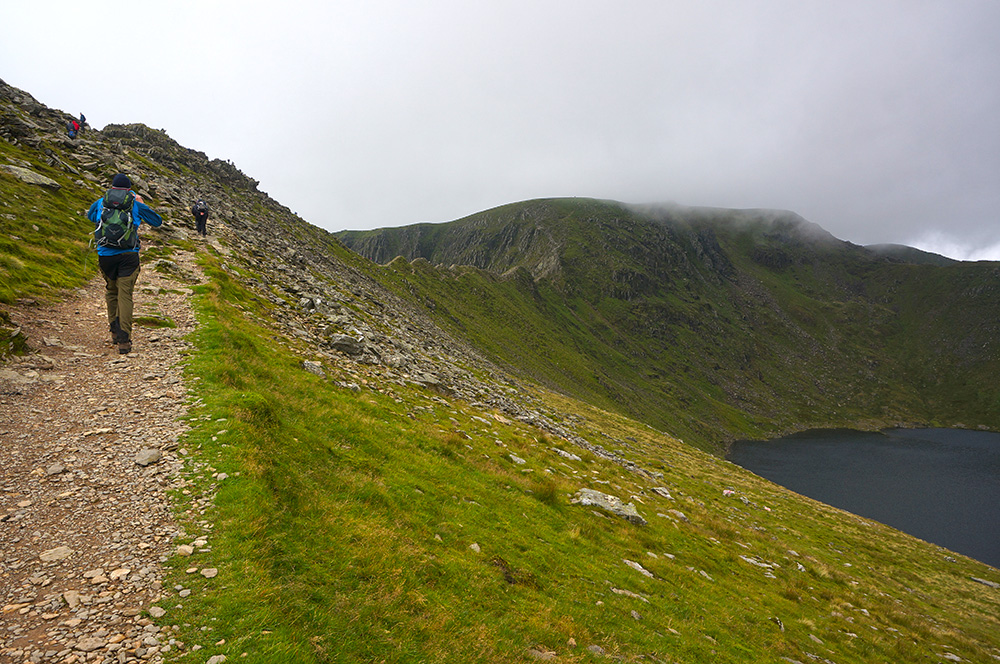
Geographically, it made sense to bag those tops most distant from the B&B on my way up so as to give myself as car-free a week as I could manage. So once I came off the M6 at Junction 36, I headed for the Stickle Ghyll car park and the Langdale Pikes. Although I’d visited on a number of occasions, I didn’t have good photographs of the summits of Loft Crag and Pike o’Stickle. When Tilly and I first bagged the Langdales back in August 2016, a dense mist had come down and although we found those two peaks, the photographs I took showed nothing but us and a few stones.
I pulled on my boots and set off on the Mark Gate route in what can only be described as “changeable” weather. It was generally cloudy with occasional heavy showers blowing in on a stiff breeze. Looking up, I could see the cloud-base just touching the tops but the sky was bright and I felt optimistic.
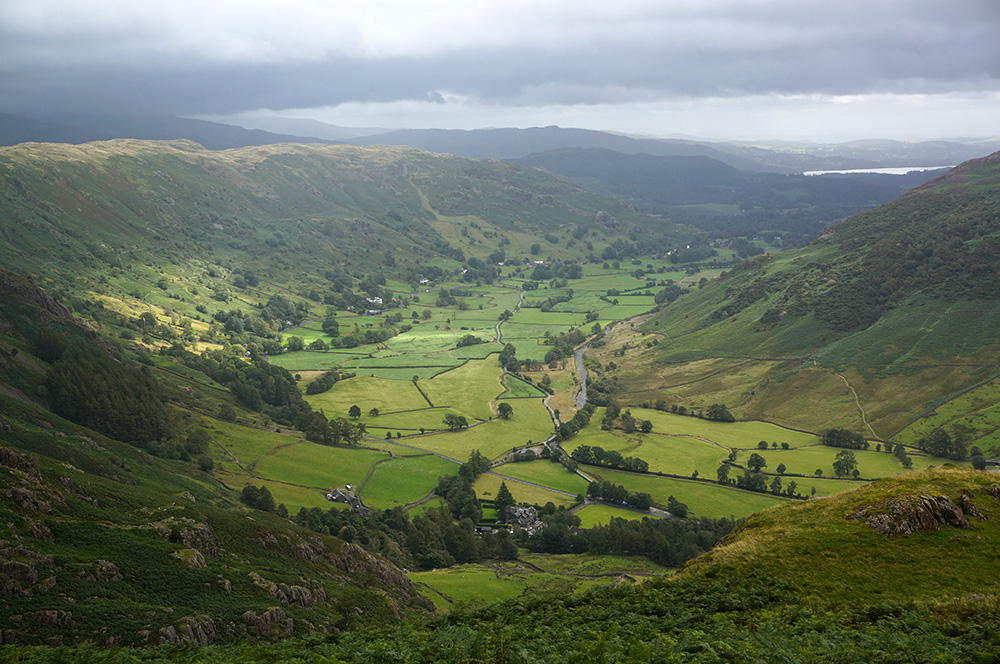
This was a new route to me. I’d followed the Stickle Ghyll route a couple of times and enjoyed the proximity of water and rock but this was a more typical Lake District climb with the addition of some light scrambling through the Mark Gate section. There are also some excellent views back down into Great Langdale and along Blea Rigg. Across the valley, Pike o’Blisco summit was hidden by swirling cloud.
At the top of the main climb, the route flattens out and the path heads north-west across a plateau towards a gully between Loft Crag and Thorn Crag. As I climbed the gully, the sky darkened, the wind rose and I could see rain approaching from the west.
Just below the final pull up to Loft Crag summit, the heavens opened, the wind wound up to a gale and I was glad I’d had the foresight to wear my waterproofs. I spent a few moments looking for some shelter from the wind and rain but it was blustery and rain seemed to be coming from all directions. In the end, I just flattened myself against a nearby rock face and waited for the downpour to pass through.
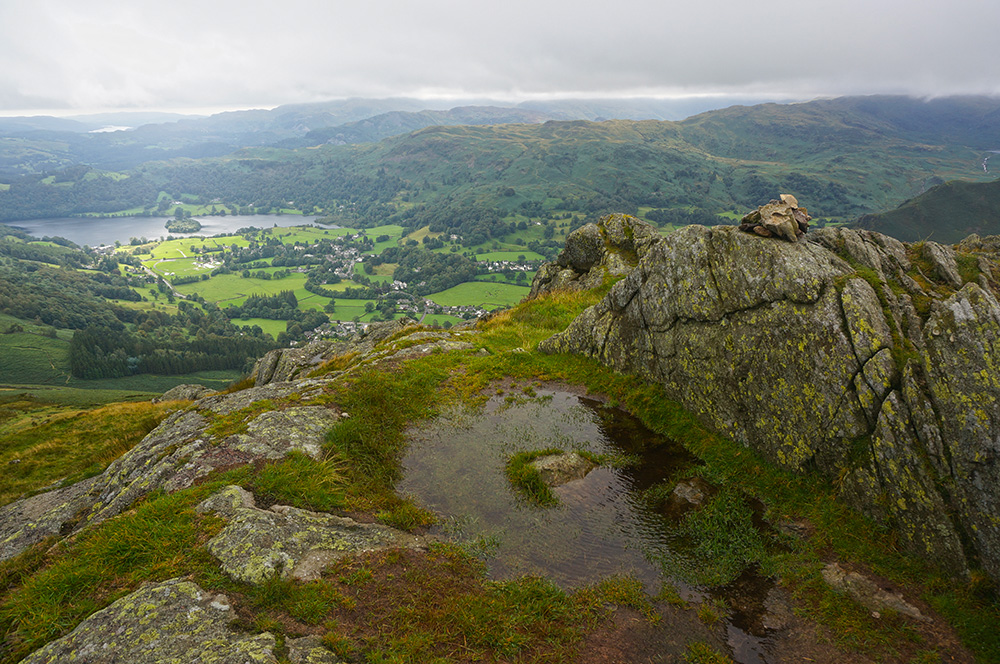
After about 15 minutes, the wind and rain eased and I made my way, carefully over slippery wet rock, to the summit of Loft Crag and by the time I arrived, the rain had stopped and the cloud had just about risen high enough to give a clear view over a hazy Great Langdale.
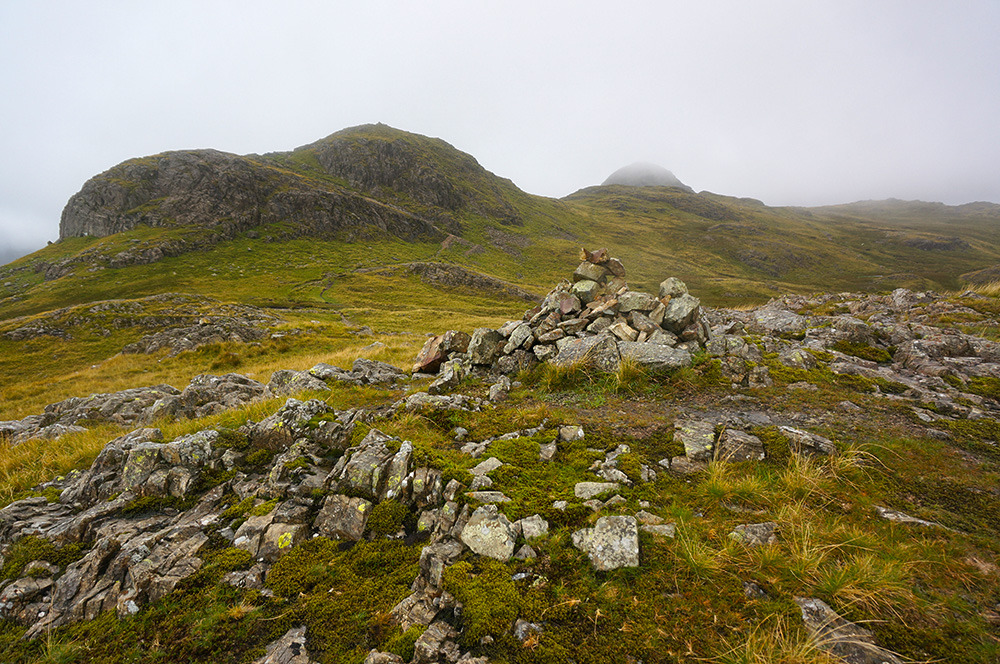
I took some time out at Loft Crag, savouring being in the Lake District once more, admiring the view and taking in the geography of the Langdales. Harrison Stickle was fifty metres above me and playing peek-a-boo in the shifting mist.

After my break, I followed a clear path on the short hop (500m) to Pike o’Stickle. Although short in distance, the approach to the summit is quite tricky, requiring some scrambling up onto the rocky, domed top. On the way down, I discovered a slightly easier route but I enjoyed the challenge of the more difficult climb.
During the approach, I saw the summit appear and disappear as banks of mist blew in and then out. On arrival, the summit was shrouded and I thought I might have missed the opportunity to get my summit photograph. However, after a short wait, the mist thinned just enough to give an impression of my surroundings. Loft Crag emerged as a ghostly silhouette and I could just make out the brighter Langdale valley below.
On a better day, I would certainly have made a circuit and returned via Harrison Stickle and Pavey Ark but in uncertain conditions, I decided to return the way I had come, thinking that I could probably get back to the car and still have time to take in another top before checking into the B&B.
I dropped down from Pike o’Stickle and took the lower path, skirting around Loft Crag, to the head of the gully. Before the descent, I visited the cairned top of Thorn Crag, from where there are excellent views to the east, over Great Langdale and north-west, back to the two tops I’d just visited.
I was back at the car by mid-afternoon and I thought about doing some sketching before heading off but it was still raining off-and-on and I couldn’t find a convenient shelter with a view.
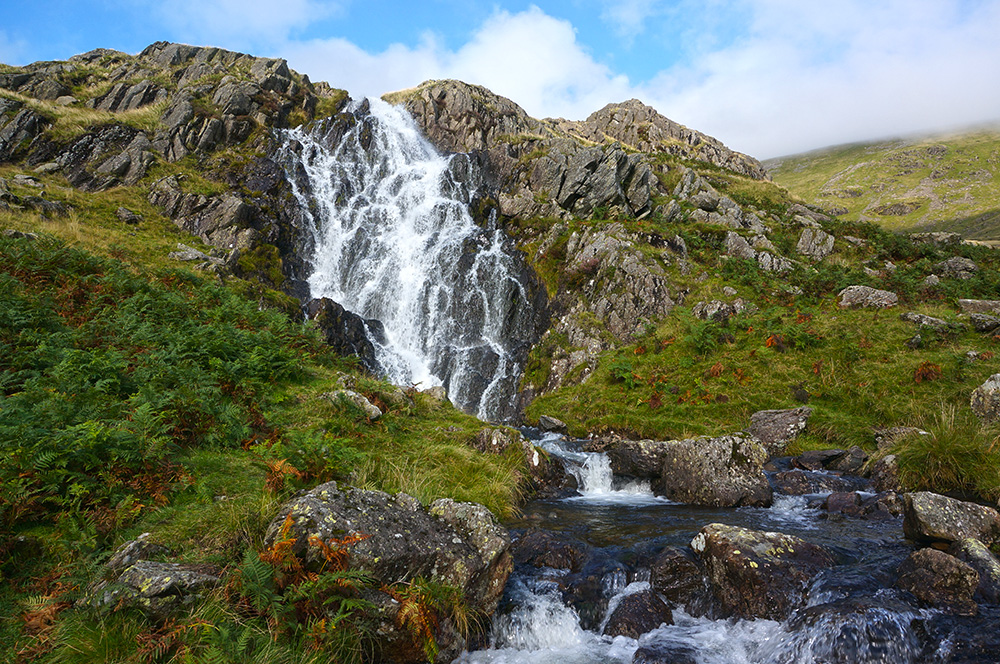
I drove back into Ambleside and took The Struggle up to Kirkstone Pass and then north past Patterdale and to the High Force car park just south of Dockray. I had Gowbarrow Fell in my sights. However, just as I arrived, another torrential downpour began, so I waited for it to pass before setting off.

From this point, Gowbarrow Fell is a relatively easy walk, at least it is in fine weather. High Force was in spate; unusual in August and testament to the recent wet weather. The climb from the river is short and sharp and as I approached the triangulation pillar at the summit, the heavens opened once more and for the second time that day I thought I might have missed my photo opportunity. I stood in the beating rain, looking north to Great and Little Mell Fells, both in brilliant sunshine.
After five or ten minutes, the rain eased and eventually stopped, so I took my photographs and headed back to the car, considering the day a complete success.
I drove back to Patterdale and checked into the B&B at Noran Bank Farm, where I received a warm welcome. Later, I ate a filling supper of Cumberland Sausage and Mash at the White Lion and hoped that the rest of the week might be as successful as my first day.
Monday
Having bagged Gowbarrow Fell the previous day and since the weather was still “changeable” I decided this would be a good day to mop up the other two outliers, Great Mell Fell and Little Mell Fell. In theory, I could complete these before lunch and then move on to another of my targets in the afternoon when the showers might have eased. Little did I suspect that this was going to be the most frustrating day of the trip.
After a generous breakfast, I drove north and arrived at the first start-point at ten o’clock. Cloud was low over the higher peaks but the two Mell Fells, being relatively modest in size and separate from the main uplands were mist-free.
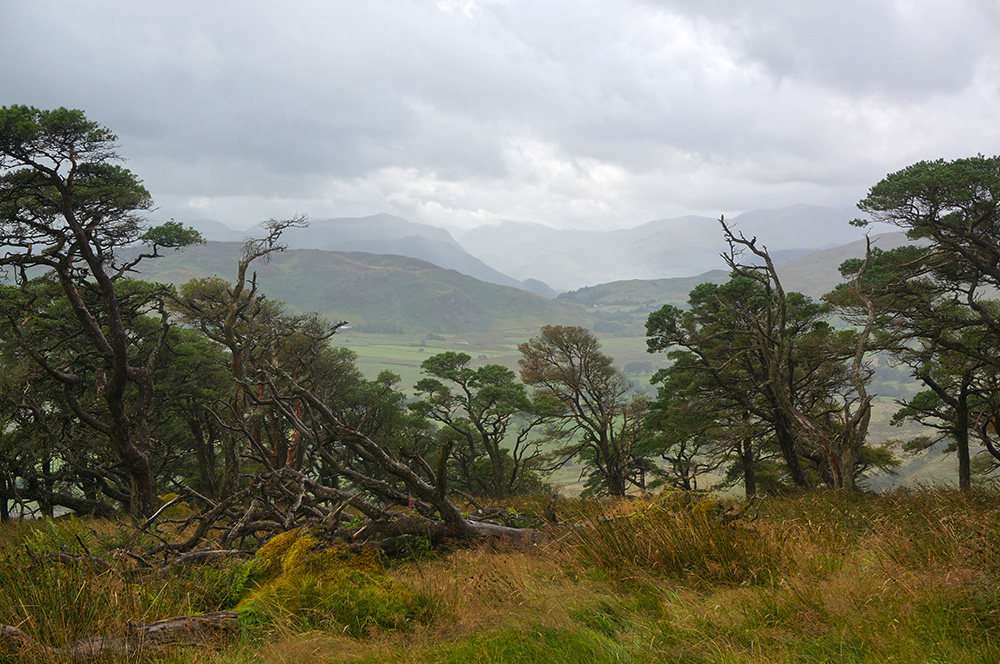
I took on Great Mell Fell first and although my first visit had taken place over three years earlier, I remembered the route very well and made it to the small summit cairn in just 45 minutes. The top itself is unremarkable although there are extensive views all around. The key point of interest are the twisted pine trees on the upper slopes of the fell. In some cases, gaps created by fallen trees form windows on to exquisite views, framed by remaining woodland.
My descent, back to the car was just as quick as the ascent and by 11.30am I was at the second starting point of the day, the lay-by below Little Mell Fell.
This climb was even quicker and twenty minutes after leaving the car, I was standing at the trig pillar. Although there was still rain in the air, the sky was brightening and I started to plan my afternoon walk. I’d have an early lunch in the car and set off south, maybe bagging Little Hart Crag or Stone Arthur.
I got back to the car, had a quick, light lunch and prepared to leave. Turning the ignition key, my heart fell into my stomach as the starter-motor told me “chug-chug-chug-phut!”. The battery was flat. I hadn’t left any lights on and the car had had a good run the previous day. I figured that the battery wasn’t just flat, it had failed.
The details of the recovery are long and tedious and I can hardly bear to repeat them here. Suffice it to say that that was the end of my walking on Monday and I ended up following the Green Flag break-down van to Penrith to have a new battery fitted.
Just after five o’clock I was back on the road and decided I should take the car on a run to ensure all was OK. I drove along the A66 to Keswick where I stopped at Booths. I thought I was probably deserving of some treats.
On the way back to Patterdale, I stopped at the Glencoyne Bridge car park where I ate fresh noodles accompanied by lovely views over Ullswater.
Tuesday
Tuesday promised to be the best day of the week. Despite a misty, damp start, the weather forecast was for blue skies and sun by the end of the day. I decided this was the day for my most ambitious walk of the week; the Deepdale Round, extended to take in Little Hart Crag.
The car had been fine since the new battery was fitted and today was an opportunity to leave it at the B&B. This walk could be done without the car – what a treat!
After another hearty breakfast, I set off along the road to Patterdale and found my way onto the popular footpath behind the Patterdale Hotel. I was still in my wet weather gear as I started the climb to Arnison Crag. The cloud was low and the higher tops to the east were covered in mist. I just hoped the forecast was correct and that the mist would lift by the time I arrived there. Right now, there was no sign of it shifting.

About half-way up Arnison Crag, I met a woman coming down. She was scrutinizing a paper map and looking puzzled. She told me she thought she’d gone the wrong way – she was headed for St. Sunday Crag and pointed out the route she had hoped to take. I recognised it as a route I’d walked before and felt pleased to be able to give her directions and get her back on track.
At Arnison Crag summit, there was still no sign of fine weather, and although rain seemed less imminent, all views from the top were filtered through a thin mist.

On paper, the next section of the walk looked difficult, with no clearly defined paths. In practice, it was very easy with a clear path running the length of a clear ridge, taking me to where I needed to be at Trough Head.
From Trough Head, it’s a steep ascent of about 200m to the summit of Birks. For the most part, the way is clear and the route follows a picturesque but rather dilapidated dry-stone-wall.
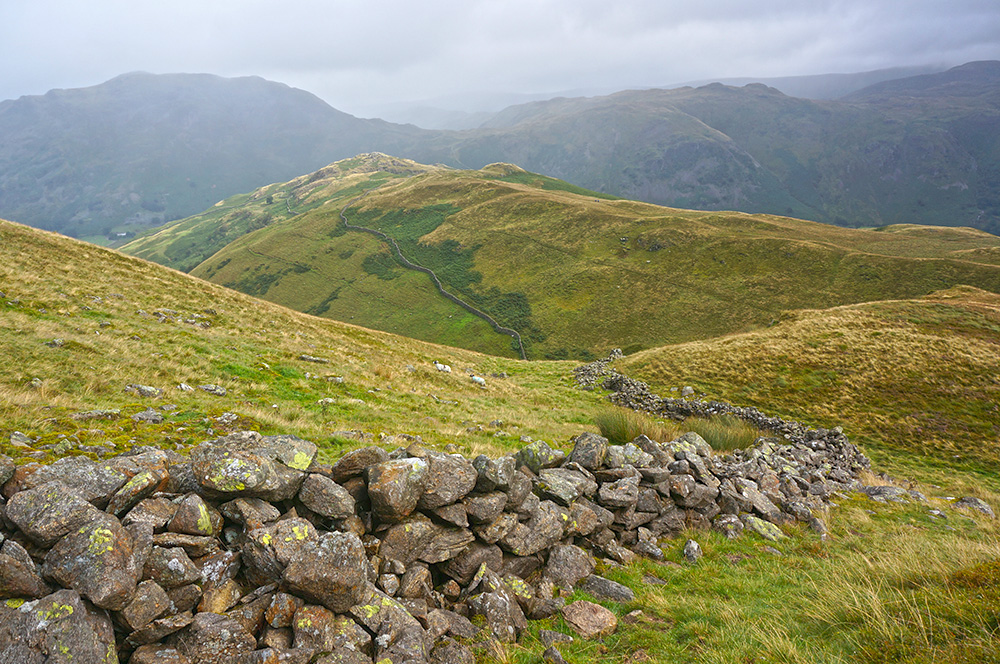
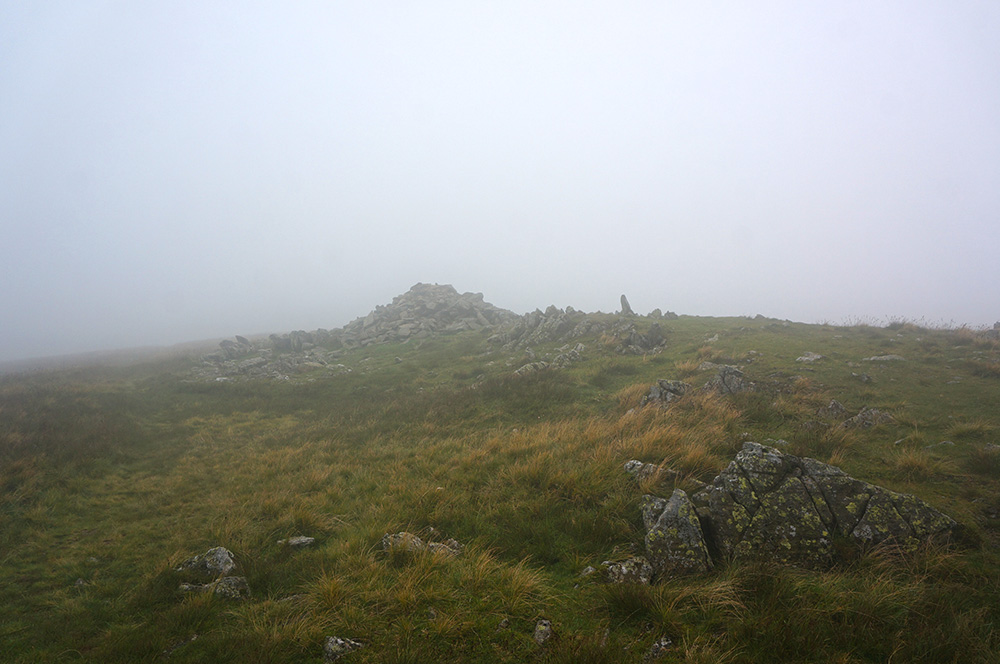
Birks presented the first conundrum of the day. Where is the actual summit? Being an undulating ridge, there’s no obvious “top”. However, there is a high point on the map with a spot height of 622m and on the ground, it certainly looked to be the highest point. But at Birks, as at many of the Wainwright tops, there is ambiguity. The high point is not marked with a cairn. Instead, a small cairn, described as “a timid huddle of stones” by Mark Richards, marks a lower point at the top of the main climb from Trough Head.
In such cases, I tend to refer to the Wainwright guide and in his chapter on Birks there is a sketch of the lower “summit”, showing higher ground beyond and set against the outline of St. Sunday Crag. So that was clear… I photographed both, just to be on the safe side.

By now, the cloud base had lifted a little but pulses of light rain were still coming in from the west. I headed along the ridge and towards the rise onto St. Sunday Crag. Just before steeply rising ground, a wonderful natural display began down to my right.
A shower had blown into Grisedale and, at the same time, sunlight was breaking through cloud in the south-east. The result was a strong, full rainbow below me – what a sight!
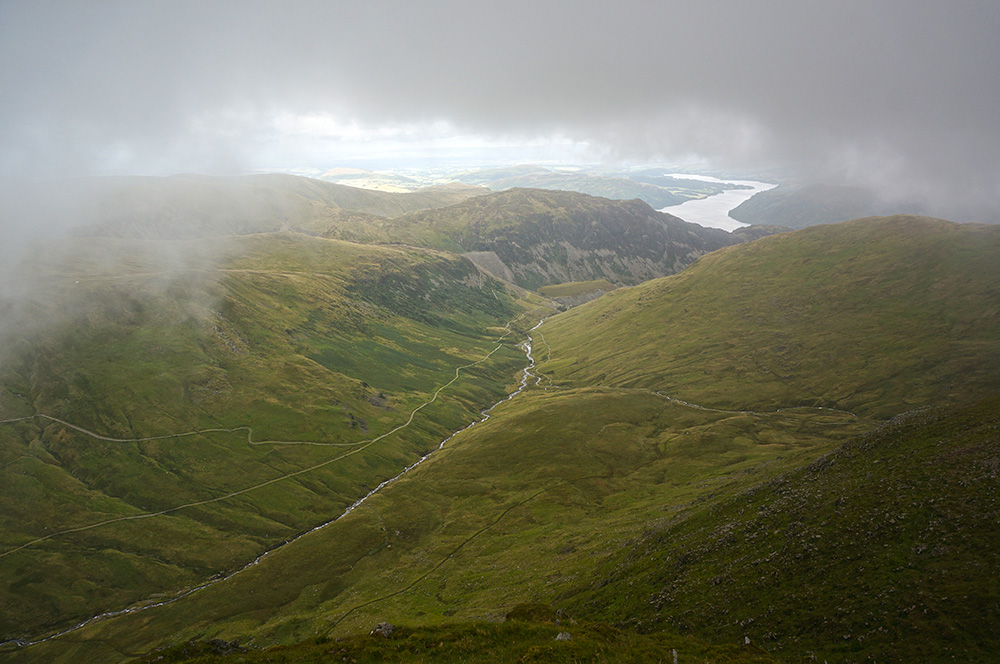
The rainbow marked a change in the weather. From this point on, the mist began to thin and the cloud began to lift. By the time I arrived at St. Sunday Crag summit, views had opened up to the west and I could see Seat Sandal and Grinsdale Tarn with the Central Fells beyond.
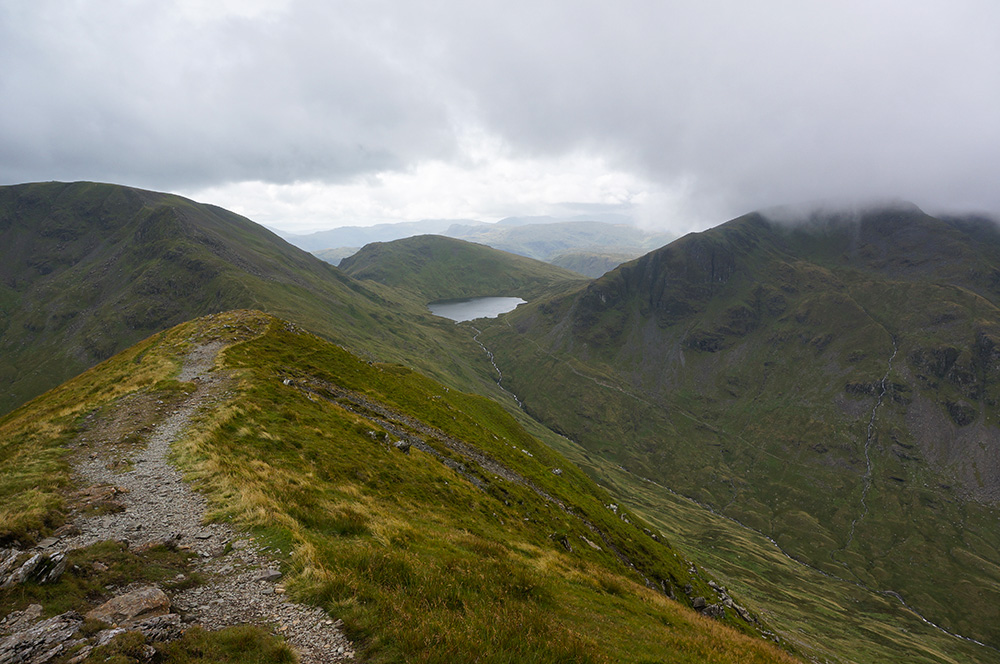
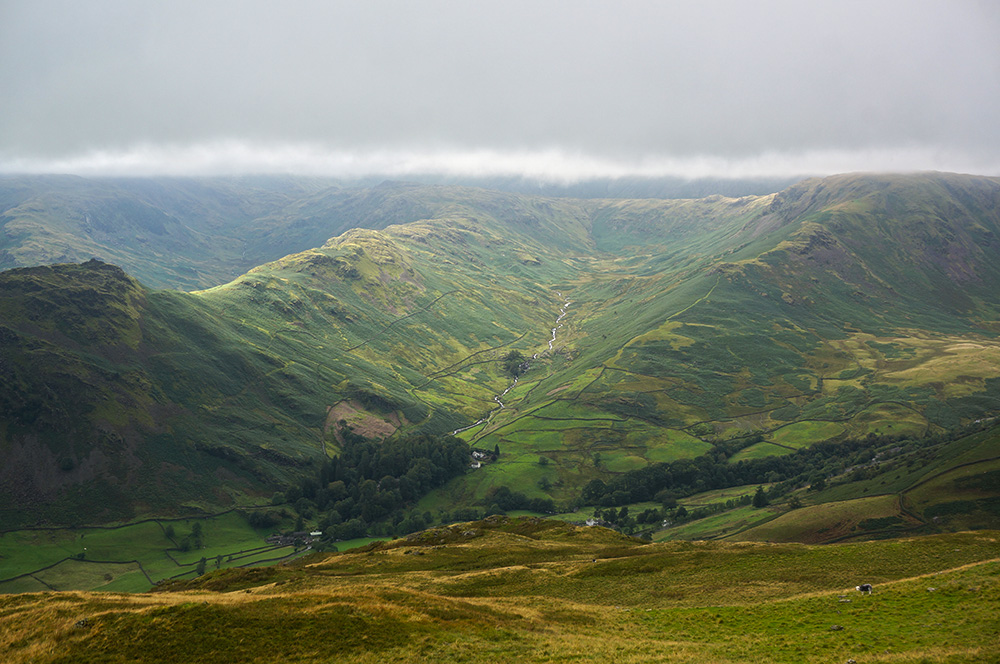
The next section of the walk is the most exciting. The drop down to Deepdale Hause is accompanied by awesome views across Grisedale to Dollywaggon Pike, Nethermost Pike and Helvellyn on the right, expansive views down into Deepdale on the left and the intimidating edifice of Cofa Pike ahead.
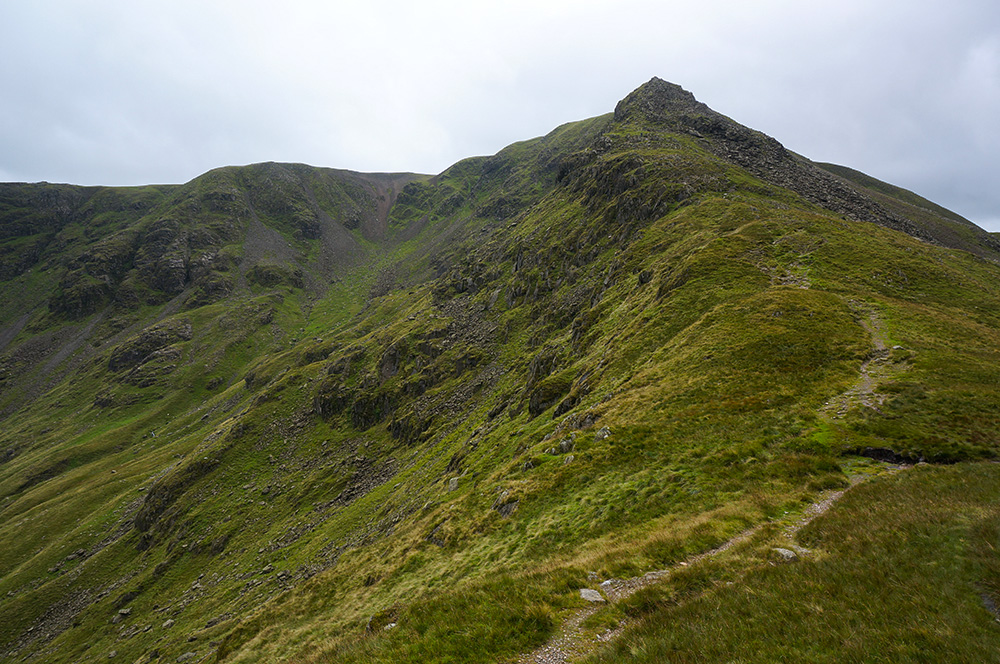
Like many rocky pinnacles in the Lake District, Cofa Pike looks more intimidating from a distance than it does close up. There is a slight frisson of exposure on the rockiest sections but, in the main, it’s a straightforward scramble.
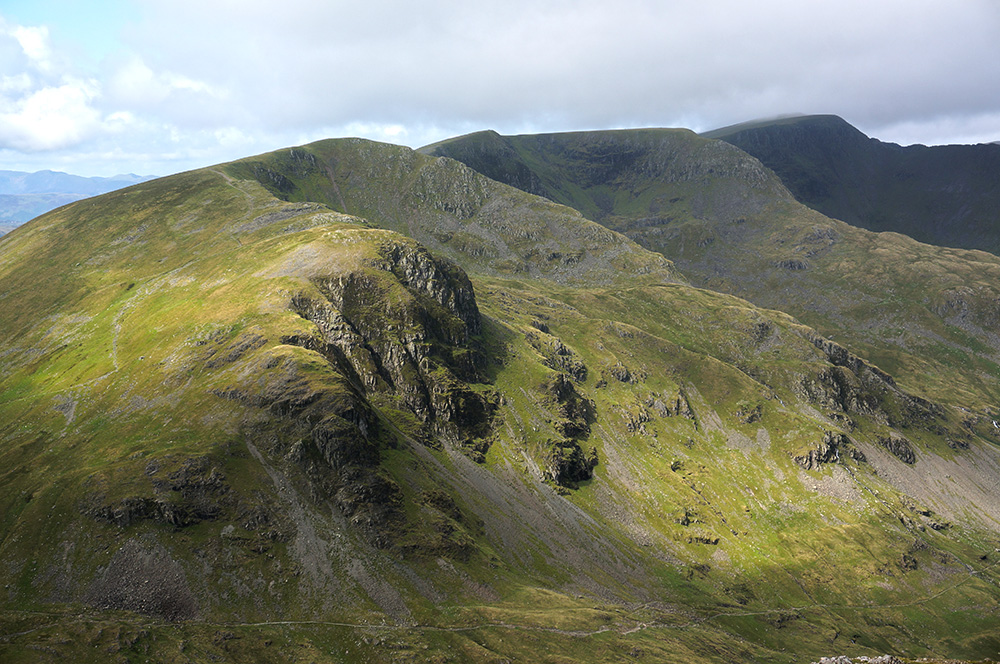
With Cofa Pike conquered, the only way is up and to Fairfield summit for my second visit in as many months. As usual, there was plenty of activity at the broad, windy summit – it’s the crossroads of the Deepdale Round, the Fairfield Horseshoe and couple of other popular walks.
My last three visits to Fairfield have been characterised by deep blue skies and dramatic cloudscapes and this is how I picture it when I’m not there. I’m quite sure I’ve just been lucky and most of the time, I imagine the weather is much more like it was on my first visit; thick mist and whipping winds.

There are a number of paths leading from the summit plateau but the most clearly defined is the broad, cairned path to Hart Crag, and that’s where I was headed next.
A month earlier, I visited Hart Crag on my Fairfield Horseshoe walk and, inexplicably, photographed the wrong summit cairn (there are two). So I remedied that error with some great shots of the accepted summit in near perfect weather.
After the descent from Hart Crag, I had a decision to make. Was I going to continue on the standard Deepdale Round or was I going to add an extra 5km to my walk and visit Little Hart Crag? In truth, the decision made itself, it was turning into a beautiful day, it was only 3pm and I was feeling good.
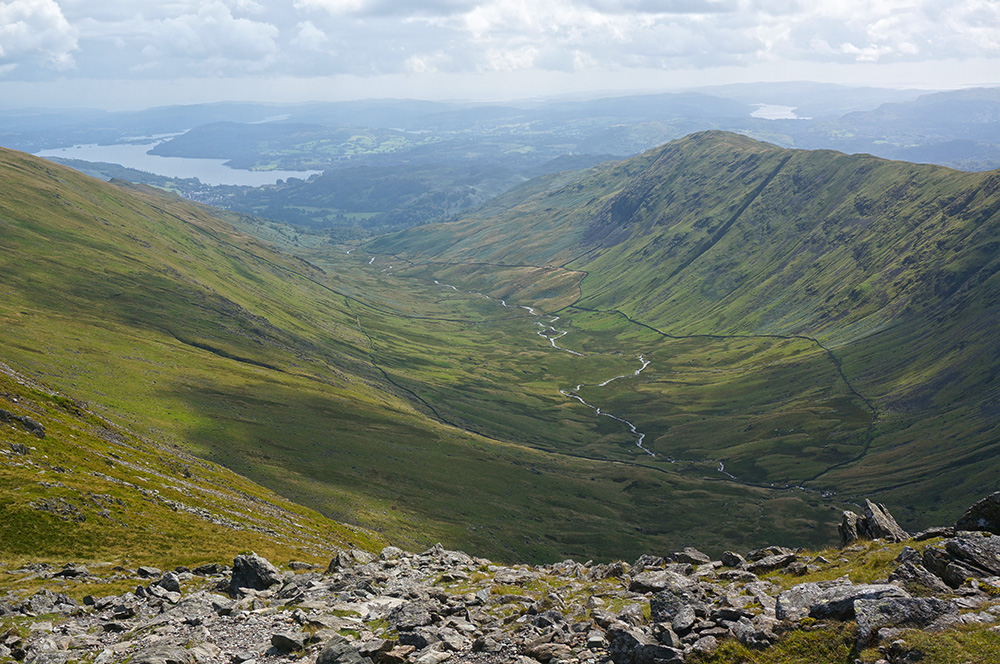
I continued down to Dove Crag, passing the summit with little ceremony and continued south to the junction with the Little Hart Crag route, marked by a small cairn. Taking a ninety degree left turn at the junction, the path is initially flat before descending 150m to Bakestones Moss. I imagined this place to be very wet in the winter months but today it was just damp, despite the recent rain.
The summit at Little Hart Crag is a wonderful place to be on a sunny afternoon. It’s remote and surrounded by higher ground but has a sense of being the centre-point of a landscape. I don’t remember feeling the same way on my first visit. It had been cold and I was intent on reaching Red Screes summit so I hadn’t lingered. But today, I was happy to spend time at this lovely summit.
After 10 minutes of contemplation, I treated myself to a snack and a drink before retracing my steps across Bakestones Moss and up towards Dove Crag. On reaching the ridge path, after the steep climb, I felt a little weary for the first time that day. I sat for a while on the broken-down wall, very pleased that I had completed the Little Hart Crag spur and had just one more top to visit on the Deepdale Round.
It was just after 5pm and I had plenty of daylight left as I set off to pass Dove Crag for the second time that day. Shortly after, I forked right from the ridge path over open fell, avoiding the extra climb to Hart Crag and aiming to meet the path onto Hartsop above How.

After a good start, the going became quite bouldery and I thought I might have to find an alternate route but a bit further on, the way became clear again and I could see the main path ahead. After a little more rock-hopping, the path was gained and I knew it was now a straightforward walk back to Patterdale. The only difficulty would be finding the final summit of the day.
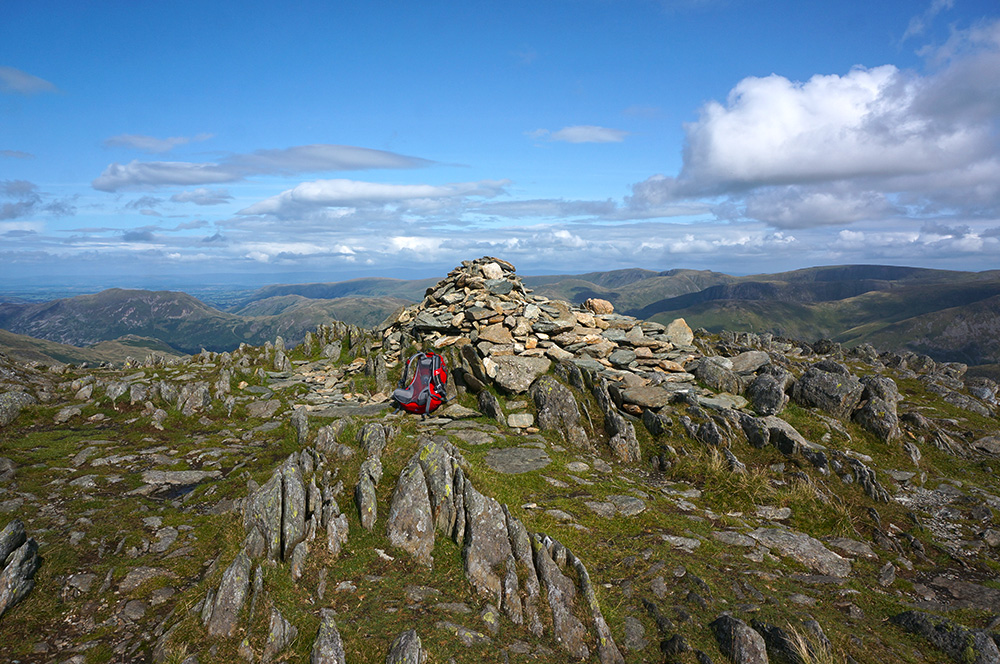
Hartsop above How is a long ridge with a number of minor prominences. Identifying the highest is not so easy. Fortunately, there is a good description of the location in Mark Richard’s guide and, when I arrived, I was confident this was the right place. I took my final summit photo of the day and, after a short break, continued north-east along the ridge, enjoying the evening sun, the solitude and lovely views across the Hartsop valley to Angletarn Pikes.
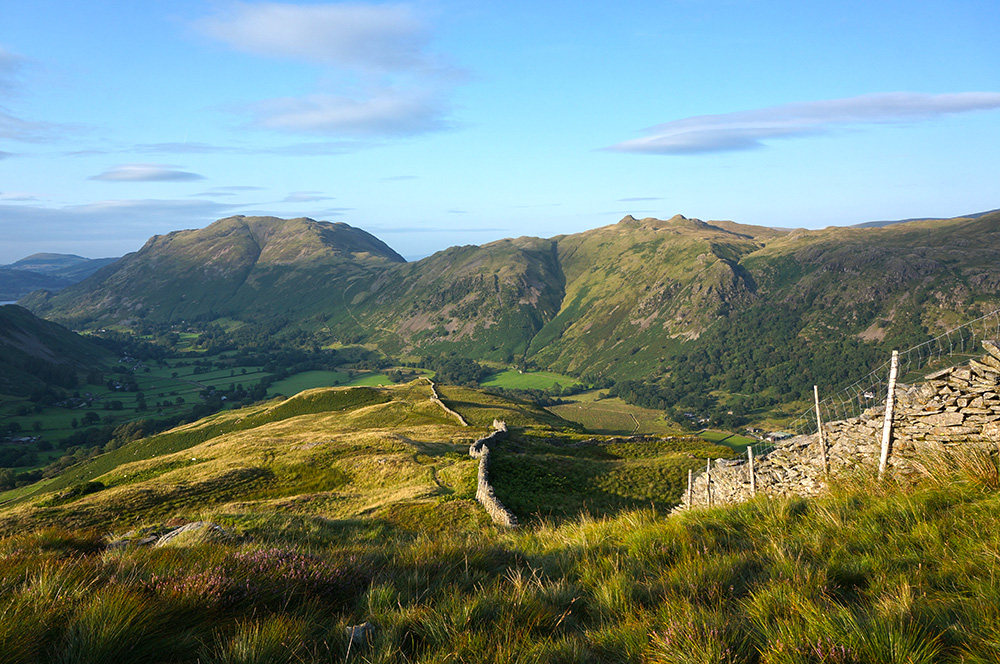
I dropped down to the A592 at Bridgend and after a short walk along the road on tired legs, I arrived back at the B&B at ten to eight. This had been one of the stand-out walks of the year; across some exciting terrain, it had started out damp and misty and had ended with crystal clear views and warm sunshine. Without doubt, a walk I would do again.
Wednesday
Wednesday morning was clear with broken cloud and looked promising. The forecast, however, warned of deteriorating weather as the day went on. I decided conditions might favour a Helvellyn walk via the edges. I figured I could probably make it round before the worst of the incoming weather arrived.
To speed things up, I made the short drive to the car park at Glenridding, where I pulled on my boots and set off along Glenridding Beck, passing the camp site where campers were milling about and preparing for their own Lakeland adventures.
Helvellyn is one of the busiest tops in the Lakes and this route is popular so there would be no chance of solitude today. I didn’t mind, the forecast had put enough people off that it didn’t feel crowded and certainly nothing like the ascent of Scafell Pike earlier in the year.

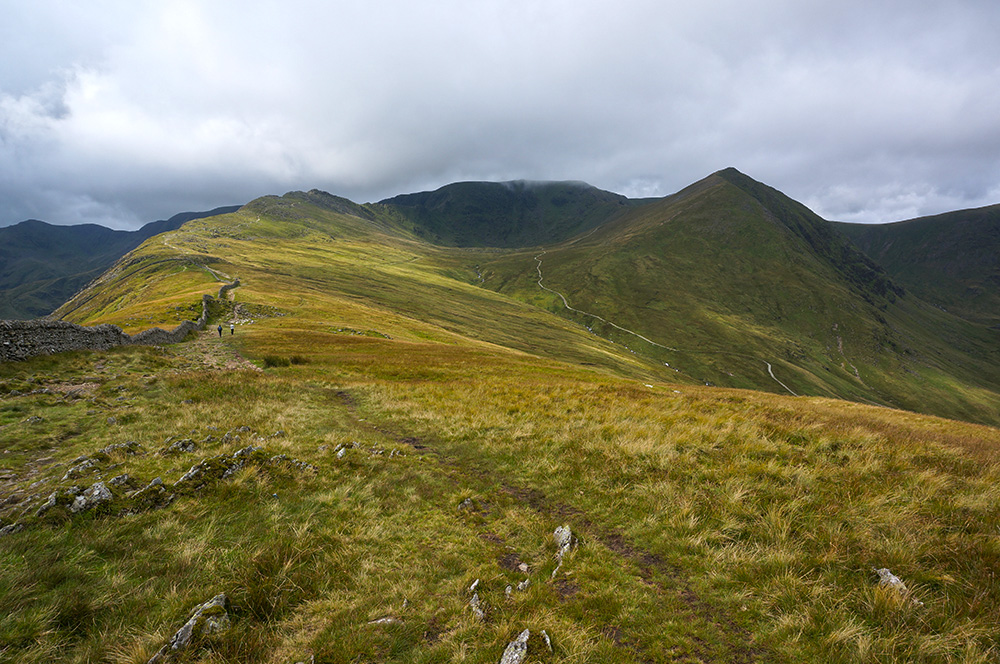
Strangely, the early part of this route didn’t feel familiar at all. Despite having walked it in the past, it wasn’t until I got to Birkhouse Moor and the open views of Striding Edge, Helvellyn and Catstycam that I felt I’d been here before. I could see weather rolling in from the west and Helvellyn was looking dark and broody.
From Birkhouse Moor, I continued south-west, along the ridge, to Hole-in-the-Wall and then High Spying How at the start of Striding Edge. All the while, the sky was growing darker and the wind was rising.
As usual, there was a bottle-neck of walkers, waiting to gain the rocky ridge-back of Striding Edge. There was a strong, gusty wind from the south-west and most walkers were edging out slowly on hands and knees. I decided not to wait, and dropped down to the lower path. I didn’t have anything to prove, I’d done the knife-edge route on my previous visit.
The lower path provides a quick and easy by-pass of the first section but still requires some tricky scrambling towards the far end of the arête and, of course, there’s no way to avoid the final chimney drop and tower climb onto the Helvellyn plateau.

Fortunately, conditions were pretty good although cloud was rolling over Helvellyn summit and as we climbed the rock tower, mist was forming and by the time I reached the Charles Gough memorial, visibility was down to about 20m.
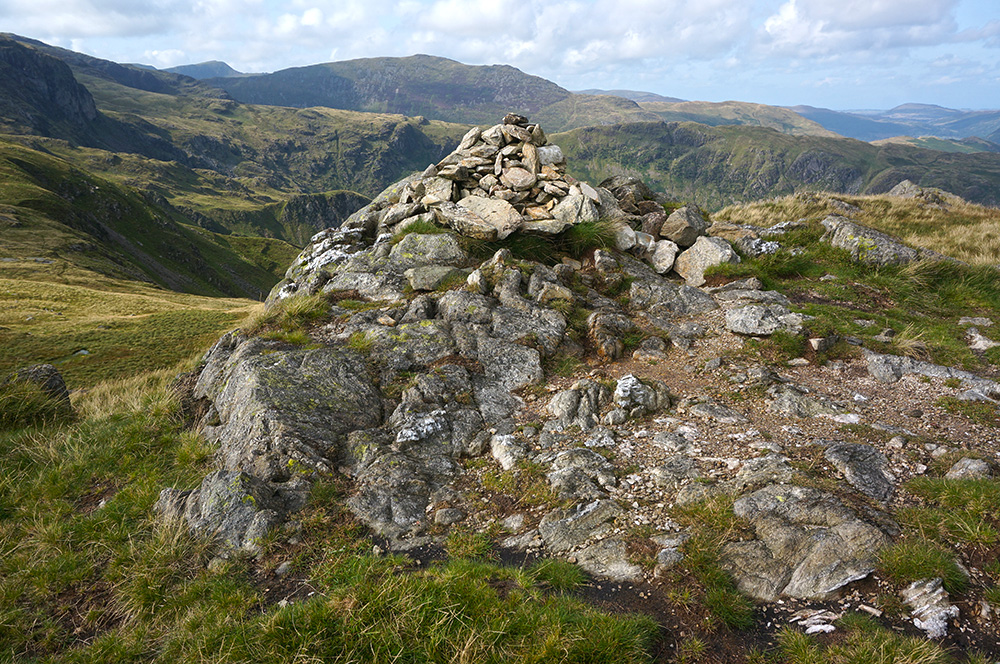
I visited the rather mean summit cairn and the OS trig pillar but thick mist meant there were no descent views out. I took a break at the cross-shaped wind shelter and had lunch, hoping that the mist might clear momentarily so I could get a good summit photo.
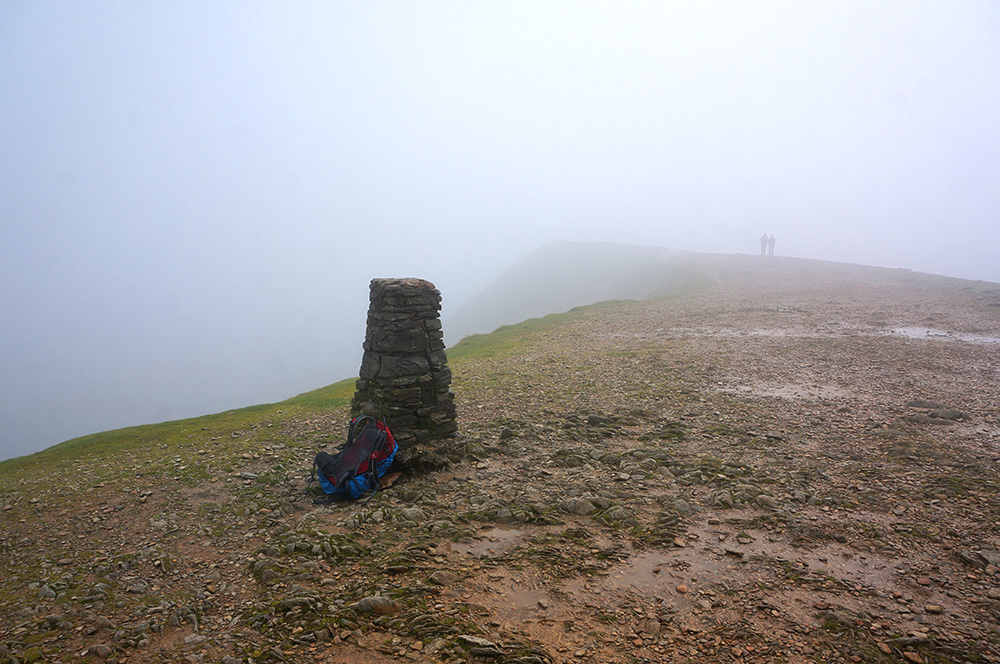
It wasn’t to be. Although the wind was strong and there were pulses of clearer air, the mist didn’t clear completely, so I had to make do with a moody shot of the summit cairn, looking across the cove towards the trig pillar.
I was keen to be on my way, the wind was cold, the mist damp, and I was conscious that rain was on the way. I headed to Swirral Edge and started the descent in the company of a dozen other walkers, including someone trying to carry a dog and negotiate the arête one-handed.

At the eastern end of Swirral Edge, all my companions, followed the path down to Red Tarn while I took the rising path to Catstycam. For the first time today, I was on my own, although I could see plenty of activity at the tarn below.
It’s a straightforward but steep climb to Catstycam summit with loose scree underfoot. When I arrived, I was delighted to find the summit vacant and with a great view all the way to Ullswater. Low cloud was speeding in from behind me and threatening to close the view but I managed to get a good photo of the summit cairn before retreating the way I had come.
Although rain was now threatening and it would have been quicker to continue east and directly back to Glenridding, I’d promised myself a visit to Red Tarn, so that’s what I did. When I arrived, there was a seaside atmosphere about the place as people frolicked at the water’s edge. I sat for a while, watching the reflections of thickening and darkening cloud on the almost still water. And then it began to rain.

It wasn’t heavy and it didn’t last long, just a premonition of what was to come. I set off on the well-worn path back to Glenridding at a smart pace, knowing that real rain was not far behind.
I arrived back at the car at ten to four, just as heavy rain started. I almost avoided a soaking. I didn’t mind. Despite the setback in my schedule earlier in the week and the dodgy weather, I had now visited all but two of the tops I’d planned to visit and I still had a full day’s walking ahead.
Thursday
It had rained all night and it was still pouring when I woke on Thursday morning. Not only that but the entire landscape was wreathed in mist. This was Lake District weather with knobs on and certainly not a day for trudging up the fells.
As this was my last morning, I checked out of Noran Bank Farm B&B after another generous breakfast and said goodbye to my host. I then did what I often do in poor weather, I drove into Ambleside, parked up and headed for Esquires coffee shop for a good atmosphere, free Wi-Fi and a power socket for my laptop. I spent a few hours there, watching the rain and catching up on some work emails. The weather didn’t look like changing much, although the rain wasn’t as torrential as it had been.
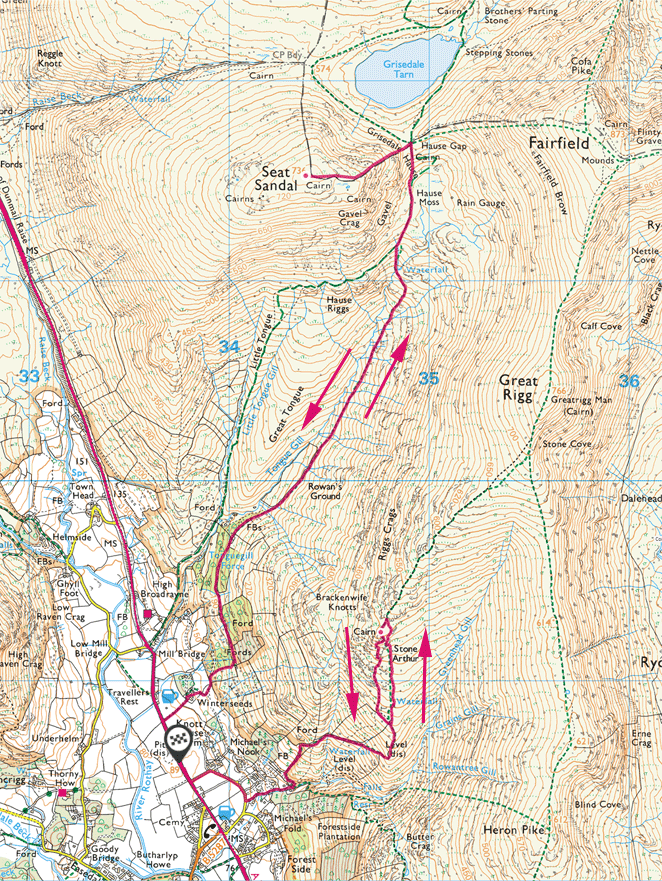
I considered my options. I had two tops to photograph, Stone Arthur and Seat Sandal. I had a walk planned that took in both of them and, once completed, I would head home at the end of the day. The weather, however, was telling me that I wouldn’t be completing my quest on this visit.
I couldn’t bear the thought of leaving the Lakes with just two tops to complete and knowing that it would likely be Spring 2020 before I’d be back. There was only one thing for it, I’d have to stay an extra night, but where would I stay?
I checked out availability at local YHAs and found a bed in a shared room at YHA Ambleside, so I booked it. Ordinarily, I avoid shared rooms because company is unpredictable and sleep is often disturbed but this was an emergency!
After some lunch, I went and did a quick recce of the start point for tomorrow’s walk and then hung around for a while at Waterhead, waiting until I could check-in at 4pm.
On checking-in, I discovered one remaining lower bunk in the six-berth room, so I nabbed it and made it up. I spent a pleasant evening in the bar, watching the people and the rain, and reading guidebooks. Shortly after ten, I went up to my shared room where some of my fellow travellers were already tucked-up. In fact, five of the six bunks were occupied. The only vacant bunk was the one directly above me and it seemed unlikely anyone would arrive this late.
I was wrong. Around one thirty in the morning, the door crashed open and a large person staggered in. To his credit, he used a torch rather than turning on the light but there was still a lot of clattering and stumbling. At first, I couldn’t work out what was going on but by the light of his torch, I caught sight of a prosthetic leg, now parked by the door. This guy had one leg and was just about to attempt the climb into the bunk above me!
Momentarily, I thought about offering a switch but realised that might have seemed a bit weird, so I just did what everyone else was doing and pretended to be asleep. Eventually, he made it onto the top bunk and was soon snoring away.
Friday
I woke early and padded over to the window, trying not to disturb the sleepers. Peering through the curtains, I was disappointed by what I saw. The day was much calmer with only light rain but everywhere was misty. However, the forecast had conditions improving by lunchtime so I figured I’d get a good afternoon on the fells. That’s all the time I needed but it would mean getting home very late.
I had breakfast, checked out and then spent a couple of hours reading in the bar, waiting for the mist to lift. All morning, nothing much changed and I began to wonder if I was wasting my time.
Late morning I left the hostel and went into Ambleside to pick up some lunch on the way to the walk start-point. The lay-by at Grasmere, which normally fills up early, had plenty of parking spaces. After parking-up, I sat in the car, eating lunch and watching for any change in the weather – none came.
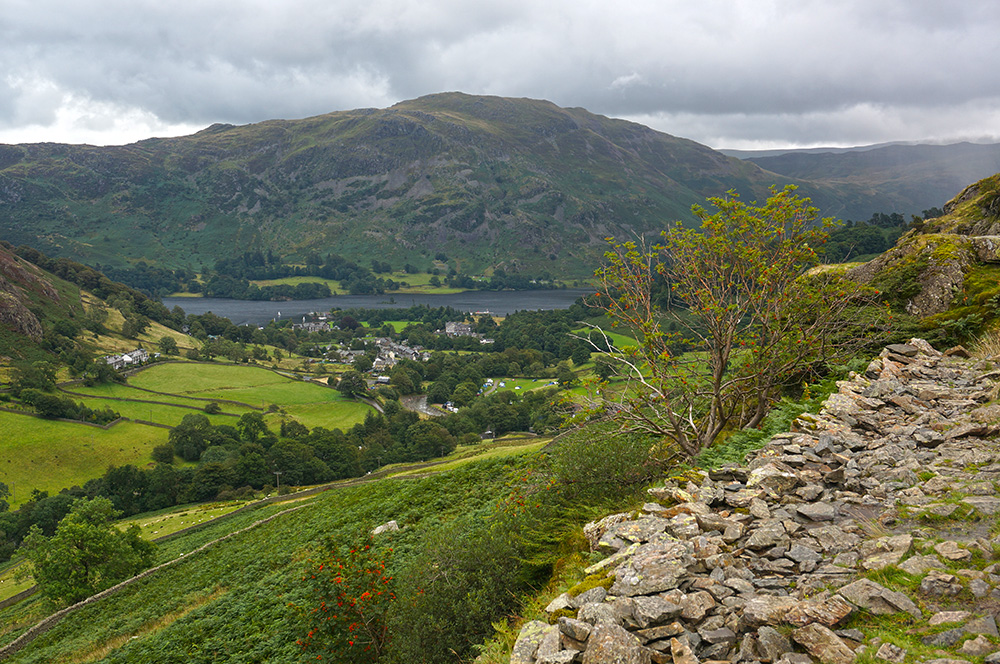
After lunch, I sat in the car, reading my latest Rebus novel until the time came when I had to make a move or call it off. I booted up, pulled on my waterproofs and set off to Stone Arthur. Everywhere was dripping but the rain had now stopped and as I climbed, it looked as though the sky might be brightening.
Mist and fog was definitely rising ahead of me but as the ground plateaued after the initial, steep climb, I could see thick fog ahead and that didn’t look like shifting any time soon. I had planned to continue up after Stone Arthur and head to Seat Sandal via Fairfield but I now realised I was going to have to come down and take Seat Sandal by another route.
After some confusion in the mist and damp ground, I found Stone Arthur summit and took my photos. It was just after 3pm and for the first time that day there was a tentative break in the cloud, allowing some weak sun to shine down over Greenburn Bottom, three kilometres away. Cheered by the improving views to the west, I quickly dropped down from the summit and returned the way I’d come.
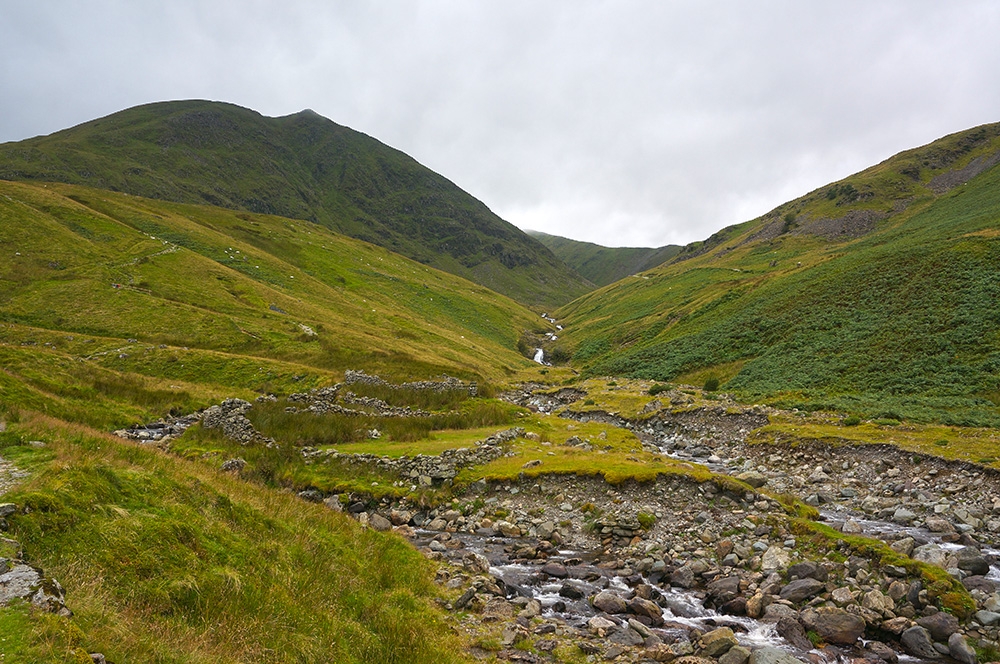
By the time I got back to the car, the weather was looking a lot more encouraging although there was still plenty of mist over Seat Sandal. Nonetheless, after as quick snack, I headed off to find the Tongue Gill route.
The main track is gained after negotiating some steep, boggy land above Winterseeds but from that point on, this is a fantastic walk with a clear and easy to follow path. The route runs along the eastern side of the valley, above Tongue Gill and the sound of crashing water is never far away.

The path rises slowly and as I climbed, cloud began to give way to blue sky overhead. I couldn’t help thinking I’d timed things perfectly and that if the mist continued to rise, I’d be summiting Seat Sandal in brilliant sunshine. I passed the waterfalls, which were cascading with recently-fallen rain and sparkling in the afternoon sunlight, and continued on the upward path to Grisedale Hause.
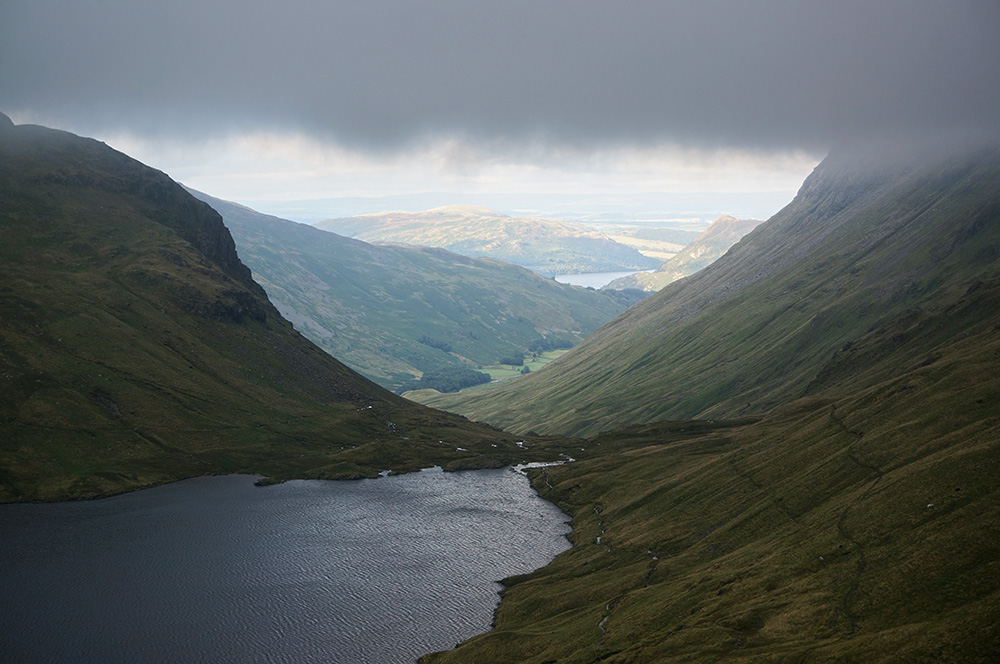
On arrival at Grisedale Hause, there were lovely, clear views over the tarn but a thick mist hung over Dollywaggon Pike and it looked like the same might be true of Seat Sandal. There was only one way to find out.
I turned left at the hause and started my ascent of the steep, scree path up the eastern flank of Seat Sandal. Before I’d reached the top, I was already in mist. At the top of the climb, visibility was poor but there was a wall leading to the summit. I followed the wall.
The last time I climbed Seat Sandal, I did so from the east, and conditions were very similar. At least this time it wasn’t pouring with rain. I decided Seat Sandal must be my jinx Wainwright and determined to climb it again in good weather. All the guidebooks talk about the view from the various viewpoint cairns but despite two attempts, I hadn’t even seen the viewpoint cairns, let alone the views.
The summit cairn was gloomy and lonely but I took my photos anyway, just pleased that I’d completed my objective for the week. I didn’t hang around, it was just after 6pm and I wanted to get back to the world of light. I retraced my steps and started the tricky descent of the scree path.
As I dropped below the mist, I was teased with lovely, sunny views of Ullswater and Place Fell in the distance. I was looking out of penumbra and into a brighter world beyond and felt like I wanted to be there and not here.
Once I’d returned to Grisedale Hause, the difficult part of the walk was over and I felt a great sense of achievement and relief. It hadn’t been an ideal day (or week for that matter) but I’d done what I set out to do.
I set off for the car and a long journey home, knowing this would be my final visit to the Lakes in 2019. I was torn between hurrying back to shorten my journey and taking my time to savour my last hour or so on the fells until next Spring. In the end, I settled on a normal pace and got back to the car at 7.20pm.
The journey home was uneventful. I stopped at a petrol station for sausage rolls and Lucozade and drove non-stop, arriving home just after midnight.∗
18th August 2019
Loft Crag (692m)
Pike o’Stickle (708m)
Gowbarrow Fell (481m)
19th August 2019
Great Mell Fell (537m)
Little Mell Fell (505m)
20th August 2019
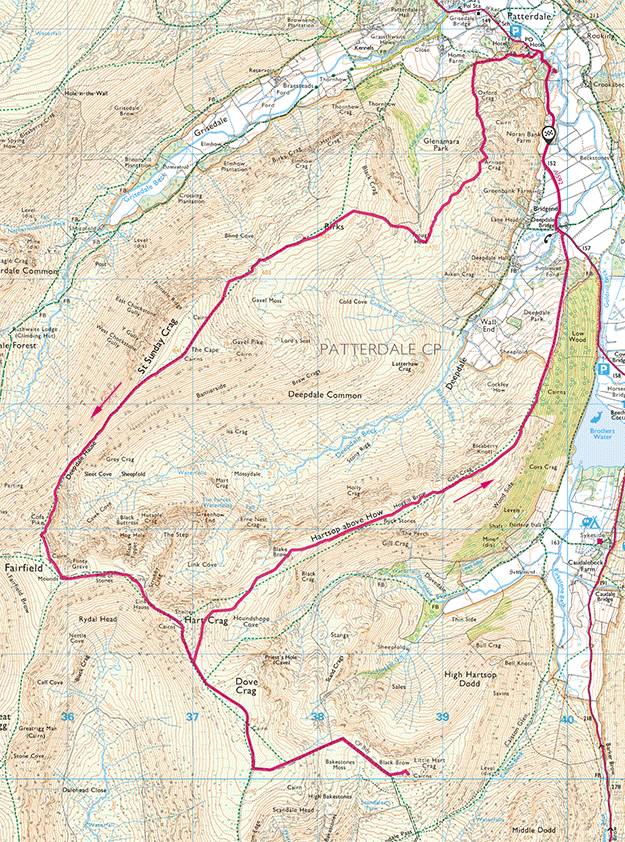
Deepdale Round
Arnison Crag (434m)
Birks (622m)
St. Sunday Crag (841m)
Fairfield (873m)
Hart Crag (822m)
Dove Crag (792m)
Little Hart Crag (637m)
Hartsop above How (586m)
21st August 2019
Birkhouse Moor (718m)
Helvellyn (950m)
Catstycam (890m)
23rd August 2019
Stone Arthur (503m)
Seat Sandal (736m)
In the end, this turned out to be a very satisfactory visit to the Lakes. Despite the setbacks, I’d completed my photographic record of all the Wainwright summits, even if it did take a day longer than planned. Not only that but I’d already made a sizeable dent in my second round of the Wainwrights. Naturally, I’m not admitting this as an objective just yet. Next year, my aim is to complete the Fellranger Fells and maybe try out North Wales or Scotland for a bit of variety.