
The summer break can’t come soon enough as each successive year in higher education becomes more pressured. Long gone are the days when some academics would disappear at the end of teaching and not return until the start on the new autumn term. For many of us, that’s a good thing but like all pendulums, this one has now swung too far in the other direction. It’s very difficult now to find the dedicated time we once had for curriculum development and the creation of new teaching/learning materials. Just at a time when our institutions are being judged on their teaching excellence and we are being challenged to be even more excellent teachers, our opportunities to make this actually happen are being reduced. But life is full of ironies and as I get older, life in higher education seems to become more ironic by the day as universities change the way they operate in order to game the system that attempts to measure their success in teaching, research, the employability of students and a dozen other spurious metrics. Yes, I’m looking forward to a few irony-free weeks.
So I’d booked 7 nights at Ambleside YHA way back in December thinking that this would be my main fellwalking trip of the year. I’d carefully planned 7 day walks and calculated that I could possibly complete 45 Wainwrights during the week but, letting myself off easily (this is a holiday after all), I’d be happy to do just 25. The best laid plans…
As usual I stopped over with mum and then drove up to the Lakes on the Friday morning, planning to walk the Lorton Fells. Oddly, I didn’t feel quite right but decided to ignore this, hoping it would go away.
Day 1
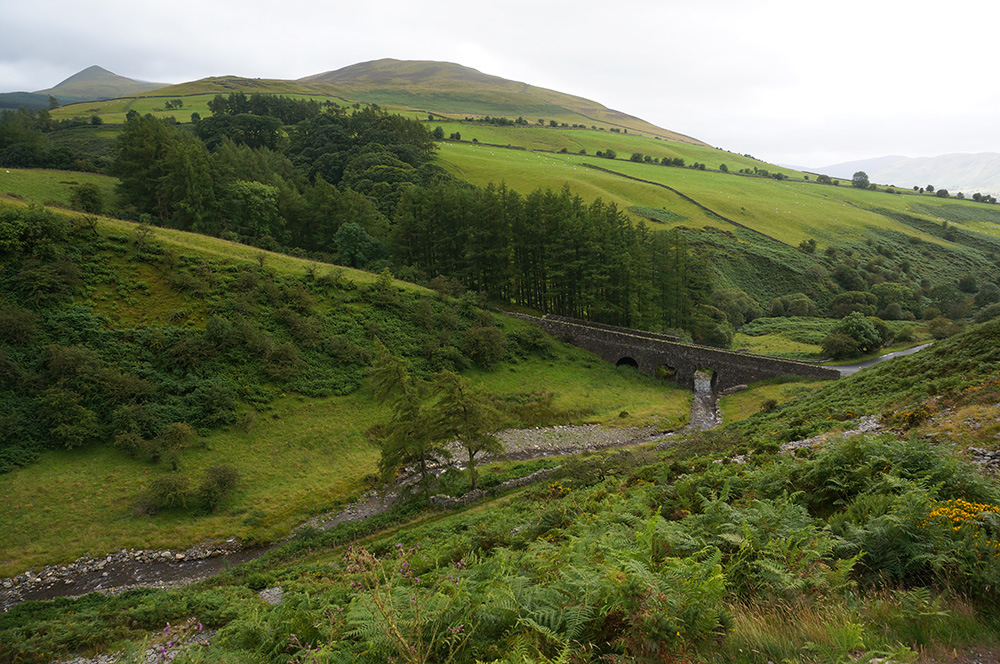
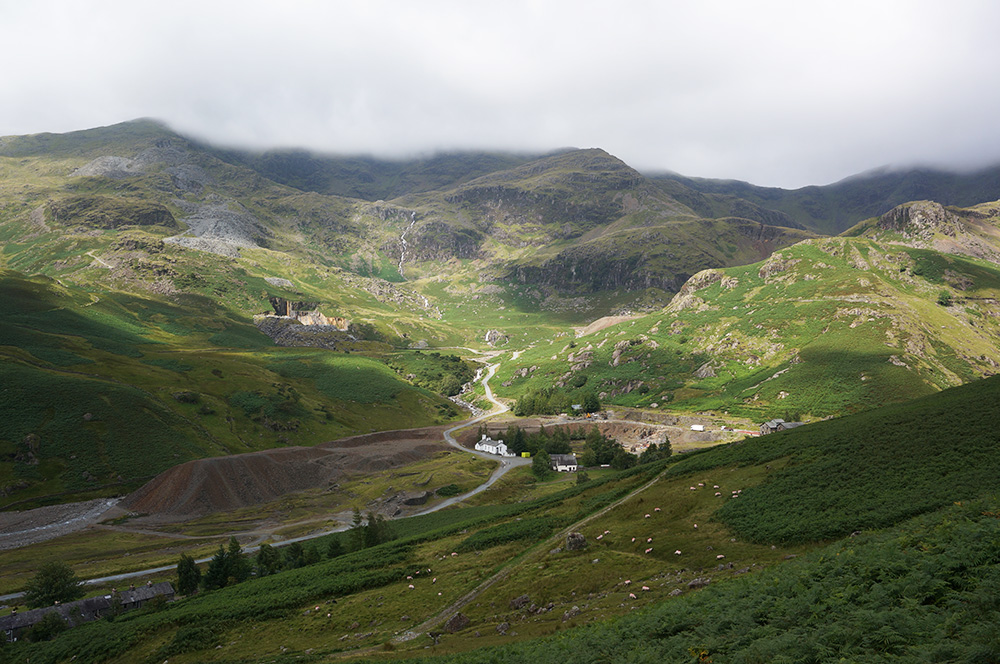
I parked up at the Darling How car park, put my boots on and set off, dropping down to Aiken Beck and crossed at the footbridge. There’s no obvious route up to Graystones from the Beck. with lots of loose quarry spoil on the slope but I found a way up to the disused quarry a little further along the path and then tracked across to meet the Darling How boundary wall above the loose spoil. From that point, it’s just a hard slog all the way to the summit.
Graystones “summit” is one of those that, on arrival, your first thought is “OK, where is it?” It’s really just a hummocky plateau and there are half a dozen possible candidates, not unlike Sour Howes. So I found a cairn on what appeared to be the highest mound and took my usual photo as proof and record.
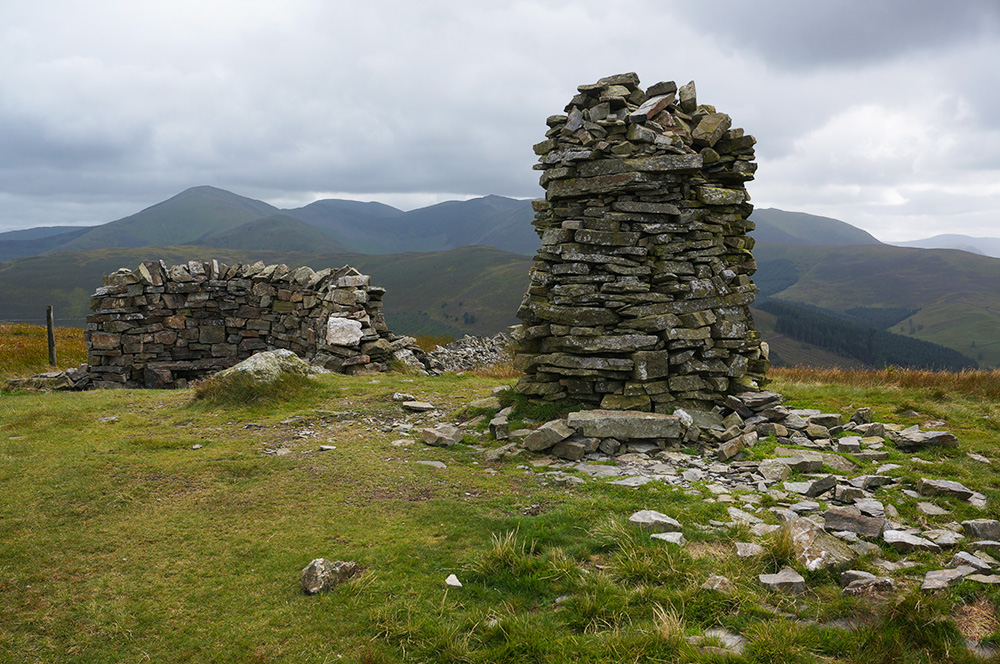
Still feeling pretty crap, I trudged on to Broom Fell, a nice, clear ridge path with destination never in doubt. What a difference a proper cairn makes! No doubt about the summit of Broom Fell, which is marked by a beautifully constructed “beehive” cairn and a shelter cairn to boot. No need to check the GPS on this fell.
Over a stile, the ridge path continues to Lord’s Seat. Not much of a summit cairn here but the form of the fell top is enough to tell you exactly where the summit is. It’s also a good spot for views so I paused for a while, feeling a little weary and decided I must be coming down with something.
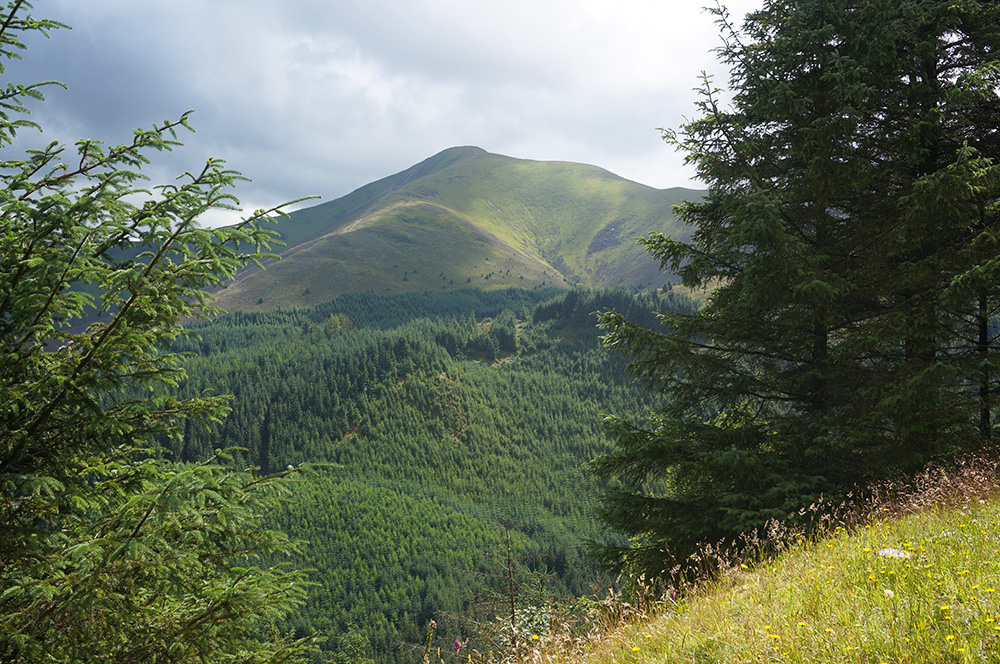
My next destination was the curiously titled Barf and I did something I don’t normally do, I set off on the clearest path assuming that would take me there. It didn’t and I realised that my judgement might also be impaired. I retraced my steps to Lord’s Seat and then set off in the correct direction, dropping down into very boggy ground.
Despite the relatively short distance between Lord’s Seat and Barf, I arrived feeling completely shattered and didn’t really have the enthusiasm to take in the excellent view along Bassenthwaite Lake and across to Skiddaw. I decided to bail out of the walk and head back to the car. I’d just have to bag Whinlatter on another day. So I headed back to Lord’s Seat, feeling pretty miserable as I trudged through the bog.
At Lord’s Seat, I checked the map and decided to follow the fenceline down to Aiken Beck and then pick up the forest track. There was a faint path and it was clear that other walkers had taken this route. The descent was relatively easy and all went well until I reached the beck and noticed that there was some serious forestry work going on, the route to the forest track was blocked by felled trees. Fortunately, I found a way round and eventually found myself on the track.
I set off, hoping I’d get back to the car without any further problems but around the next bend I could see that the track itself was impassable, blocked by lots of felled trees. Fortunately, it was after 5pm and there was no active work taking place but I had no option but to climb up into the dense woodland and work around the blockage. Eventually, I got back to the track without further incident and passed the large machines, now parked up for the weekend.
A little further up the track, I passed through a gateway with a large warning sign, “STOP, do not pass this point” and since I was coming from that direction rather than heading towards it, I figured that I must now be out of trouble.
There was some late afternoon sun to help me back to the car but even so, I arrived feeling like I couldn’t take another step. I drove to Ambleside, checked into the YHA and made myself a quick meal before going to bed feeling completely exhausted and cursing my bad luck.
Day 2
The following morning I got up for a late breakfast and then went back to bed. I wasn’t missing anything, the weather was poor but the forecast was for better things later in the day. After a morning recuperating, I dragged myself out and set off to complete my walk of the Lorton Fells.
It was a lovely afternoon when I arrived at the Whinlatter adventure centre car park and it was full of activity with lots of mountain bikers coming and going. After eating a late lunch, I set off for Whinlatter top and Brown How. Fortunately, it was an easy route and I soon found myself on the summit ridge with lovely, sunny views across to Grisedale Pike.

Whinlatter Top was quickly reached and then I made for Brown How, the official Wainwright top, despite being slightly lower. There are a few instances where the official summit is not the highest point of a fell and most (as in this case) result from errors in earlier OS maps which have, more recently, been corrected. In such cases, it’s probably best to visit both tops, the official summit and the actual summit. On this occasion, it was a delight to do so, even though I was still feeling pretty feeble.
Day 3
The next day I was still in no fit state to attempt a full day walk so I’d planned a couple of shorter walks that would allow me to have a relaxed start to the next couple of days and avoid the worst of the rain. The first short walk was to Scar Crags and Causey Pike.
I drove to Little Town, hoping to park up at the small parking area there but when I arrived, it was full so I continued across the very narrow Chapel Bridge and found some ideal roadside parking close by.
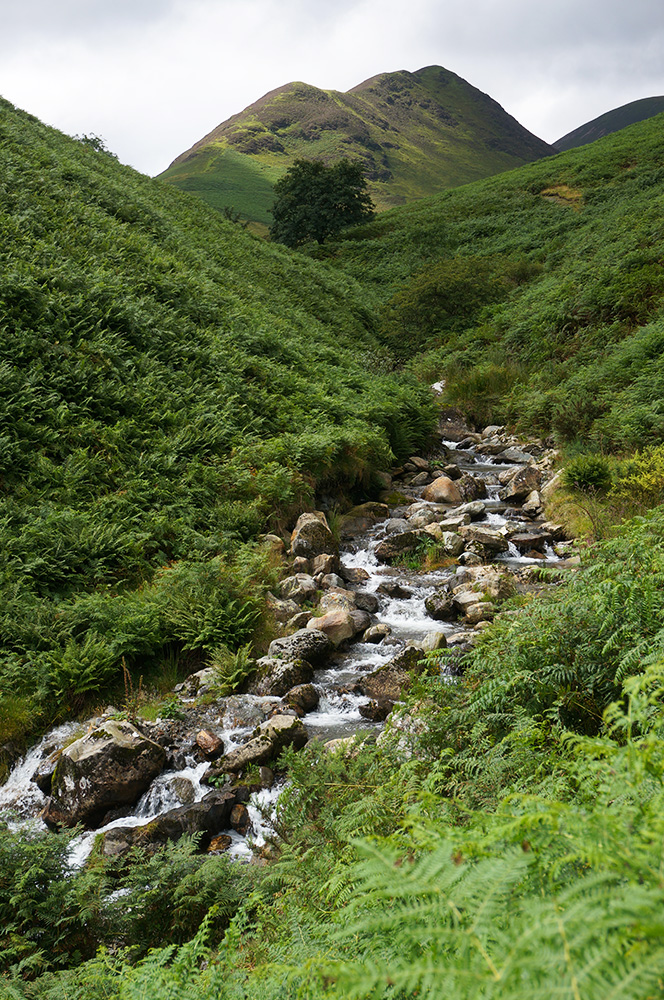
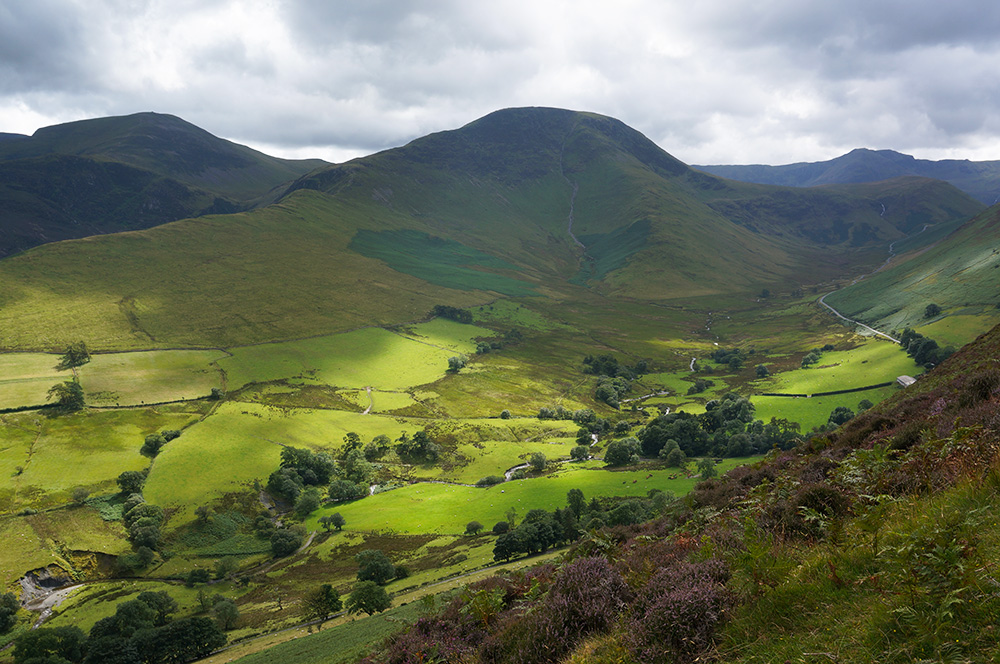
I set off north, along the road and soon came to the modern house called New Riggbeck. It’s refreshing to see interesting modern architecture using traditional building materials and in this case, it works really well. Shortly after, I arrived at Rigg Beck and the start of the path that leads all the way to Buttermere. Initially, the footpath follows the beck but it gradually angles up slope until you’re looking down on the beck, 30m below. It’s a wonderful footpath with a very dramatic aspect. The further up the beck you climb, the more you feel overtopped by Ard Crags on your left and by Scar Crags on your right.
Eventually, I arrived at the top of the watershed where Rigg Beck rises and flows east and where Sail Beck rises and flows west. It is said there is a direct route up to Sail Pass from here but only a mad person would attempt it. I decided to take the orthodox route and continued as the path descended with Sail Beck and looking for a diagonal path on the right that would take me up to Sail Pass.

As I walked west, I could see rain approaching up the valley and I just had enough time to get my waterproofs on before it hit, along with a gusty wind. After a few checks of the map. I came to a small cairn that conveniently marked the junction with the rising path. Turning back on myself, I started on the steep climb towards Sail Pass and after a few hundred metres the gradient lessened and the walk became easier.
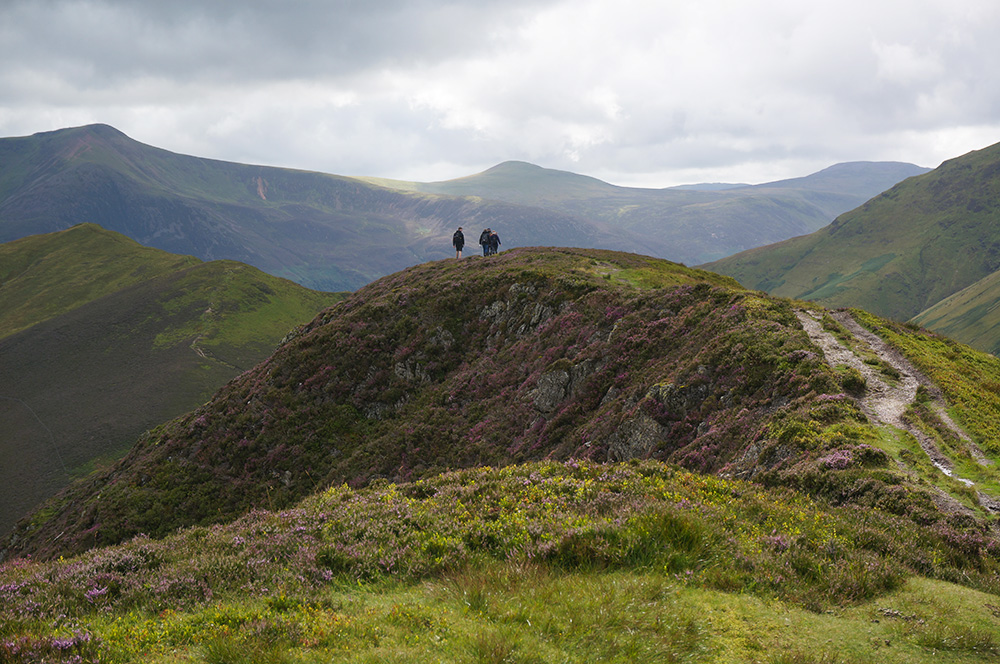
I arrived at Sail Pass a little damp from the rain but knowing that the bulk of the work had been done and with just a (relatively) gentle 50m rise to the summit at Scar Craggs. There’s a generous summit cairn at Scar Craggs and some great views east across the Newlands Valley to Robinson, Dale Head and Maiden Moor.
The ridge walk to Causey Pike is dramatic but easy, even in the wind and rain. It’s just a shame visibility wasn’t better because the views are extensive, across Derwentwater to Keswick and beyond.

There’s a small assemblage of stones at the rocky summit (not worthy of the term “cairn”) of Causey Pike and a steep drop down to Sleet Hause and Rolling End. The initial descent is a tricky scramble down a rock tower and I ended up coming down part of the way on my bum. The rocks were slippery in the rain and I had to double-check every hand and foot hold. Wainwright describes the route thus: “…this is rocky at first, needing great care in bad conditions, and is not pleasant to descend”. Spot on.
At the bottom of the rock tower I met a couple with a dog who were hoping to make the summit but were worried about getting the dog up there. I didn’t think that was a good idea and they agreed. There is a path to the left of the outcrop that Mark Richards suggests can be used to gain the summit without the rock climb but it soon petered out and my fellow hill-walkers decided to turn back.
The yomp along Sleet Hause is very pleasant (or it would be in fine weather) but the drop at Rolling End is a bit of a chore with a number of steep, rocky drops. Eventually, I joined the footpath back to the road at Rolling End Farm and from there it was just a short walk along the road and back to the car.
Day 4
Rain continued into the following day but the afternoon brought some better weather and I set off, once again, to the Newlands Valley to pick up Ard Crags and Knott Rigg. This time I gave Little Town a miss and parked in the small disused quarry car park at the start of the Rigg Beck footpath.
I set off along the same route I’d taken the previous day but this time, I left the path before it started to rise and crossed the beck, taking a faint but clear diagonal route up onto the Aikin Knott ridge. Joining the ridge path, I climbed over Aikin Knott and then along to Ard Crags, a relatively modest Wainwright at 581m.

When I arrived at the summit, I met a family of four who had arrived via a different route. We exchanged pleasantries and then they all gathered around their OS map and decided that this must be Knott Rigg. I was then faced with a Very British Problem. Should I tell them that they are wrong and that this is, in fact, Ard Crags or shall I say nothing. I thought for a moment and then decided that if I were in their boots, I’d want to know where I was. “Actually”, I said, “I think this is Ard Crags”, pretending to check the GPS on my phone. That broke the ice and we had a good conversation about Wainwright bagging and exchanged a few anecdotes about getting lost in mist and accidents on Striding Edge (they’s actually seen someone fall off and the subsequent mountain rescue). It turns out they were slightly behind me on around 100 Wainwrights but were much more casual in their approach.
After they proceeded to Knott Rigg, I waited behind to have the summit to myself for a while and to take in the excellent view of Scar Crags, looking quite dramatic in the shifting afternoon light. Then I went in the same direction, passing them on their return journey.
Knott Rigg is another unsatisfactory summit. Wainwright suggests there are two summits, one of which has a small cairn but there was no sign of any cairn at the designated spot.
So now I just had to return and I’d decided I wanted to take the Rigg Beck path back down, so I retraced my steps to Ard Crags summit and then turned left, down the steep grassy slope to the head of the beck. There is a faint path and I got down without any major problems. I then turned right onto the path and started my descent, back to the car. I’d enjoyed this route on the way up the previous day but I enjoyed it even more on the way down. There’s a lovely section across scree that looks precarious from a distance but which is very stable when you’re on it.
Day 5
The following day, I felt strong enough to take on a day walk and the weather looked as though it might be relatively benign, so I decided to take on the Newlands Round between Robinson and Catbells, 6 Wainwrights in all.

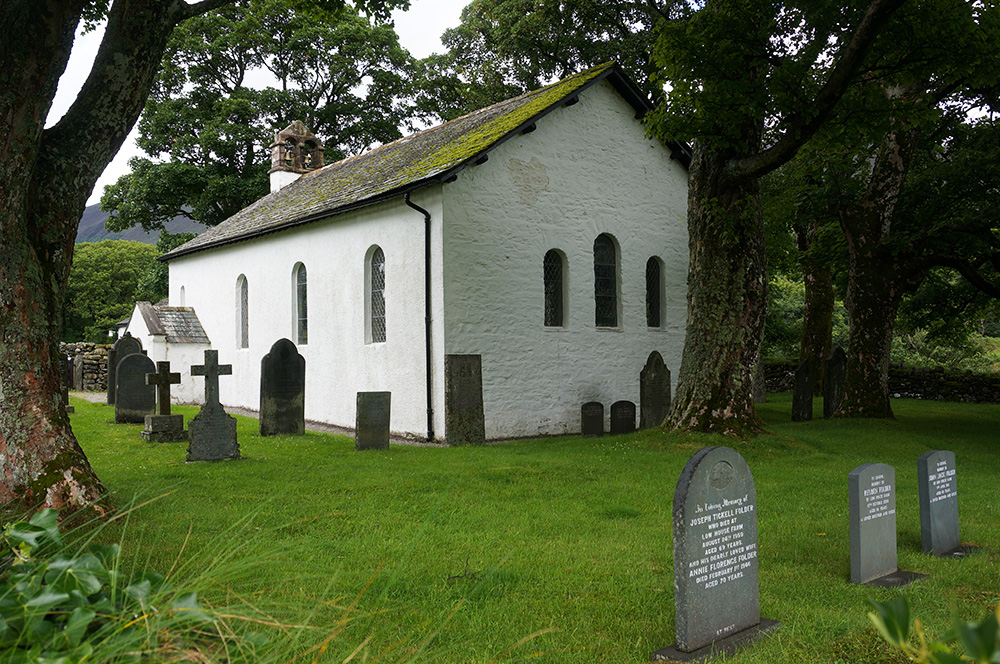
I parked up, once again, at the disused quarry car park and set off south on the road to Newlands Church. It was a fine morning and the old whitewashed church (most would call it a chapel) was looking lovely. I continued along the track as it began to rise and soon passed the equivocally named Low High Snab. From there, the landscape opens out and you move from wooded farmland to open fell.
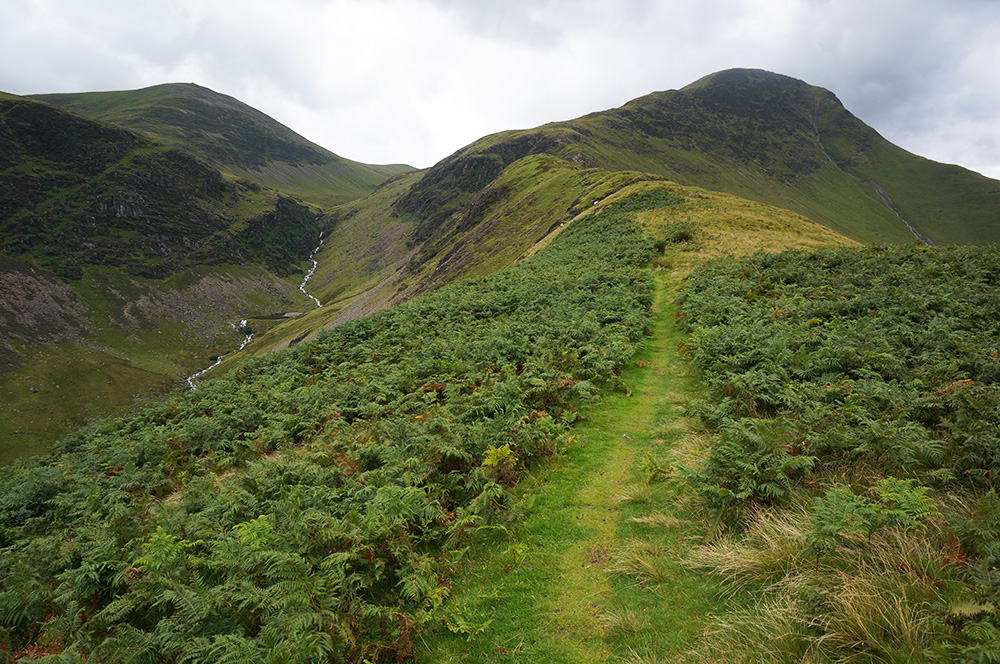
The enclosure fence then turns sharp right up the steep grassy slope onto High Snab Bank and I followed it along an obvious path through bracken and then furze. Once up on the bank, it began to rain but it was a half-heartened affair, amounting to no more than a few light showers over the next half hour. The gradient along the bank is shallow and walking was easy with views down into Scope Beck on the left and across to Knott Rigg, where I’d been the previous day, on the right.
After about a kilometre, the ridge narrows and becomes rocky with three rock steps to negotiate, the first of which is a simple scramble. The second rock step is far from simple and stopped me in my tracks. The key is finding the right line of ascent and I only just managed it on my third attempt, the first and second attempts ending in a an uncoordinated slide down slippery rock – just as well there was no one round as witness. Wainwright notes that, “Three rock steps, each 20′-30′ high, require concentrated action by hands, feet, elbows, etc.” to which I can definitively add “knees”.
I was relieved to make it past the second rock step and after that challenge, the third didn’t seem so bad although it was significantly more difficult than the first.
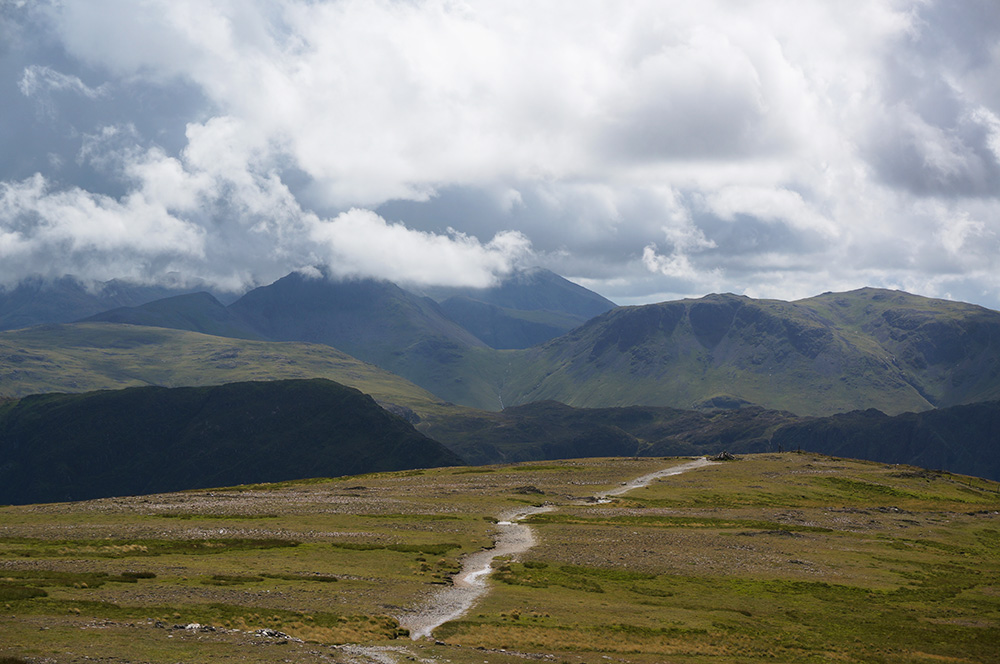
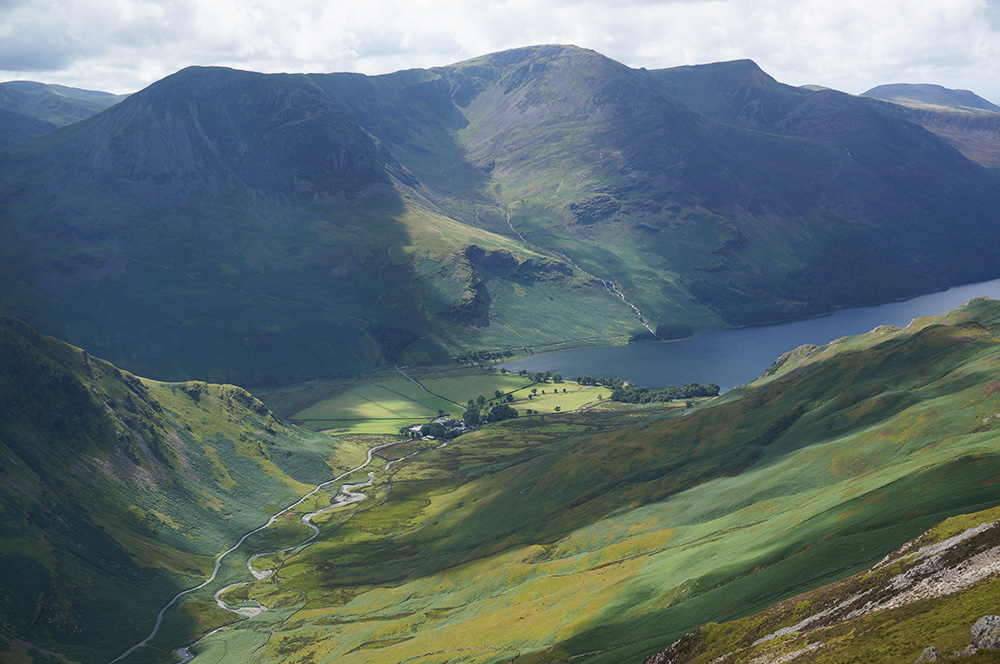
Having successfully scaled the rock steps, the walk to the summit is pretty straightforward. It’s a broad dome of a summit with great views in all directions. As I approached the shelter cairn, the cloud broke up and blue sky was seen for the first time that day. In fact, it turned out to be the best part of the day. I perched on a comfortable rock and had my lunch, taking in the the views, particularly those over to Grasmoor and down to Crummock Water with Loweswater in the distance and the coast beyond.

After a beautiful, solitary lunch, I set off to Littledale Edge en route to Hindscarth. It’s a wonderful thing that even in the best weather, at the height of the holiday season and with Ambleside and Grasmere thrumming with tourists, one can still find solitude and quiet out on the fells.
After the drop down from Robinson, I took the diagonal path across to Hindscarth summit. Like many paths in the Lake District, it’s not shown on the Ordnance Survey maps but it is a real and clear path on the ground.
Hindscarth has two shelter cairns on the summit, one at the highest point and an even more impressive one to the north, overlooking the drop down to Scope End and with wonderful views to Derwentwater, Keswick and the Northern Fells. An ideal spot for lunch had I not already had it.
From Hindscarth summit, the path leads round Hindscarth Edge and up to Dale Head, the highest point on the walk at 753m.

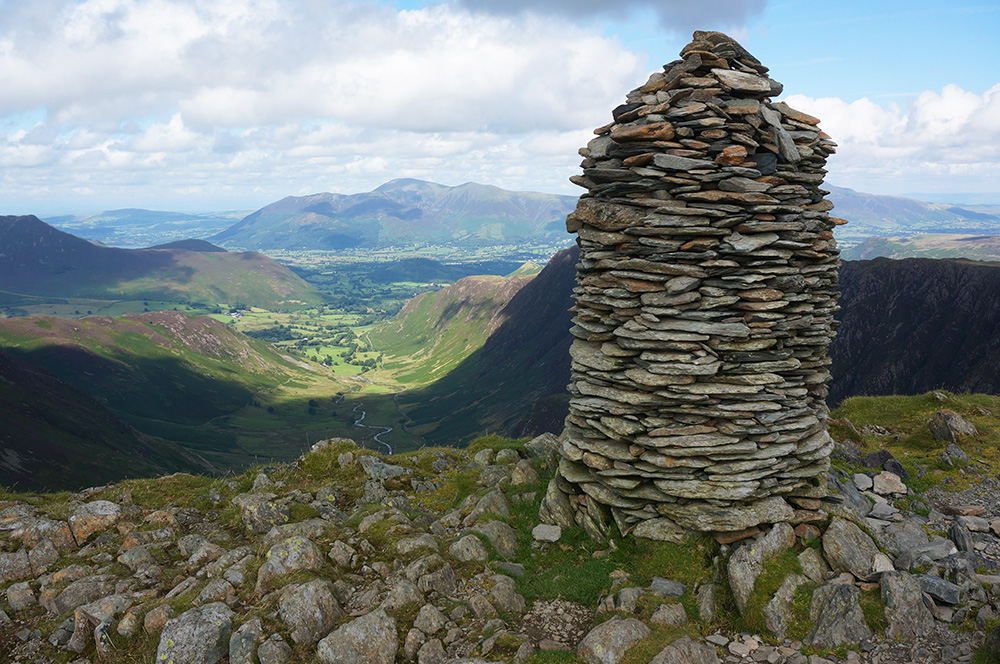
Although Dale Head doesn’t have the physical feeling of a summit – it’s approached via a gentle incline – the beautifully built beehive cairn definitely makes the statement. Add to that the gob-smackingly amazing view down the Newlands Valley and you have a classic summit and one that should be on everyone’s to-do list. I lingered for a while, waiting for a couple of other summiteers to depart and then took the steep descent down to Dale Head Tarn.
Although small, Dale Head Tarn is rather beautiful. There are the remains of a sheep fold on the eastern shore so I found a comfortable perch there and had a snack. By this time in the afternoon, there were a few more walkers about and I sat and watched as people struggled up the steep, rocky slope to Dale Head, congratulating myself for doing this walk in an anti-clockwise direction.
After the short break, I crossed the outflow stream and started the rough but not too steep climb to High Spy. The summit at High Spy is also marked by a beehive cairn but, fittingly, it’s not as tall or majestic as that on Dale Head. It is, after all, 100m lower.
It’s an easy and relatively level walk from High Spy to Maiden Moor so I took Mark Richard’s advice and made a short detour to Blea Crags to take in the view. Sadly, the summit of Maiden Moor is rather disappointing, being no more than a small pile of loose stones on a grassy bank but I was encouraged by the fact that I’d broken the back of this walk despite not feeling 100%.
On paper the line of descent to Catbells looks straightforward but there are a few twists and turns and some rocky drops that need some care with tired feet.
The previous evening I’d sat and watched as a helicopter made a number of visits to Catbells summit, dropping off large bags of stone, presumably for repair and so I expected to see some evidence of this when I arrived. The bags of stone where there, just where the helicopter had left them and part of the summit was cordoned off. It looked as though some kind of monument might be being built but it was difficult to tell.
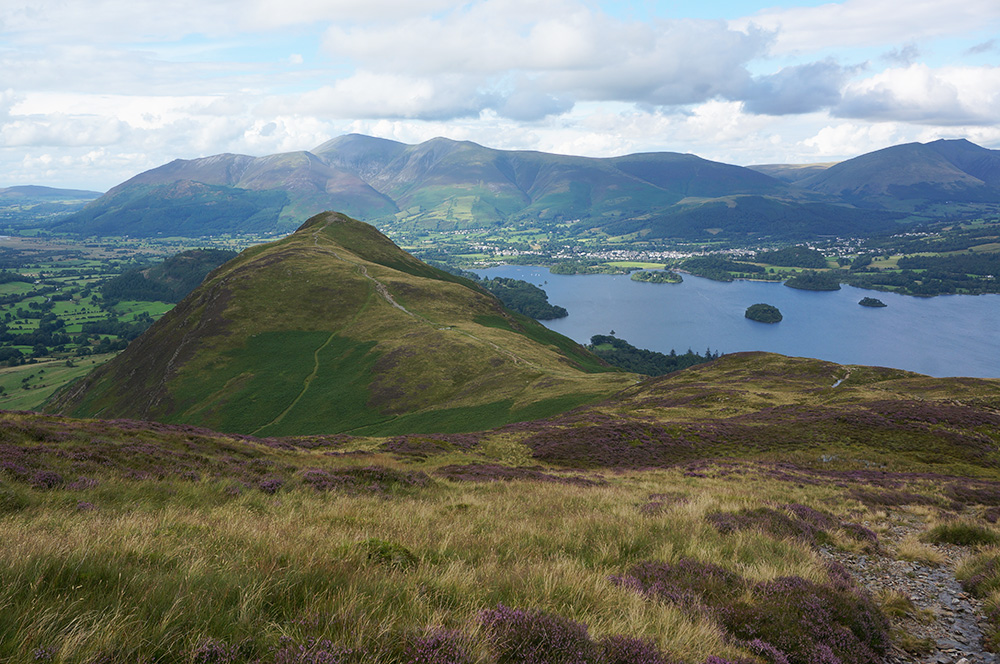
Catbells is a popular summit and I wasn’t surprised to see plenty of people taking in the pleasant evening weather. From there I followed the well-used path north towards Hawes End. Part way down there’s a memorial stone to one Thomas Arthur Leonard, an unsung hero who is considered to be the “Founder of co-operative and communal holidays and ‘father’ of the open-air movement in this country.” I particularly like his quote that “the best things any mortal hath are those which every mortal shares.” By which, I assume he means the landscape and the air we breathe.
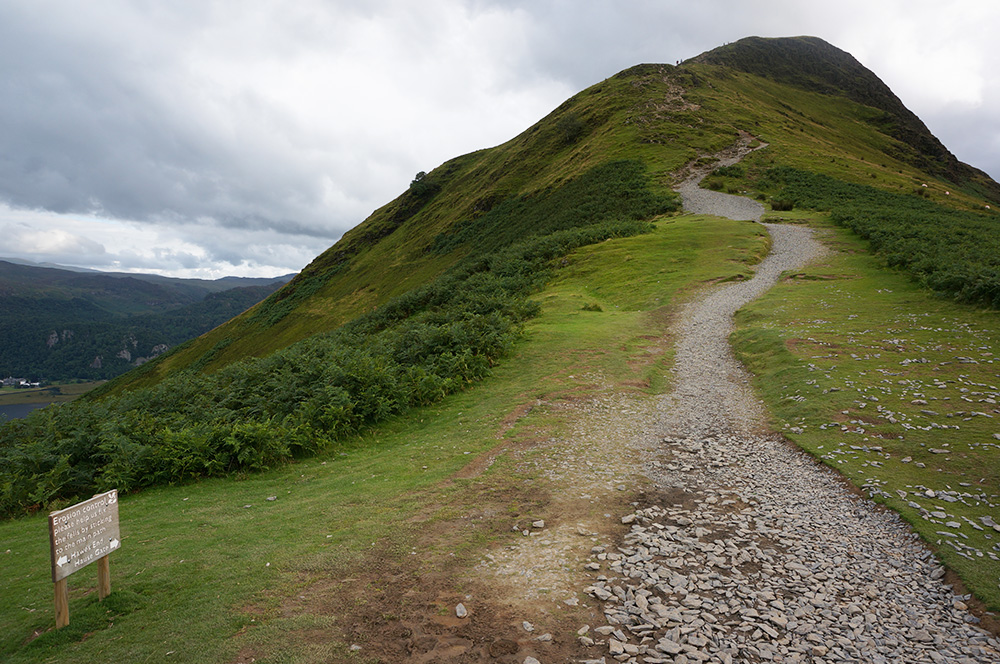
Near the bottom of Skelgill Bank I took the footpath west and down to the road Near Skelgill and then followed the road back to the car, arriving just after 6.30pm and completing the walk in eight and a half hours. I was pretty weary but very pleased that I’d managed one full day walk during this trip and, more importantly, that I’d now completed the North-Western Fells. So that’s four of Wainwrights seven guides complete. All I had to do now was crack on with the Southern Fells.
Day 6
The next day was a lost day. I woke up feeling completely exhausted, the previous days walk having taken more out of me than I expected with what had now developed into a heavy cold (in August!). Added to that, the weather was not kind (again). It rained for most of the day and cloud hung over even the lowest fells. So I decided a day off was in order. By the evening, the weather had improved and I walked from the youth hostel to Rydal Water and back, just to give myself the sense that the day hadn’t been a complete waste of time and allowing me to hit my FitBit target for the day. It’s a very pleasant, easy walk, mostly on roads, that I hadn’t spotted before and I will definitely add it to my list of things to do in Ambleside when I can’t get out onto the Fells.
Day 7
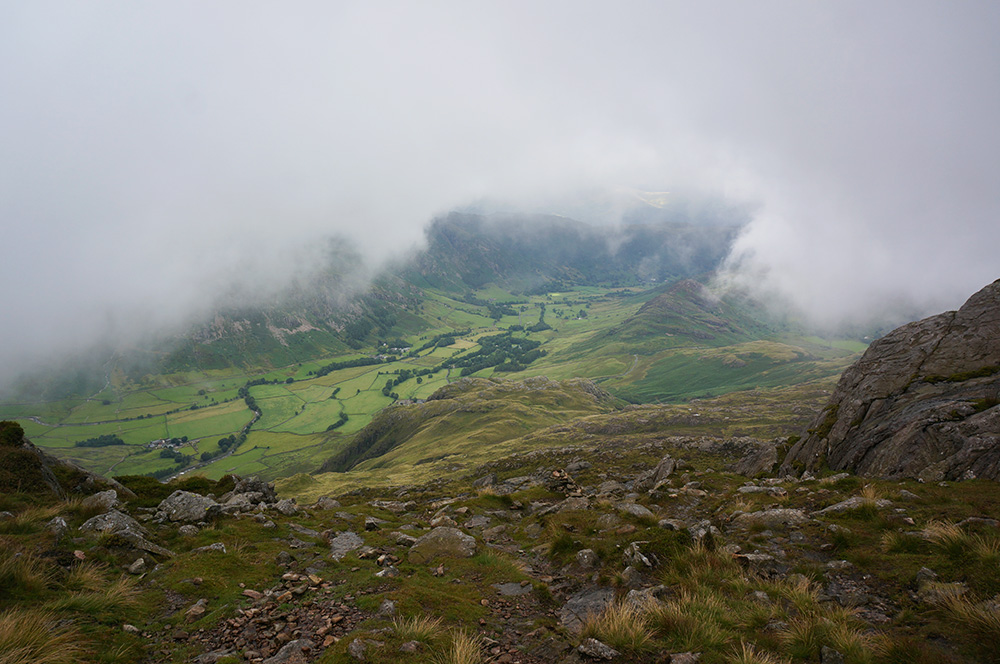
Sunday morning was again very wet with very low cloud and all of the fells shrouded in mist. I cursed my bad luck and spent some time planning a more limited walk. I had hoped to do the Head of Langdale walk but it was clear that wasn’t going to happen. So I decided to pick off Pikeo’Blisco, Cold Pike and Little Stand (a Fellranger top, not a Wainwright). By mid-afternoon it looked as though things might be improving, so I drove to the Old Dungeon Ghyll car park just in time to see that last few whisps of mist clear from the top of Pike o’Blisco.
I set off along the road to Wall End and then took the Redacre Gill path. This is a popular route (although not today) and an amazing amount of work has been done to stabilise the path and reduce erosion. I think it’s probably the longest section of pitched path I’ve used so far and it is beautifully done, resembling a standard flight of steps on some of the steepest sections.
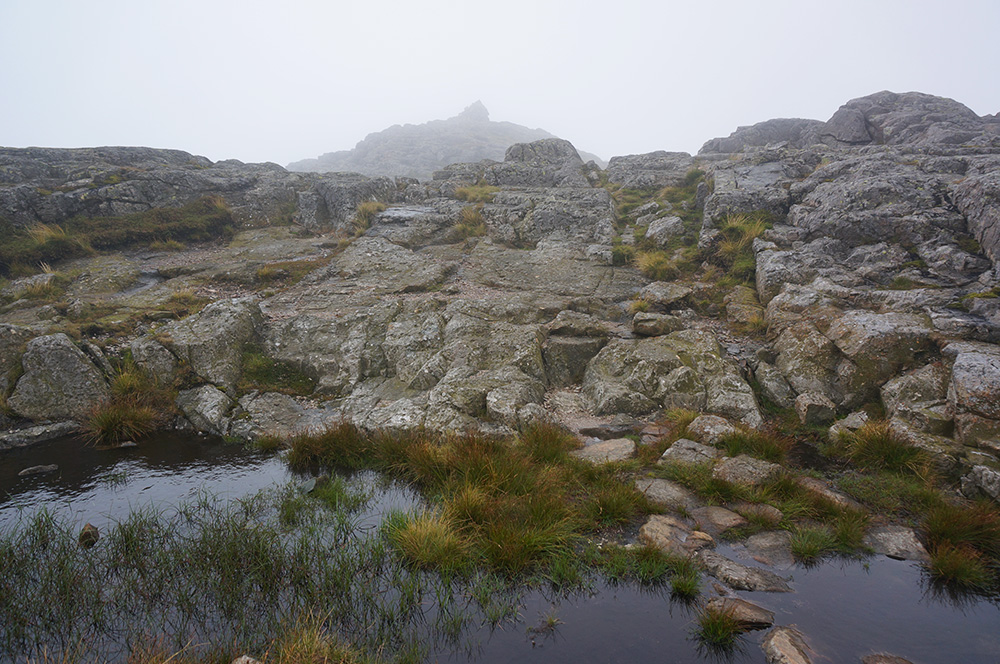
At the top of the ghyll and the end of the pitched path, the gradient decreases and an approach to the summit can be seen for the first time. It was disappointing to see the top, once again, shrouded in mist. None the less, I ploughed on, not intending to turn back after having put in so much work. The route to the summit includes a number of rock steps and although some are tricky, there was nothing to equal the Robinson rock step I’d conquered a few days before.
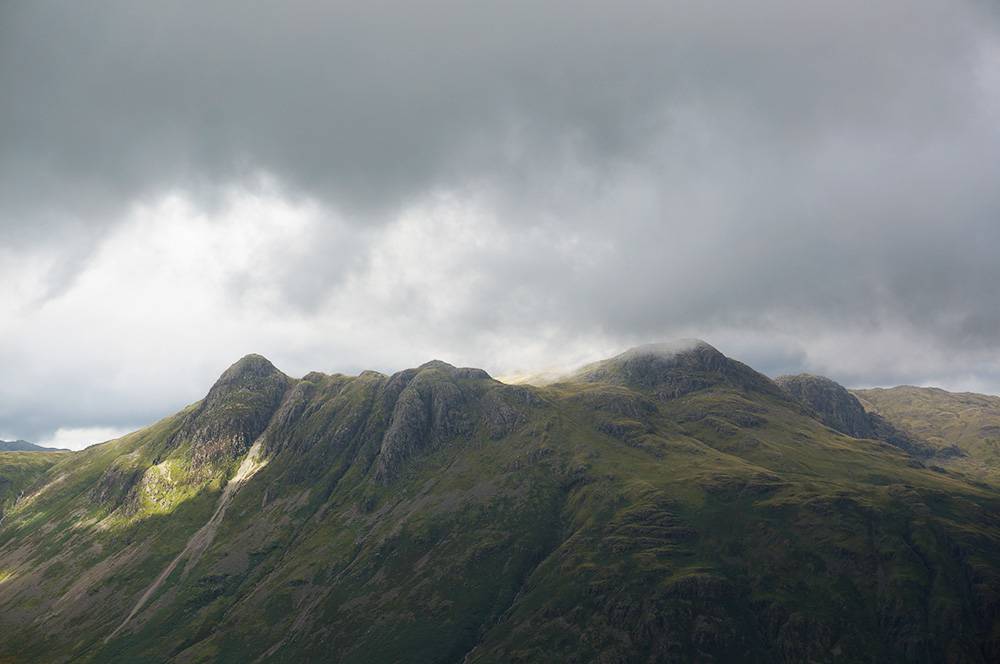
There is a beautiful summit cairn at the top, in fact, there are two, separated by a boggy dip. I headed for the northern, summit cairn and hunkered down in the gusty wind, hoping that the mist would lift and I’d get a decent view out. The scene was changing rapidly as the wind drove banks of mist in from the west and there were a few moments when I could see across to the Langdale Pikes. However, the longer I remained there, the thicker the mist seemed to get. I thought very briefly about continuing to Cold Pike but not knowing the rough terrain, I was reluctant to attempt it without good visibility. And, in any case, I’d already decided on this trip that fell walking should be enjoyable and not an exercise in masochism. So, with that in mind, I decided to call it a day and to retrace my steps.
On the way down, I imagined getting back to the car and looking up to see Pike o’Blisco summit bathed in golden, evening sunshine. Fortunately for me, that never happened, the sky just became darker as the cloud thickened and it was already raining again before I made it back to the car.
Day 8
The weather on my last day in the Lakes seemed to show some promise and rather than go back to Langdale, I’d decided I might have better luck in Coniston, possibly even getting a full day walk in and doing the classic Coniston Round, beginning with Wetherlam. So I checked out of YHA Ambleside and drove to Coniston, parking in the main car park, bright and early.
I set off and immediately got distracted by a sheep drive along the main street in Coniston. It was amusing to see the puzzled looks from motorists on this relatively busy road as they had no option but to stop and allow the sheep to swarm around them.
In contrast to the start of most fell walks, this one didn’t have an initial steep uphill pull, there was a moderate gradient for most of the way. There were some sunny breaks as I took the rising path above the old Coniston copper mines but all the tops were obscured by swirling mist. I was banking on the fact that the cloud base would rise by the time I arrived. The route to the summit at Wetherlam is long but pleasant with only a couple of head-scratching moments. There were a few showers as I gained height but nothing persistent. However, the wind was rising and the higher I got, the more of a chore walking became as I was constantly buffeted by strong gusts.
The wind at the summit was so firce that I could barely stand up. It was even stronger than my recent visit to Grisedale Pike with Tilly. Banks of mist were being driven in from the south-west and views out were only intermittent. My thin Berghaus waterproof was whipping a cracking and tufts of grass were combed flat.
For a while, I sheltered in the lee of a large boulder trying to work out what to do next. The onward route to Swirl How was far from clear and the conditions were really unpleasant. So I kept to my new resolution that fell walking should be enjoyable and decided that today was not the day to complete the Coniston Round. I’d bagged one Wainwright, so the day hadn’t been a complete waste. In fact, I’d enjoyed the walk up and will no doubt return in better weather.
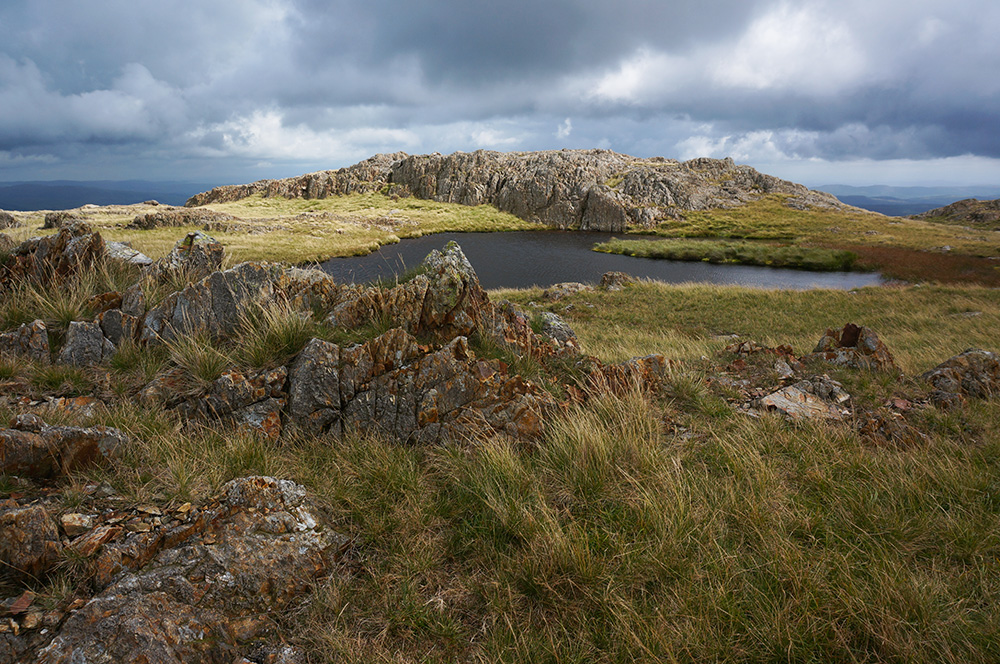
I quickly dropped down from the summit plateau to where the wind was more manageable and then slowly retraced my steps, taking in the views as the mist cleared and taking advantage of the many photographic opportunities I’d passed on the way up. There’s a particularly pretty tarn about a kilometre from the summit and the oxidised stone outcrops against the steel grey sky looked beautiful as racing sunlight played across the scene.
When I got back to Miners Bridge, I took an extended break by Levers Water Beck and had some lunch. The wind here was no more than a light breeze and it was a good reminder that there’s no way to predict the conditions on the fell tops from the valleys below.

When I got back to Coniston, I treated myself to a double scoop of artisan ice cream as a reward for managing to keep going through the week. Although I hadn’t managed my minimum target of 25 Wainwrights (17 was the total), I thought I’d done pretty well under the circumstances. The weather had been really poor (yes, the title is ironic!) and I’d felt sub par the whole week. All in all, not bad but it made me realise that there’s little point booking trips to the Lakes 8 months in advance because even in August, the weather is so unpredictable.
Catbells
Catbells has a special significance for me because although it became the 132nd Wainwright of this challenge, it’s not the first time I’ve visited the summit. In fact, Catbells is the very first Wainwright I ever bagged (although I didn’t realise that at the time), way back in (I think) April 1973. I was an eleven year old schoolboy on an outward bound trip and although the experience of that trip is overwhelmingly positive, and probably adds to my nostalgic feeling for the Lakes, I distinctly remember not enjoying the fellwalking experience. I remember thinking that the climb up to Catbells summit was never going to end, I guess it was probably raining, and the only benefit I could see of getting to the top was knowing that it would all be downhill from there on. Forty-four years later I feel differently about fellwalking but I have to admit that there have been occasions over the last two and a bit years when I’ve felt a little bit like that eleven year old kid.
Meadowsweet
It seems that every time I visit the Lakes, a different native plant is dominant in the landscape. In late July/early August, the heather hasn’t yet reached its best but Meadowsweet (Filipendula_ulmaria) is in full bloom and is a common feature of many waterside locations. Its cream-coloured, frothy blooms are a perfect compliment to the tumbling foam of busy becks. The plant is reputed to have medicinal qualities but I’m just glad it’s there as a permanent but transient feature in such a beautiful landscape.∗
28th July 2017
The Lorton Fells
Graystones (456m)
Broom Fell (511m)
Lord’s Seat (552m)
Barf (468m)
29th July 2017
Whinlatter (517m)
30th July 2017
Scar Crags (672m)
Causey Pike (637m)
31st July 2017
Ard Crags (581m)
Knott Rigg (556m)
1st August 2017
A Newlands Round
Robinson (737m)
Hindscarth (727m)
Dale Head (753m)
High Spy (653m)
Maiden Moor (576m)
Catbells (451m)
3rd August 2017
Pike o’Blisco (705m)
4th August 2017
Wetherlam (762m)
So that brings the current total to 134 Wainwrights out of 214, leaving just 80 to complete the set. I’m well ahead of schedule and thinking that maybe I could take the rest at a more leisurely pace (unlikely).