For the second year running I had planned to combine a week’s walking in the Lakes with a few days in Snowdonia (or Eryri as the national park is now called). In spring 2021, my plans were thwarted by the COVID-19 pandemic with the lockdown not being eased until May. This year my plans had to be abandoned when, just as I was preparing to leave home, a large crack appeared from top to bottom of the Honda’s windscreen. Inexplicably, it would be two weeks before a replacement windscreen could be fitted. I had no option but to cancel the trip to North Wales, and go straight to the Lakes. Once again though, I’d need a hire car.
A few days later than planned, I set off for Southport in a nippy, red Toyota Aygo, taking full advantage of the Bluetooth stereo. I spent two nights in Southport and on the Saturday I managed a nice pub lunch with my mum, brother, sister, and sister-in-law.
Early on Sunday morning I drove up the M6 to Junction 40 and then the A66. I was headed for the Northern Fells.
Sunday
It was a lovely day with blue skies and fluffy white clouds. I was really looking forward to blowing away the winter cobwebs with a day on the fells.
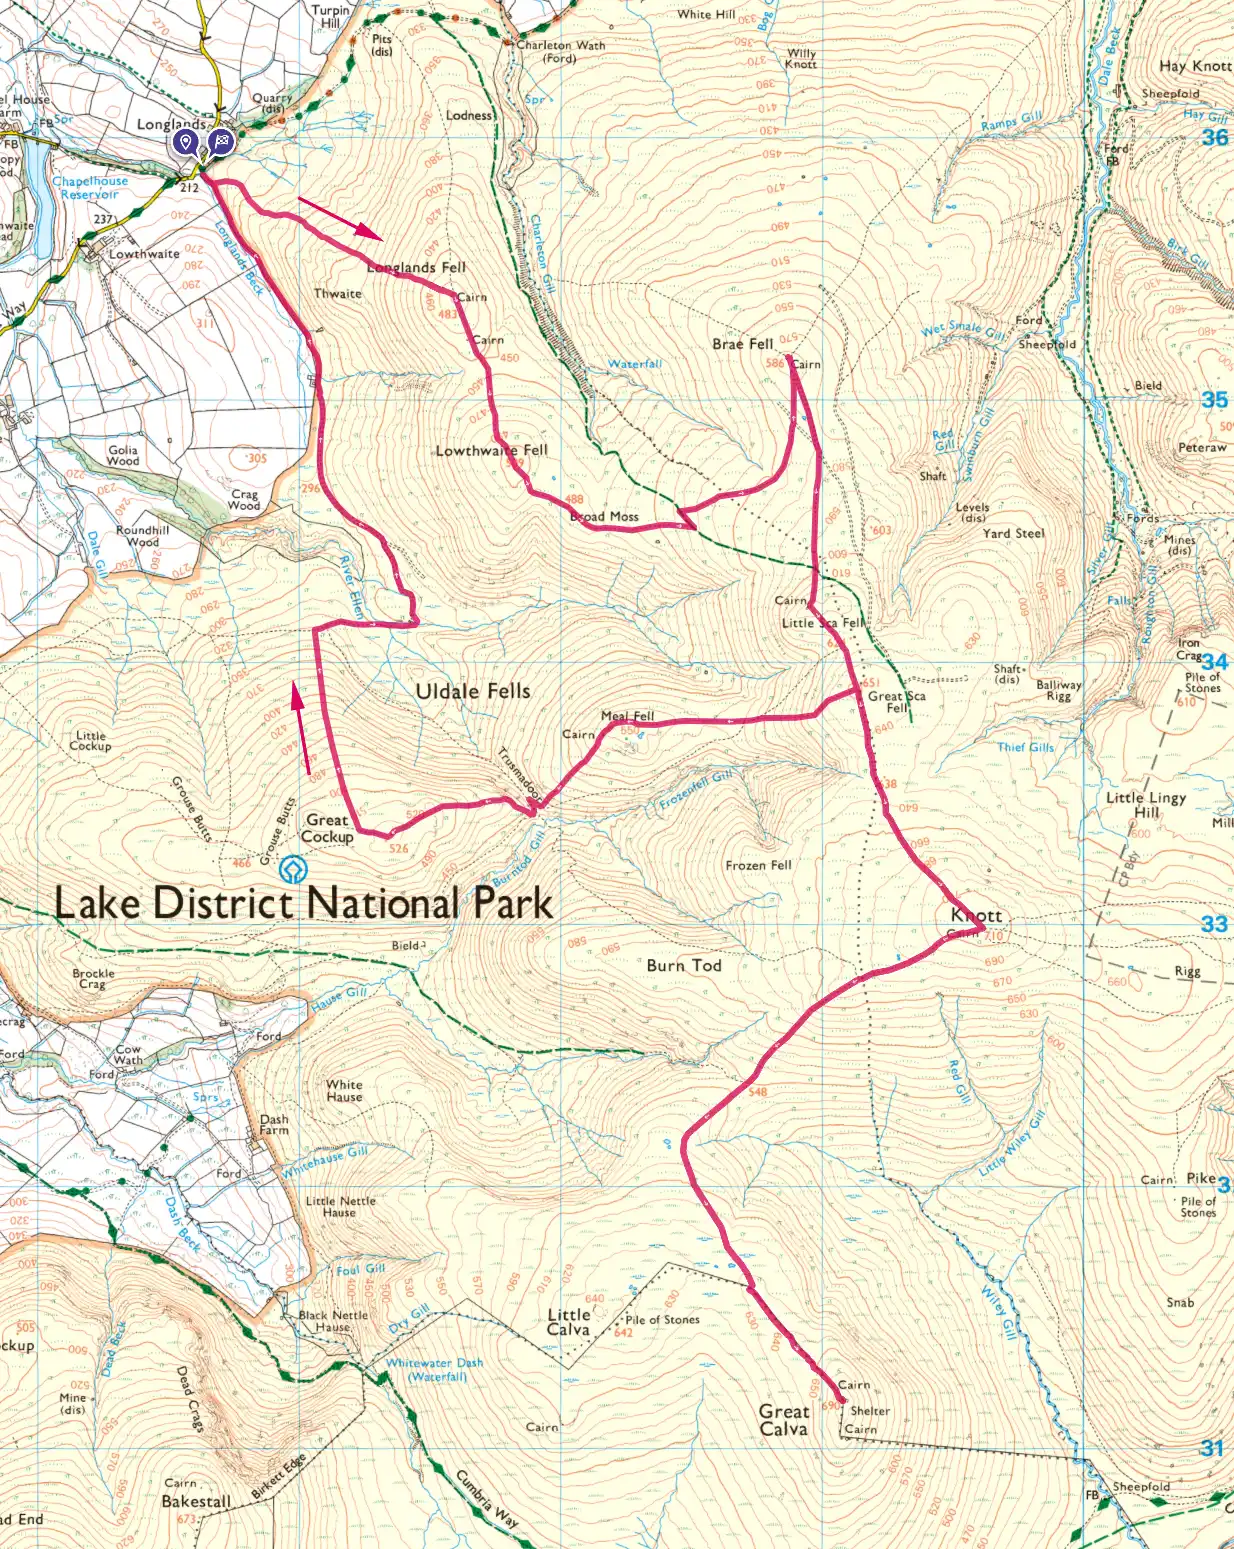
This walk would be a near repeat of the rather miserable walk around the Uldale Fells I’d make four years earlier. On that occasion, the mist meant I hardly saw a view all day and the photos I’d taken of the summits could, frankly, have been taken anywhere. Today would be quite different and I was aiming for a full set of presentable summit photos. I’d also allowed myself the option of including Great Calva if I was feeling up to it. So, with a clear mission, I headed to the start point at Longlands.
Once off the main roads, the drive into the national park at the start of a visit is always full of anticipation. I’ll normally have spent hours planning the walks, often months in advance, and the weather is always responsible for setting the mood. Today felt great and my only worry was finding a suitable parking spot.
There are very few parking spaces at Longlands but, fortunately, someone was just leaving as I arrived at 9.30am, so I parked up and prepared for my first Lakeland day-walk of 2022.
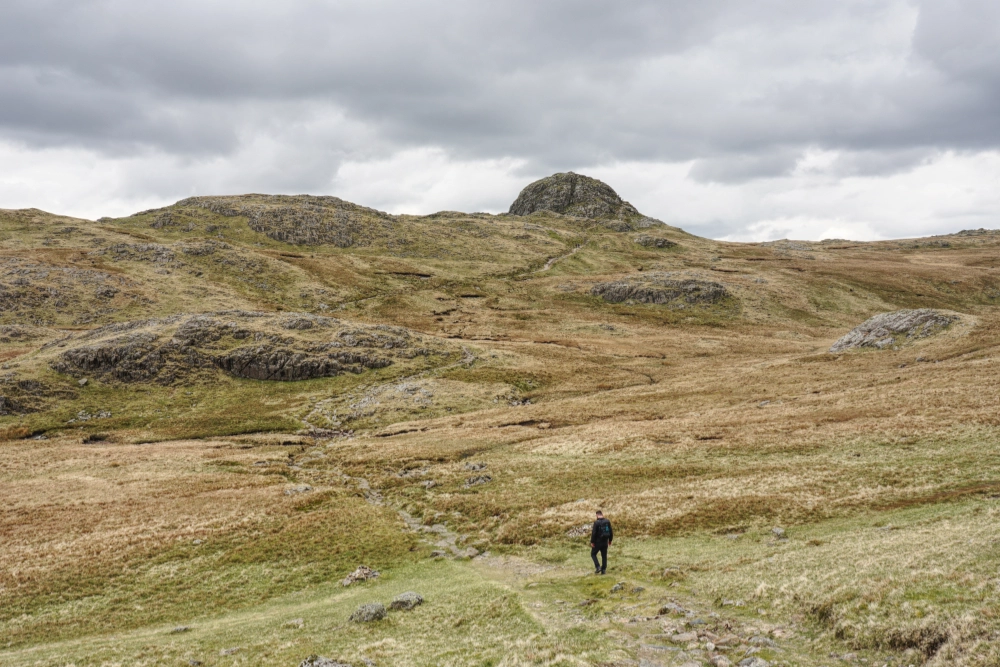
An hour after parking, I arrived at the first top of the day, Longlands Fell. Gaining the higher ground at the start of a fellwalk is always the most energy-sapping part of a day on the fells. On this occasion, I’d taken my time, I didn’t want to repeat the error of my previous visit. Wainwright says of Longlands Fell, “Anybody who cannot manage this short and simple climb is advised to give up the idea of becoming a fellwalker.” At least I’d passed that test!

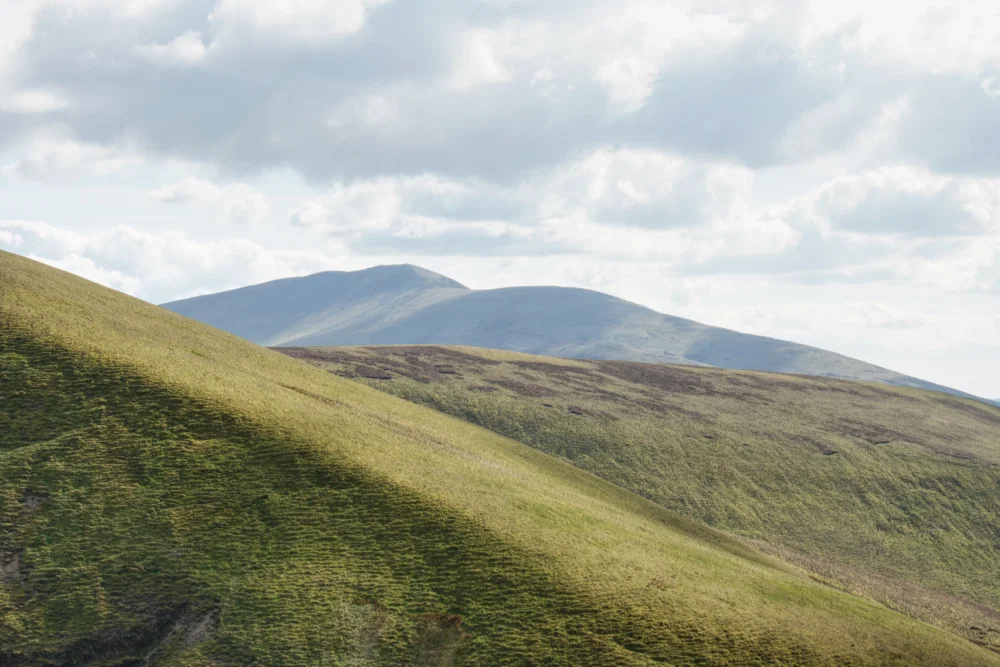
Today, the air was clear and views from the top were extensive. Binsey out to the west looked full of detail. Skiddaw to the south looked imperious. The only downside was a stiff and constant wind that was blowing in from the north.
The next top, Brae Fell was gained after a long arcing route over mainly gentle gradients, during which, the wind became stronger as I turned into it on the northerly route. Taking the summit photos was tricky as it was difficult to hold the camera still, even with my back to the wind. Clouds scudded across the sky and I could feel those winter cobwebs being blown away.
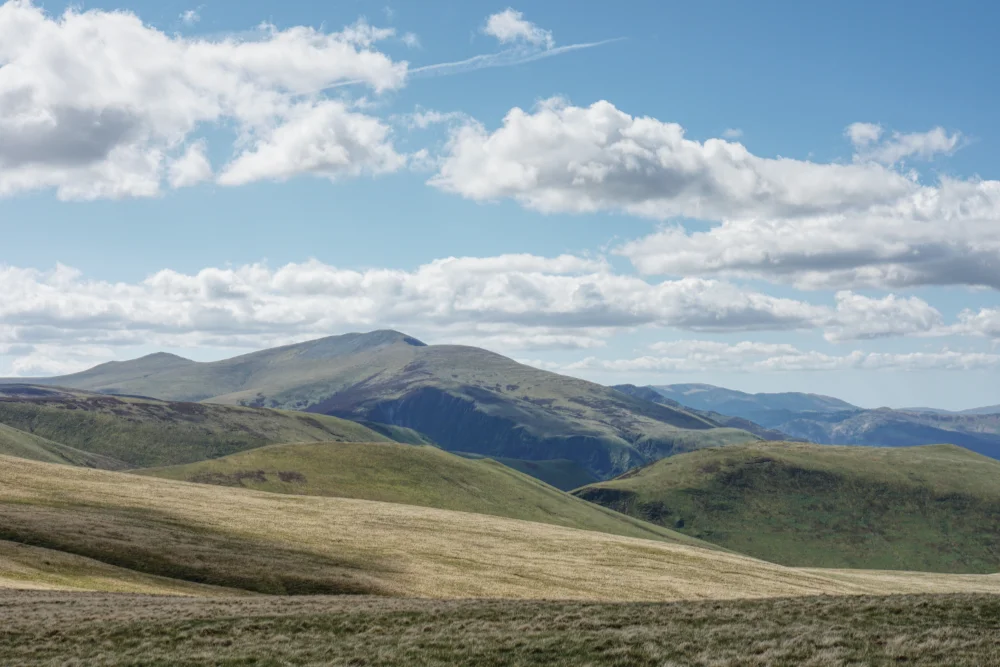
My route now turned south, so I had my back to the wind when I arrived at Great Sca Fell. On my previous visit, I’d had to follow the GPS, the mist was so thick that there was no other way to navigate. This time, the cairn at Little Sca Fell provided a clear beacon and a good waymarker en route to its larger sibling.
The smaller fell has much the better summit, so I stopped for a while and had a quick snack. It was 11.30am and I felt I’d made good progress, despite my lack of fitness.

A few hundred metres further on and I was at Great Sca Fell. Not a classic fell top and I suspect it may only be marked by a small cairn because it stands as a crossroads of paths. To the west lies Meal Fell and to the south lies Knott. I was headed south and would return to Great Sca fell after an out-and-back route that may also include Great Calva.
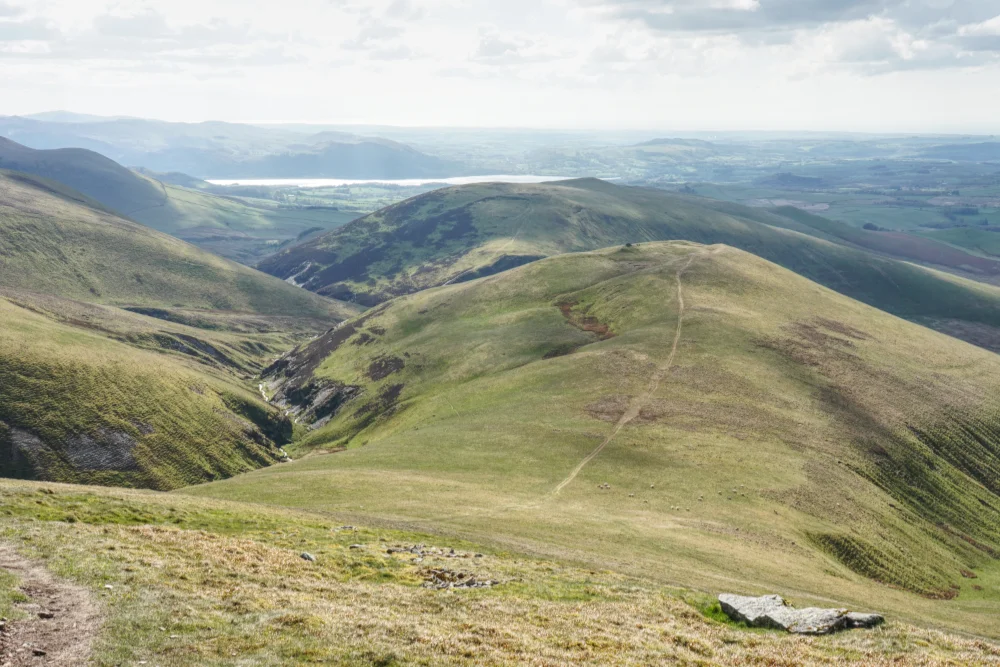
I arrived at Knott at 12.30pm feeling battered by the wind but otherwise strong and eager to bag an extra Wainwright. I could see pointy Great Calva across the Wiley valley, but to get there and back, I’d need to lose and regain almost 200m of height, twice. I spent a while pondering – would this be too much for me on the opening day of my trip? I remembered completely knackering myself on the Helvellyn Skyline walk a few years back, and I didn’t want to spend the next day recuperating. In any case, I couldn’t. I’d arranged to meet nephew Tom for a walk around the Langdale Pikes.
In the end, I decided to go for it. This was the end of April, there was plenty of evening light and I could take my time. So I set off on the unfamiliar downward path. At the bottom of the valley, the forward route was not entirely clear but, eventually, I arrived at the ridge fence, leading to the summit. An hour after leaving Knott, I arrived at Great Calva, still feeling good.
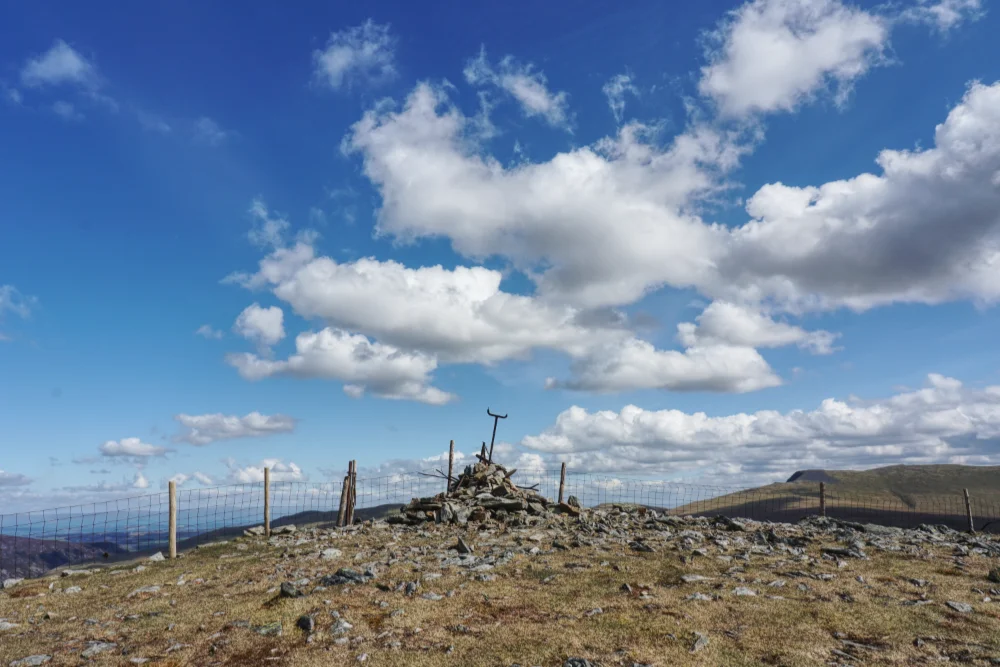
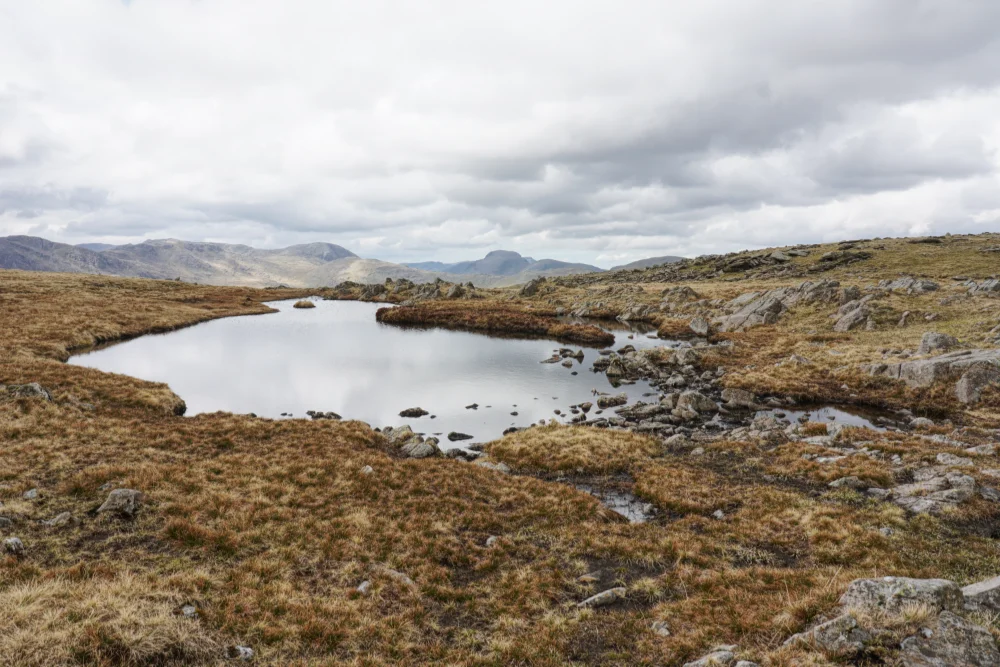
Great Calva summit is an enigmatic place. Even (or especially) in the mist on my previous visit – it has a spooky feel to it. I think the twisted metal additions to the cairn help to provide drama and the generous wind shelter has the feeling of an ancient settlement. I spent a while trying (and inevitably failing) to capture this feeling in photographs. There are open views all around, but the view down the throat of the Glenderaterra gap and into the Eastern and Central fells is special. It’s also a great place to view the entirety of Mungrisdale Common. Many commentators have wondered why it is included in Wainwright’s 214. I particularly like his description of its aspect: “Most fells have at least one good aspect, but the Common, from whatever side it is seen, has no more elegance than a pudding that has been sat on.”

Having toiled to get to this point, and not relishing the return journey, I spent a while at Great Calva, just enjoying being there. Eventually, I had to leave. At this point, I was still only half way round the walk. I left the summit at 2 o’clock and arrived back at Knott just under an hour later. At Knott, I retraced my steps back to Great Sca Fell and turned left at the crossroads. Next stop, Meal Fell.
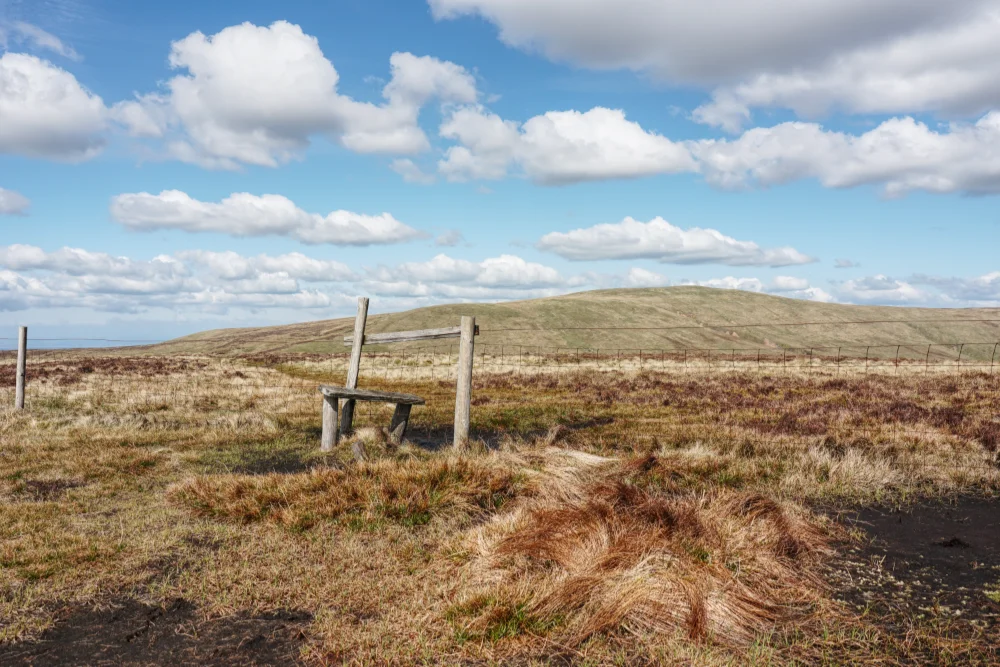
By the time I arrived at Meal Fell, the wind that had been battering me most of the day began to abate and for the first time I felt I wasn’t in a battle with the elements. There’s a great view of Meal Fell way below as approached from Great Sca Fell and with a straight and clear path. Navigation is not a problem here!
The summit of Meal Fell has the feeling of a small Iron Age hillfort, but there is no obvious indication that it is. Perhaps it’s just the parallel ridges and the circular wind shelter. At the very least, it is an interesting summit – certainly more interesting than it’s parent, Great Sca Fell.
From there I descended to “the neat little pass of Trusmadoor…”, taking a short rest near the bottom and girding my loins for the last uphill slog of the day.
I arrived at Great Cockup summit at twenty past four, thinking that I’d done really well to keep to a reasonable schedule on such a long walk. Having said that, the Uldale fells are only modest in size and generally grassy under foot. Not exactly a severe test, but I was happy nonetheless. The cloud had thickened, but it was still sunny and, most notably, the wind had almost completely stopped.
I dropped down the pathless north ridge of Great Cockup until I reached the River Ellen, where I turned right to a crossing point. After crossing the river there is a clear track all the way back to Longlands. I arrived back at the car just after 5.30pm. It had been an excellent, if windy, 8 hour walk and I was really pleased to have made such a good start to my Spring campaign.
To celebrate such a good day on the fells, I decided a sit-down fish and chip supper was in order so I headed off to Ambleside. Sadly, the Walnut Fish Bar was closed, so I continued to YHA Ambleside where I just missed last orders. I’d have to cook for myself. A packet of microwave rice and tinned curry did the job of filling my stomach but it didn’t feel like a celebratory meal.
Monday
I’d set the alarm clock for an early-ish start on Monday morning. I was meeting nephew Tom at the Stickle Barn car park at 9am for a sausage bap breakfast. The car park was surprisingly quiet and although there was plenty of cloud in the sky, it was bright with the odd patch of blue.
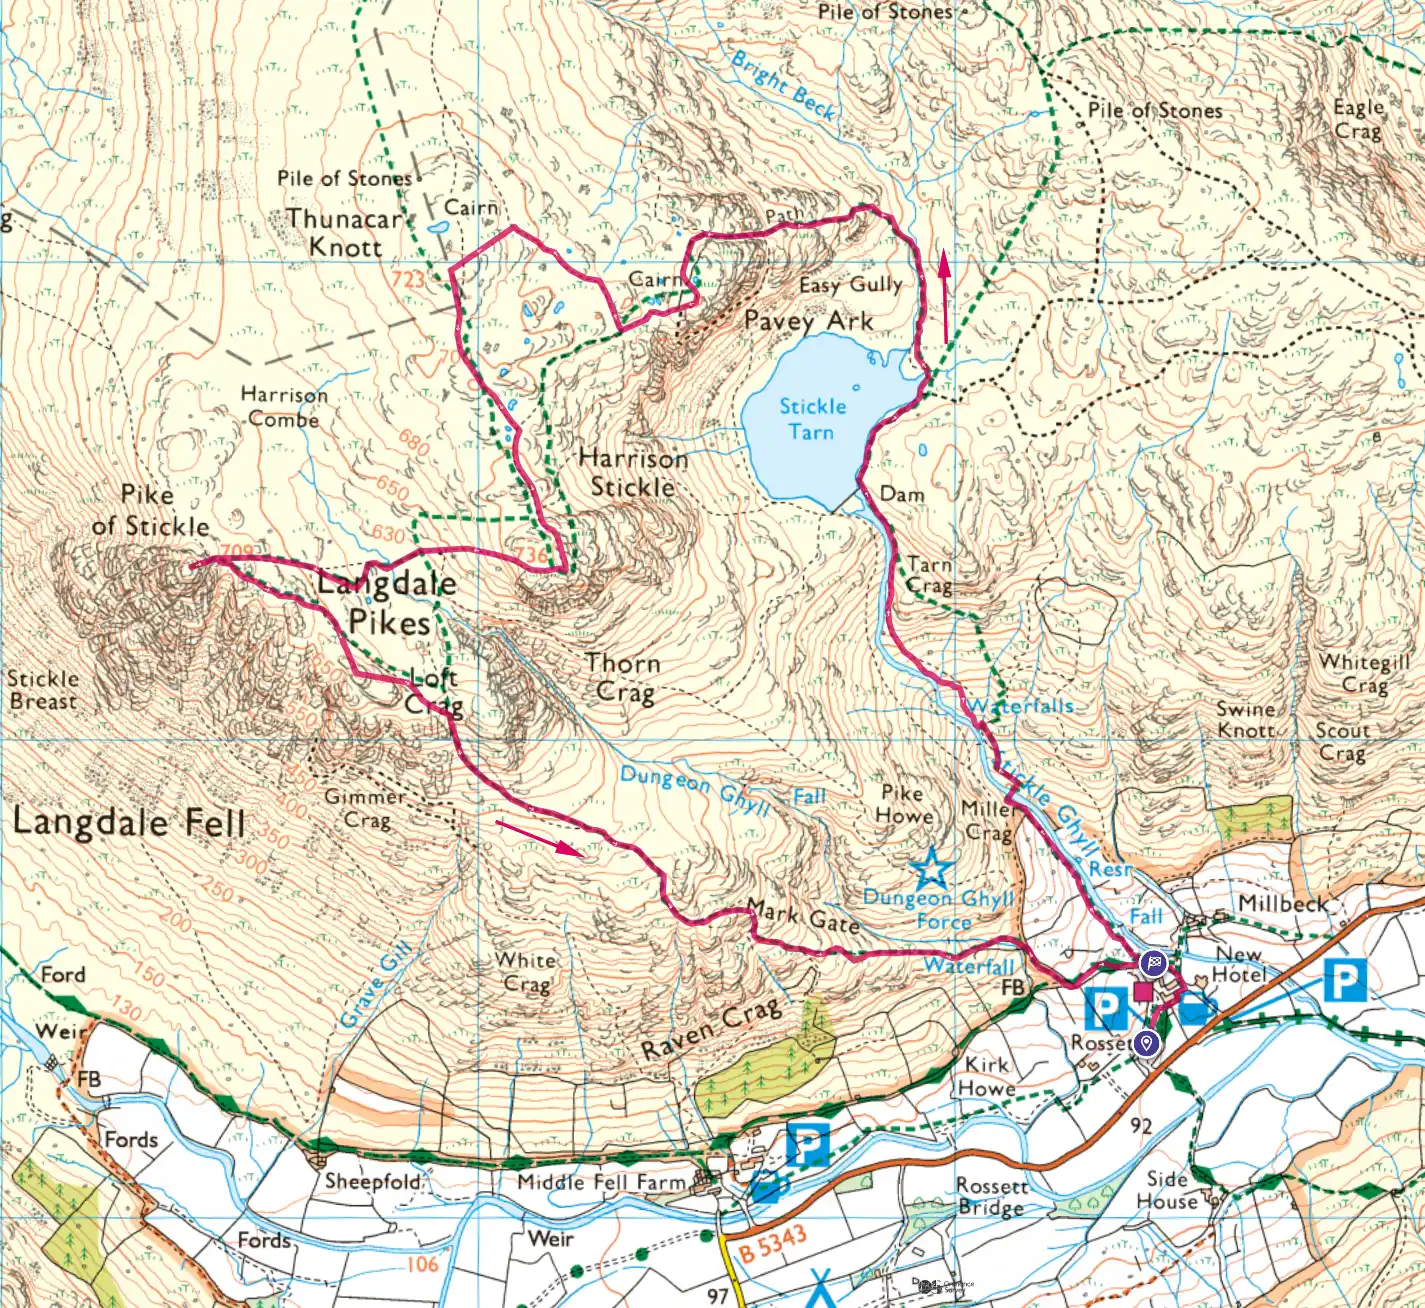
Tom had recently taken up fellwalking but hadn’t tackled the Langdale Pikes so I reckoned a classic walk was in order. It also meant that I could tick off a few extra Wainwrights from the Central Fells.
After breakfast we set off on the steep climb of Stickle Ghyll. I have to admit that I found this more testing than the Ulldale fells, and progress was quite slow but Tom did’t seem to mind and we had a good conversation about what he was doing and his plans for the future. In fact, the conversation flowed easily throughout the day.
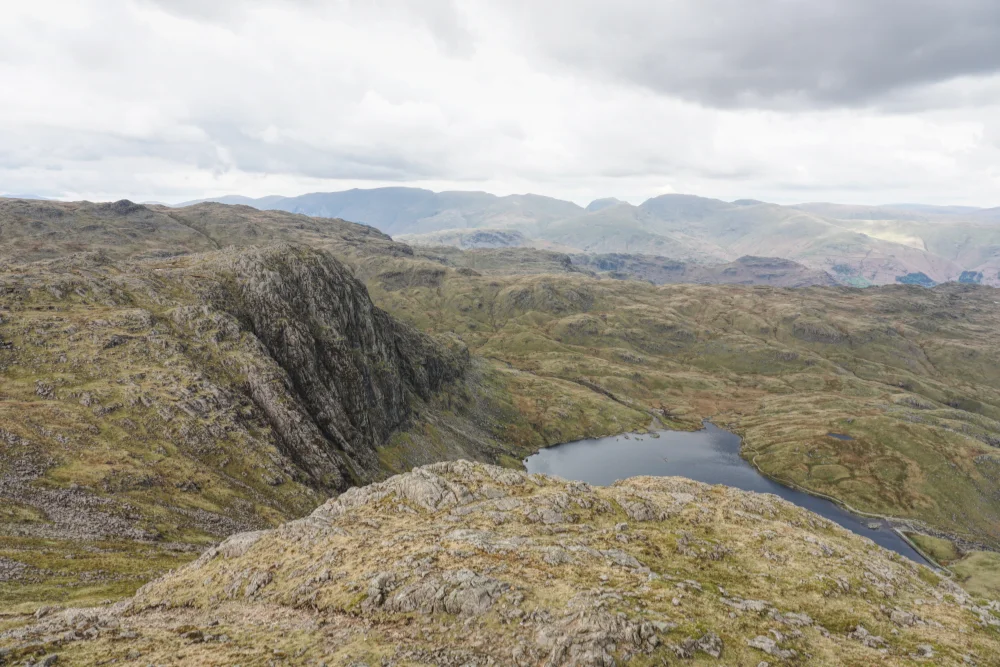
We eventually reached Stickle Tarn just after 10am. The cloud had broken and the sun was out. Pavey Arc stood, cathedral-like in front of us while we rested and took in the atmosphere.
After a short break, we walked around the tarn and to the north along Bright Beck to find the gully scramble that would take us to the top of Pavey Arc. It’s a fun scramble with no real difficulties and a couple of places where it levels out, giving great views over Stickle Tarn.
Pavey Arc summit is a little nondescript, being composed of bald, rounded rocks but it was great to be there with views across to Harrison Stickle and beyond to Bowfell. By this time, the cloud had thickened and it was looking pretty moody.
From Pavey Arc we made the short journey to Thunacar Knott. The light was looking amazing, the pale rocks matched the colour of the not-yet-green grass, and the whole landscape felt alien. I spent a while photographing the scene and we visited both tops (north and south). Wainwright is less generous: “From north and south and east and west, Thunacar Knott is completely unphotogenic, and the best that any illustration can produce is a slight roughness of the slowly swelling curve that forms its broad summit.”
Next stop was Harrison Stickle, the fell with the identifiable flat top as seen from the east. From closer views, it doesn’t seem to have the same distinctive form but as the highest of the Langdale Pikes, it’s always a key target for walkers.
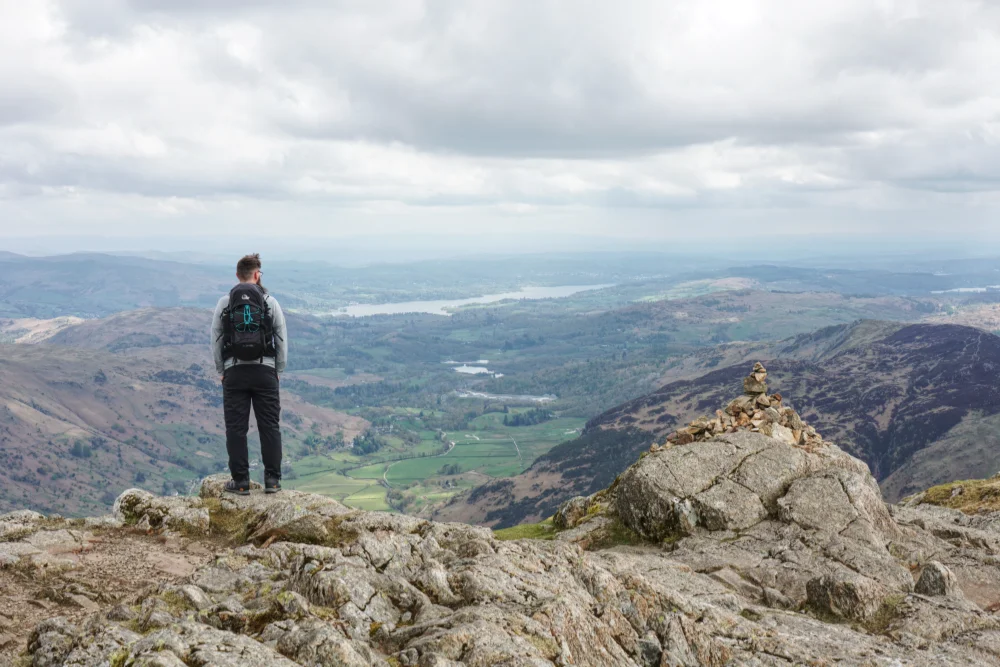
A small group was just leaving the summit of Harrison Stickle as we arrived, so we had the place to ourselves for a little while. The small cairn was looking good and provided an excellent foreground to the dramatic view back to Langdale and Windermere.
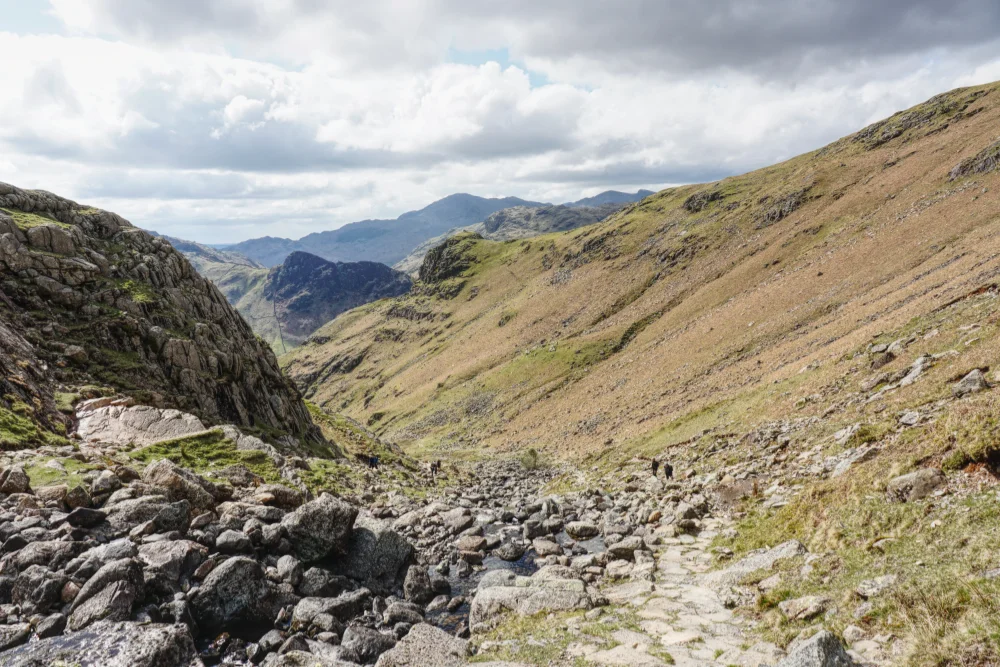
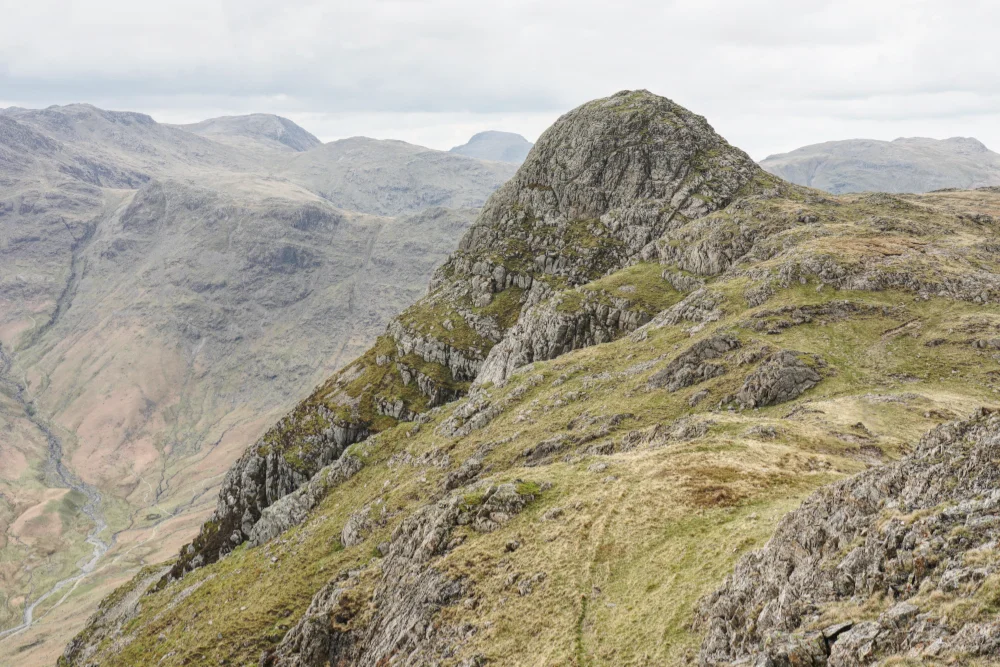
As another group arrived, we left and headed off to Pike o’Stickle, dropping steeply and then walking across Harrison Combe towards the iconic dome of rock. On this visit, I remembered to look out for the short scramble to the summit and it seemed a whole lot easier this time than on previous occasions.
There isn’t much space at Pike o’Stickle summit and a constant flow of visitors, so after the customary summit photos, we scrambled down and headed in the direction of Loft Crag, our fifth and final Wainwright of the day.
Once you get to Loft Crag, you know it’s downhill all the way back and, as is often the case, we were reluctant to leave this high perch. We took a while to enjoy being closer to the sky, drank in the dramatic views and took our time over snacks. Wainwright describes it thus: “The small, delicately poised summit makes a splendid halting place, both for a survey of the fells around the head of Langdale and for its own comfortable bilberry couches, whether fruit-bearing or not.” Well, there was no fruit to be had at this season, but it was a great place to be.
Eventually, we broke camp and set off for the long but relatively easy descent through Mark Gate. We took our time and had a good chat about contemporary issues. The cloud thickened a little more and there were a few spots of rain but it never really threatened a soaking. Finding a vacant bench just above the car park, we took a seat and chatted some more.
We’d had a good day and although a cold bitter shandy at Stickle Barn would have been the ideal end, Tom had to get back, so after taking off our boots and packing the cars, Tom drove home and I drove down to Booths at Windermere. I was aiming for the components of an enjoyable meal to compensate for the previous evening.
Tuesday
After two challenging days on the fells, I needed an easier walk. I didn’t feel like I needed a breakfast so I headed straight out to the car and took a short drive to the southern end of Dubbs Road. I parked up just after 9am on a beautiful, sunny morning. Today, I’d switched to the Far Eastern Fells and would visit Sour Howes and Sallows. The key reason for doing so was to check that I had, in fact, visited the correct summit at Sour Howes on my previous visit. It was certainly not obvious at the time, but this time I would use the what3words app to ensure I was in exactly the right place. The excellent Peak Bagging the Wainwrights by Karen and Dan Parker included OS grid references, latitude and longitude, and W3W locations for every Wainwright summit. I’d never have to wonder if I was in the right place again!
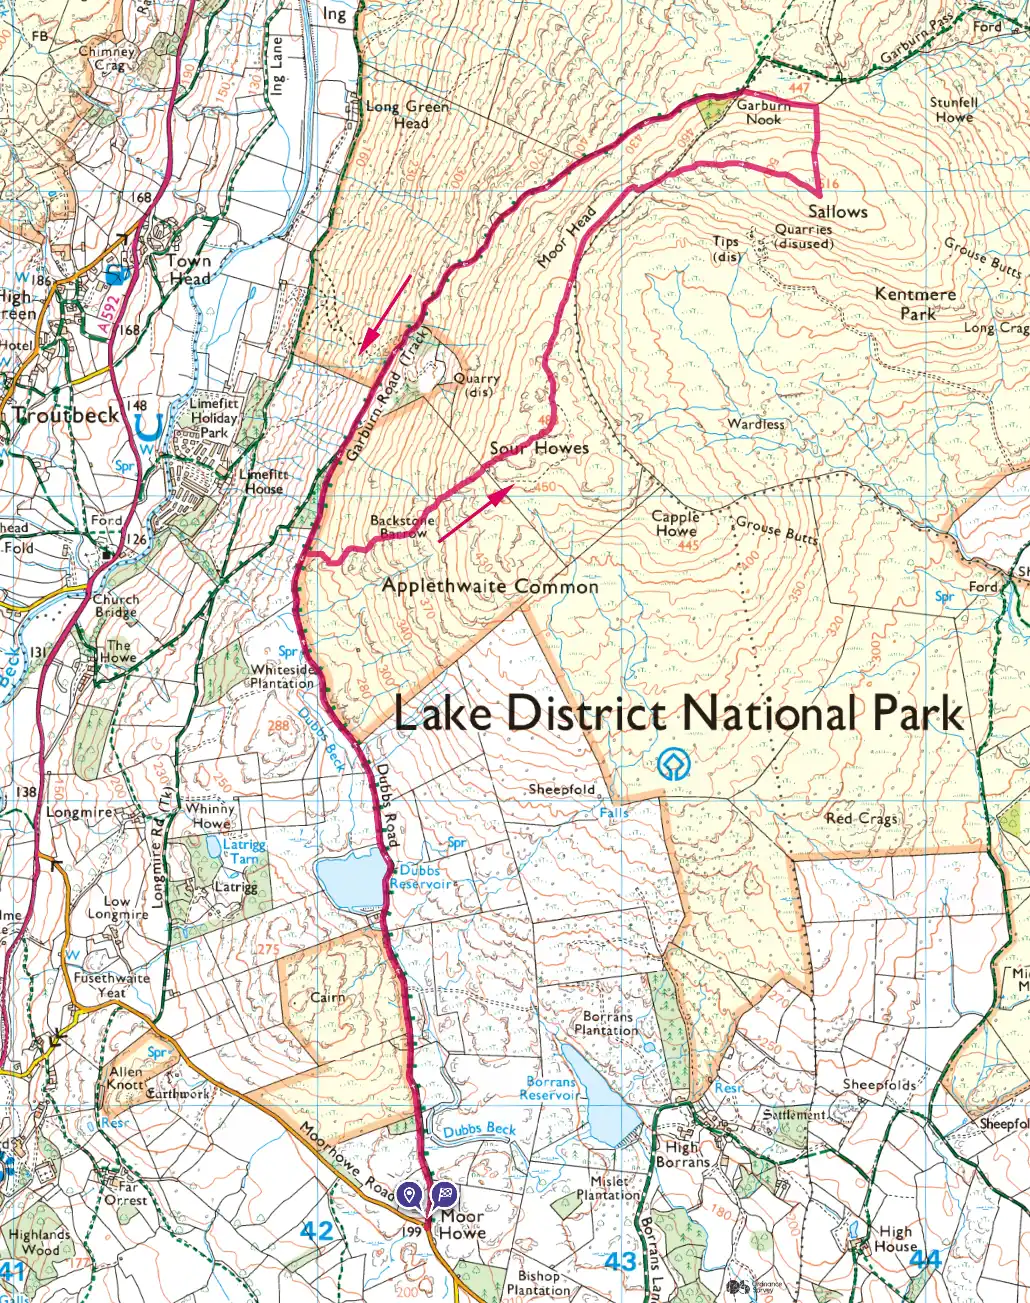
I set off along the Dubbs Road in glorious sunshine and walked about 2km, passing Dubbs Reservoir on the way. At the ladder style, I left the road and began the climb to Sour Howes. It’s a 200m height gain from the road, but the going is relatively easy.

Reaching the hummocky plateau, I used the what3words app to locate the summit. I was very pleased to confirm that I had found the summit on my first visit. It’s far from clear but there is an eroded path to the top of what seems to be the highest hummock.
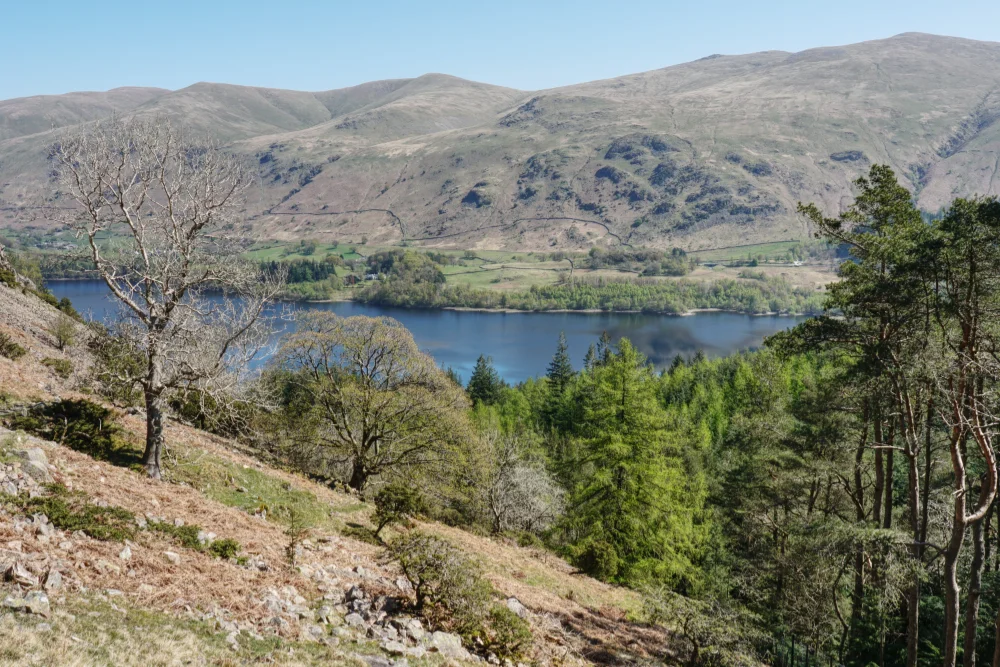
The view of Windermere from the summit is one of the best in the district. I spent a little while familiarising myself with the area round the summit and taking a few photos. Cloud was now bubbling up and the day was not looking as beautiful as it had been an hour and a half earlier.
From Sour Howes it’s a gentle 1.5km stroll to Sallows where the summit, although not spectacular, is at least unambiguous. I took my usual summit photo and then set off, due north, descending to Garburn Pass and picking up the Garburn Road.

An hour and a half later I was back at the car just after 1pm. After changing boots, I drove into Ambleside for a lunchtime Cumberland burger. After lunch I sent postcards to Hannah, Max and Tilly. I had a mooch around Ambleside and then returned early to the hostel.
Wednesday
Wednesday morning I had planned to rise early and head off to Lingmoor Fell for some sunrise photos of the Langdale Pikes. It’s a well-known photo location and this was part of my scheme to refocus some of my time in the Lakes towards more creative activities. Unfortunately, I woke to blanket cloud, which wasn’t forecast, and that put an end to my photographic plans.

As usual I had planned enough walks for the entire trip so it wasn’t too difficult to switch to Plan B. I was headed to the northern Central Fells. It’s not an area I had particularly fond memories of, so I was approaching this walk as a gap-filler rather than anything I would do by choice. As it turned out, this walk would completely change my view of that locality.
Having got up early, I had breakfast and then drove north to Keswick and then south into Borrowdale, parking up at the National Trust car park at Great Wood. I arrived shortly after nine and although there were plenty of people around, there were still plenty of parking spaces.
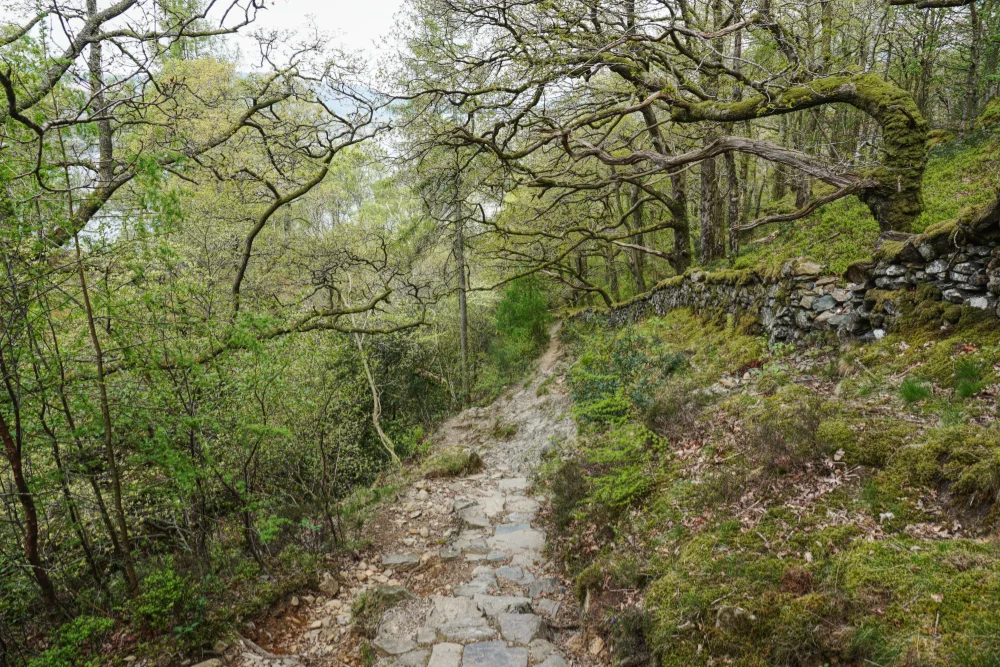
There are several routes to the top of Walla Crag but I’d decided to take what looked like the most interesting (and steepest) via Cat Gill. I can officially confirm that it is very steep and that I seemed to be the only person going that way. Fortunately, much of the route is pitched in stone, so the going is pretty easy if you’re fit. I wasn’t feeling fit but I thoroughly enjoyed the challenge and took it slowly. Forty minutes after leaving the car, I was at the top and admiring the lovely view across Derwentwater to the North Western Fells.
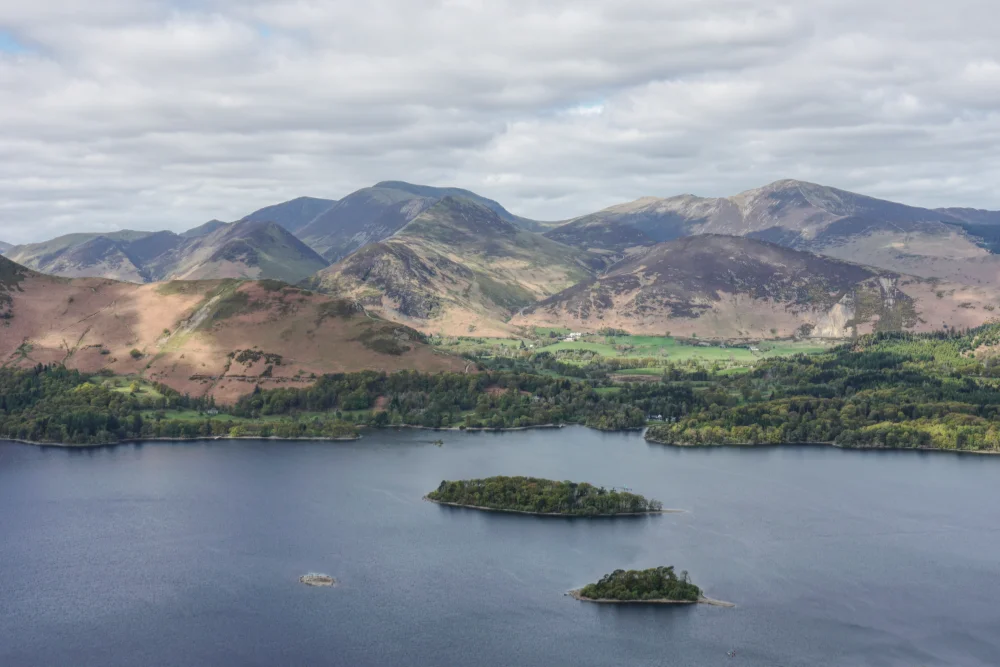
Walla Crag is a popular destination because of its proximity to Keswick and the extensive panoramic views from the summit. There were plenty of people admiring the view although it didn’t feel crowded. After grabbing a few photos, I set off south, following a clear path into apparent wilderness towards Bleaberry Fell, which was clearly visible in the brightening daylight.
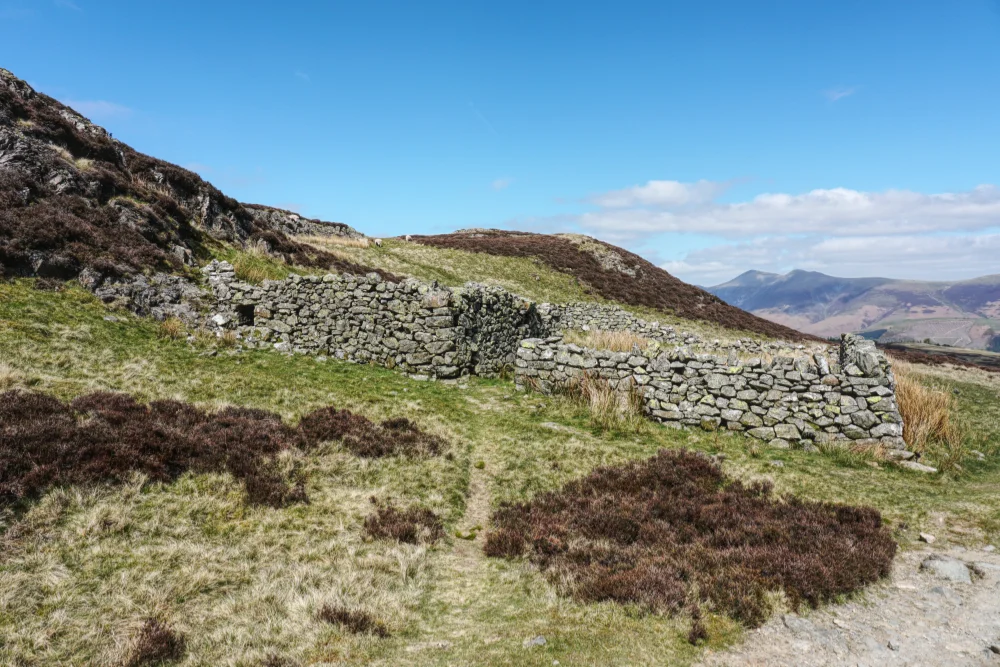
After the steep climb beside Cat Gill, the gently rising path to Bleaberry Fell was a welcome relief and the weather was improving all the while. By the time I reached the stone-built sheepfold at Brown Knotts, blue sky was overhead and a warm sun lifted my spirits further.
The final section of the climb is quite steep with loose rock underfoot, but it’s not difficult and the first (enormous) cairn is soon reached. There were still several groups following the route and most took the opportunity to rest at the cairn.
The summit, however, is a couple of hundred metres further south-east, and that’s where I headed. When I arrived, the summit was deserted and I had the opportunity to take a few photos and have a few moments of contemplation.
My original plan for this walk was to return to Great Wood after Bleaberry Fell but conditions were perfect and the day was still young, it wasn’t yet midday, so I set my sights on High Seat. Taking on this fell from the north would mean I could avoid approaching it via The Pewits, a miserable tract of bog that I am glad to have experienced once, if only to confirm that I’d never want to go there again. So I happily set off south on a much less certain path that the one I’d taken thus far.
Navigation between Bleaberry Fell and High Seat is moderately challenging. It’s a route less well travelled and over some boggy ground so there are twists, turns and detours. Fortunately, the destination is always in view so there was no chance of getting lost.

Eventually, the route rises onto firmer ground and the final pull to the top provides a sense of achievement (once the fence stile has been negotiated). Many of the views from the stone-built trig column are truncated by foreground, but the 360 vista is excellent. Wainwright calls it “…a first-class viewpoint, with much of interest to see in all directions”.
I looked south to High Tove but even on this lovely day and with plenty of time, I wasn’t tempted to cross The Pewits. Instead, I spent some time at High Seat, admiring the views, naming the fells and taking an early lunch. I had the summit to myself and there didn’t seem to be a better place to be at that moment.
After lunch, I set off north-west on a clear path over dry ground, descending Ashness Fell and headed for Ashness Bridge. This was an unexpectedly lovely section of the walk. Return legs of walks are often pragmatic rather than scenic, but this was both. The waterfalls above Ashness Farm were a particular highlight, encountered as the path twists into and out of Ashness Gill.
After the waterfalls, a steep drop, first out of the gill and then on grass beside a fence, brings the walker to the lovely Ashness Bridge, a favourite photographic subject – I guess it must have been snapped millions of times.
From Ashness Bridge, a public footpath follows a beautiful terrace walk above the shore of Derwentwater and back to the car park at Great Wood where I arrived shortly after three o’clock on a still beautiful afternoon.
This walk was fantastic and I now consider the area one of my favourites. Taking things nice and easy, this is a 6 hour walk presenting only minor challenges for the moderately fit and I would certainly do it again.

Back in Keswick, I visited the pencil museum and then picked up a ready-meal and a few cans of beer from Booths. The evening would be spent listening to Liverpool’s Champions League game against Villarreal (a 2-0 win).
Thursday
The plan for Thursday was to drive up the western shore of Thirlmere to the parking area at Armboth and from there to bag High Tove and Armboth Fell. It seemed like a simple plan. What I didn’t know was that the lakeside road was closed from both north and south and it wasn’t until I’d tried both options (signage was at best ambiguous) that I decided it would be less frustrating to be somewhere else.
I drove north, back to Keswick and then again to Borrowdale. I had hoped to park at the small car park and Rosthwaite, but the time wasted around Thirlmere meant I had no chance of a space there, so I continued to my favourite car park at Seatoller where I always seem to find a space. It meant a longer walk in but that didn’t bother me too much. I’d wasted quite a lot of time already but I was determined to have a descent breakfast so I got the stove out and had sausage baps for what was more like brunch.
By the time I set off, it was 11.30am but this wouldn’t be a long walk and I was happy enough knowing that I would have plenty of time to bag both Great Crag and Grange Fell.
The last time I bagged those fells, I was with Tilda and it was a very hot day in August (2016). We had an enjoyable walk that day and although today was looking rather grey, I wasn’t anticipating any problems.
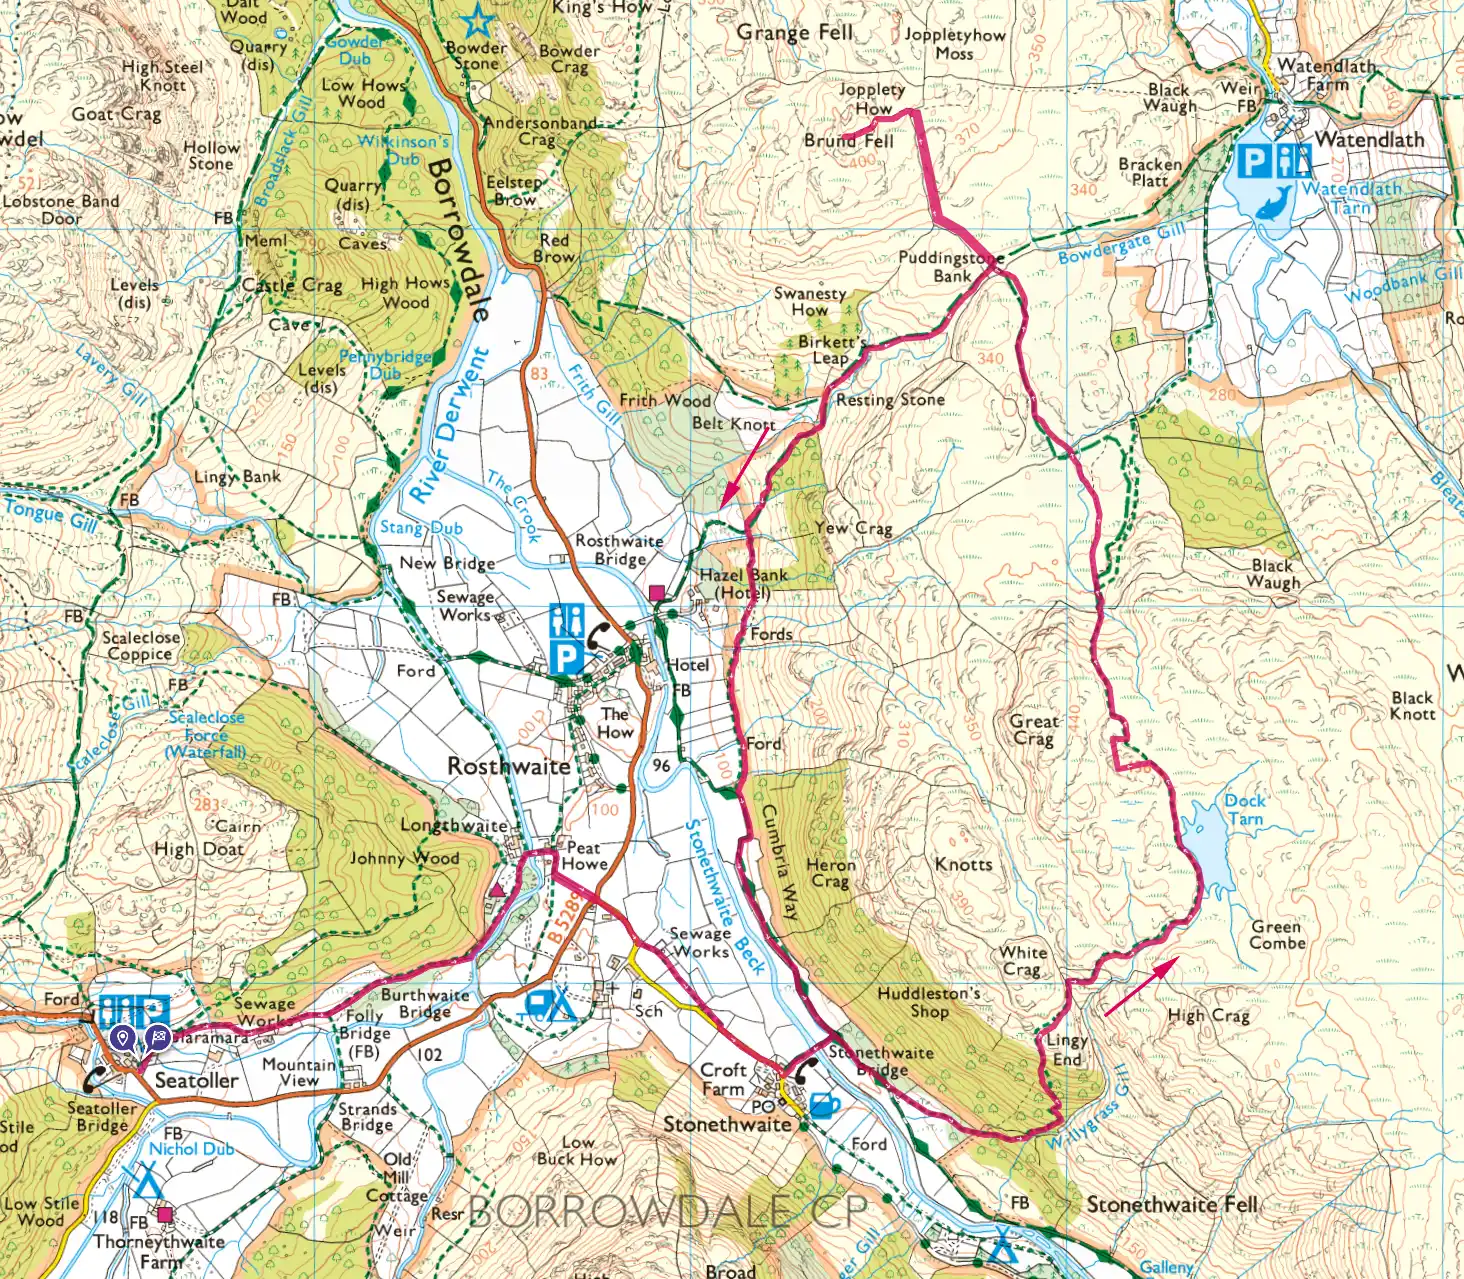
I walked along the footpath to YHA Borrowdale and then crossed the B5289 to Stonethwaite. At Stonethwaite, I crossed the beck, turned right and then looked out for a path leading left up Lingy End.
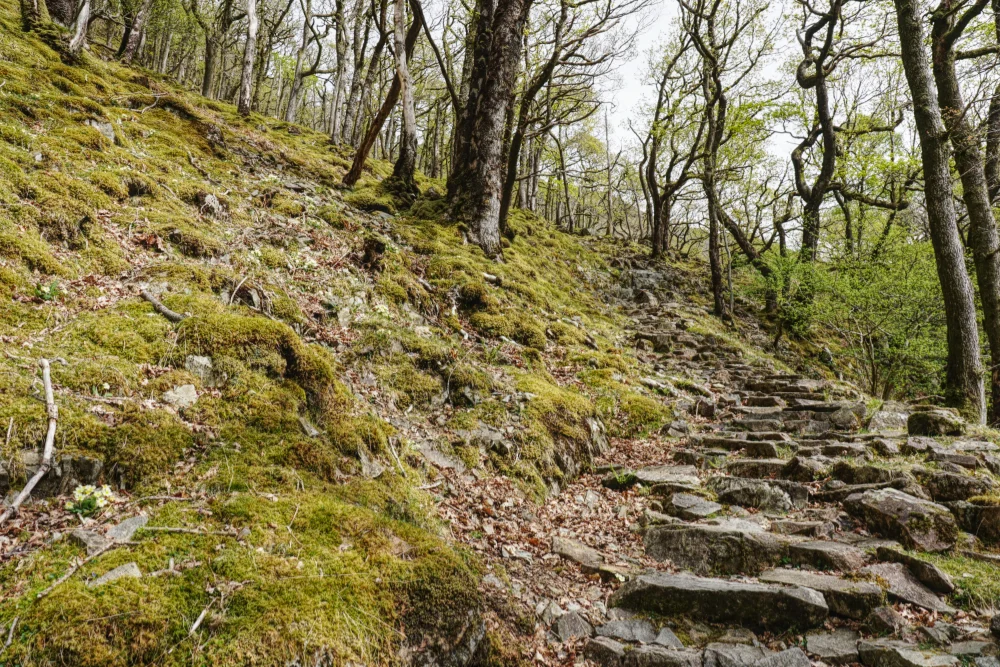
It’s a steep climb to Lingy End but the woodland is lovely and the path is well pitched. Above the woodland, views open up across the valley to Bessyboot and most prominently to Eagle Crag in the south.

A couple of hours after leaving the car, I was at the beautiful Dock Tarn, although today it wasn’t sparkling in the sun as it was on my previous visit seven months earlier. On that day I came upon Dock Tarn for the first time at the end of a long walk and then dropped down via Lingy End, so I’d now done that section of walk in both directions.
From Dock Tarn I followed the footpath towards the ambiguous summit(s) of Great Crag. On my first visit I had mistaken the northern top as the summit because of an incorrectly captioned photo in Mark Richard’s Fellranger guide and although I had visited both tops, I had photographed the wrong one. So now was my opportunity to correct that error and this time I used the what3words app to ensure I had it absolutely right.
The ambiguity is understandable as it’s impossible to tell, by looking at the two tops, which is the higher. There must only be perhaps a metre in height between them, and they are both marked with substantial cairns. So this time I photographed the actual (southern) summit and felt happy to have a complete photographic record of all the Wainwright summits.

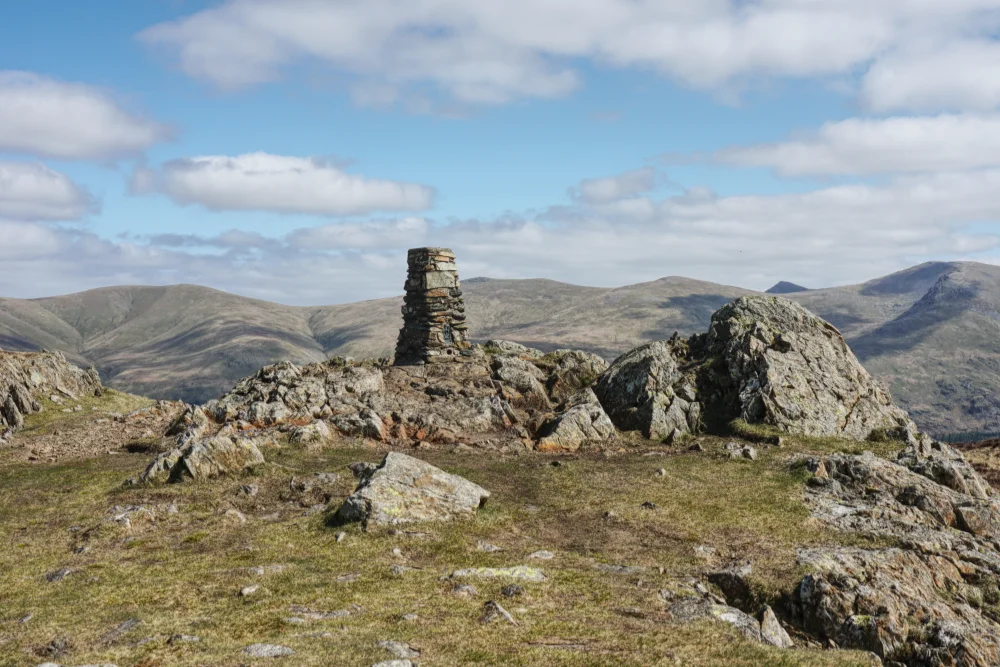
Dropping down from Great Crag summit, I followed the path to the summit at Grange Fell (Brund Fell). There is also some ambiguity here and there are several rock outcrops that could lay claim to the highest point. However, the accepted top (not necessarily the highest) is a rock outcrop marked with distinctive igneous medallions and the W3W app confirmed that this is the same point I visited on my first round.
I left Great Crag summit at 4pm and followed the path down towards Rosthwaite. Rather than descending to the road, I picked up the public footpath along Stonethwaite Valley until it joined with the Cumbria Way. I followed that until I reached Stonethwaite Bridge, which I crossed and made my way along the road and back to the B5289 and then the footpath via YHA Borrowdale back to the car park, arriving around six in the evening.
I drove back to Ambleside via Keswick and couldn’t resist another stop at Booths (fast becoming my favourite supermarket). I bought a microwave supper and a bottle of Lakes Gin as a present for Hannah.
Friday
This would be my last day in Lakeland for this trip. I had one walk remaining and just a couple of fells to tick off to complete the Central Fells. The only problem was the road closure at Thirlmere. However, the previous evening I’d done some research and decided I could park up on the A591 and walk in from there. Although the road was closed to vehicles, I could walk the 2.5km from the main road to Armboth, and that’s what I did.
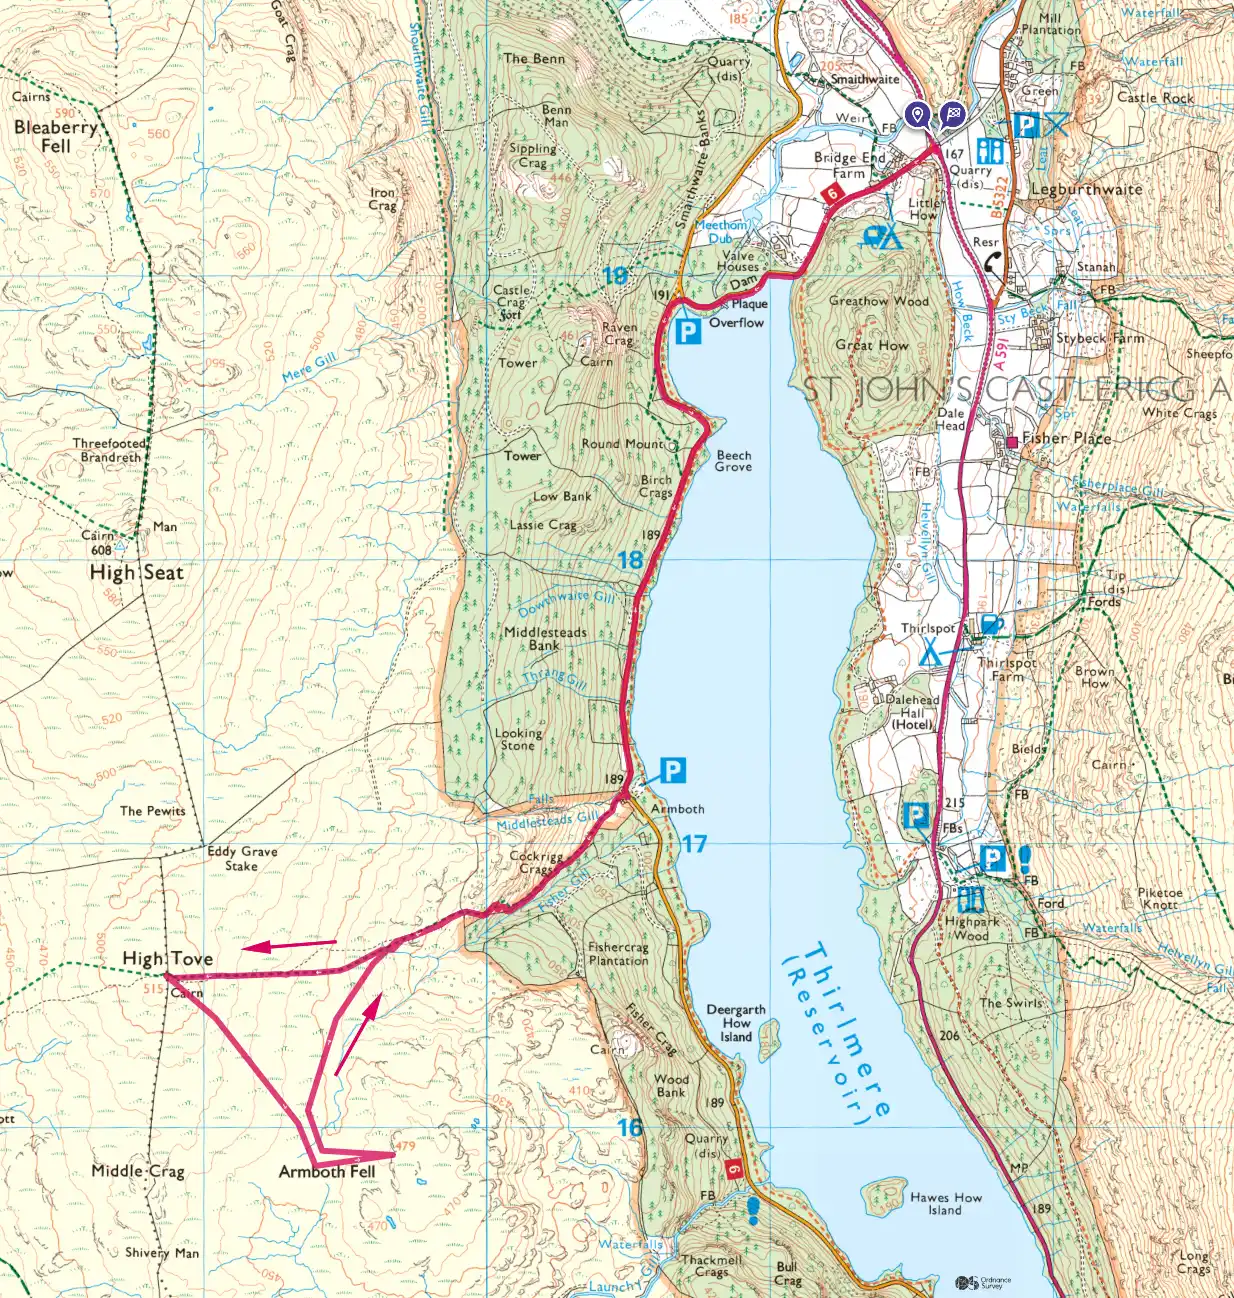
I packed early and checked out of YHA Ambleside. It was a beautiful morning with not a cloud in the sky and I arrived at the start point before 9am. There were already several cars parked up and (rather curiously) a pile of turnips looking just like a summit cairn.
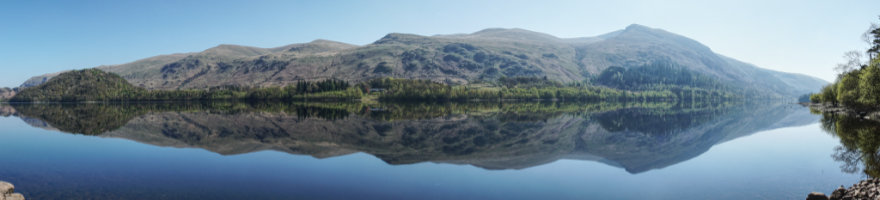
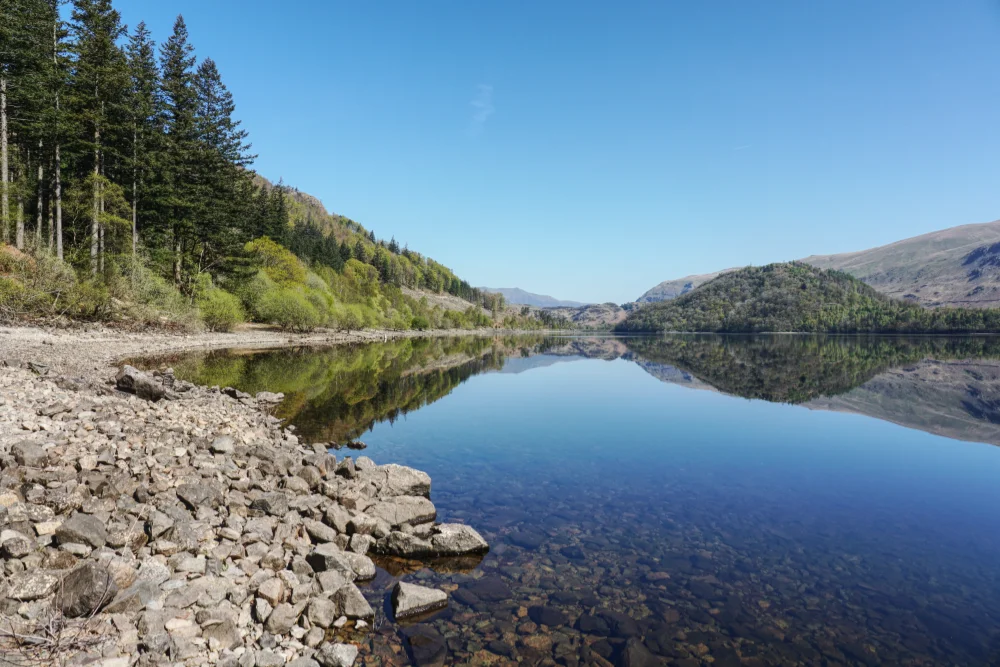
I set off towards the dam at the northern end of Thirlmere. There was not a breath of wind and as I passed over the dam and under Raven Crag, the reflections of the surrounding fells in the water looked amazing. I’d made the right choice to put off this walk until today, the place looked absolutely stunning.
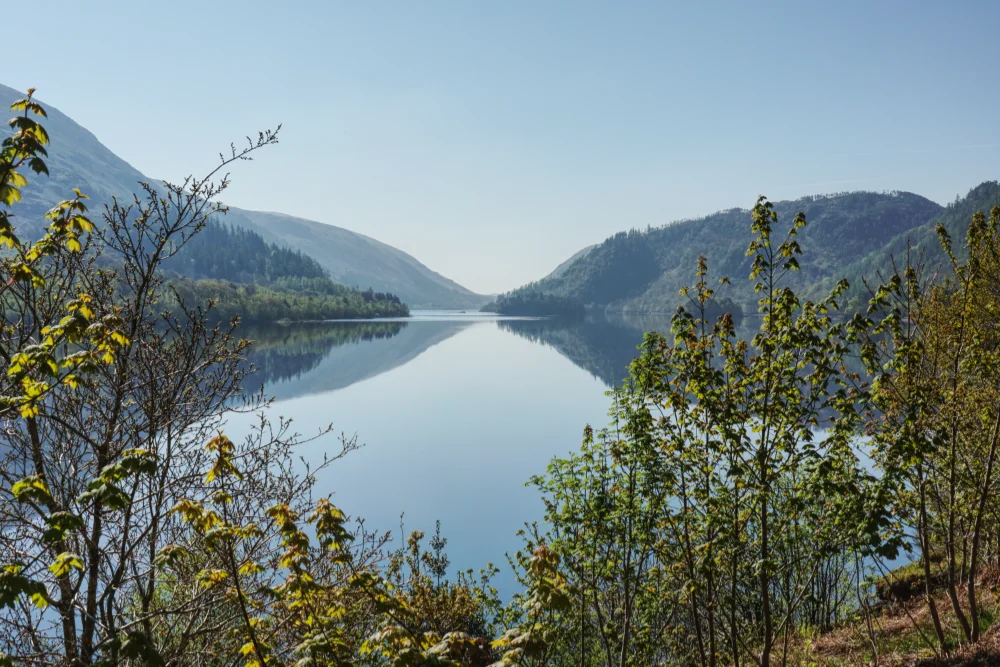
This walk along the lake, with no traffic and no one else around was an absolute treat. I took my time and arrived at Armboth just before ten. I went down to the waters’ edge and took lots of photographs. I am running out of superlatives to describe the way the Helvellyn range looked as reflected in the mirror-like surface of Thirlmere – it was breathtaking.
Photographs can only go so far in describing a place. What they can’t do is describe the feeling. I felt lucky to be alive and lucky to be possibly the only witness to this awesome scene. I stayed at the lake edge for some time, not wanting to break the spell.
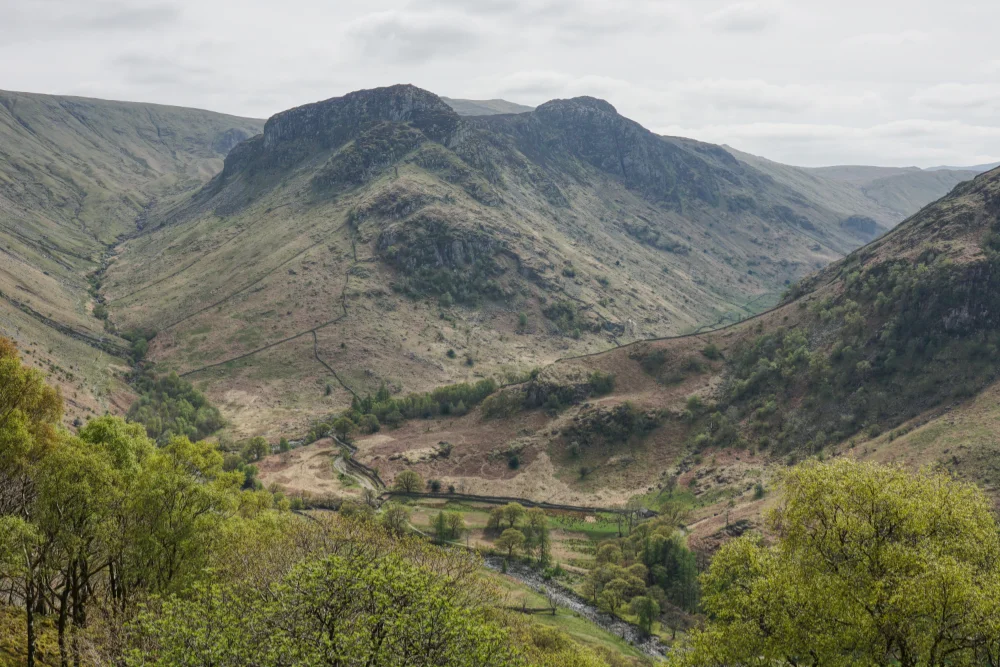
Eventually, the faintest breeze disturbed the surface of the lake and the moment had passed. I turned my attention to the walk and set off uphill towards High Tove. The climb is a bit of a slog, but much of it is in the shade of Fishercrag Planation and, despite the sun, I didn’t feel too hot.
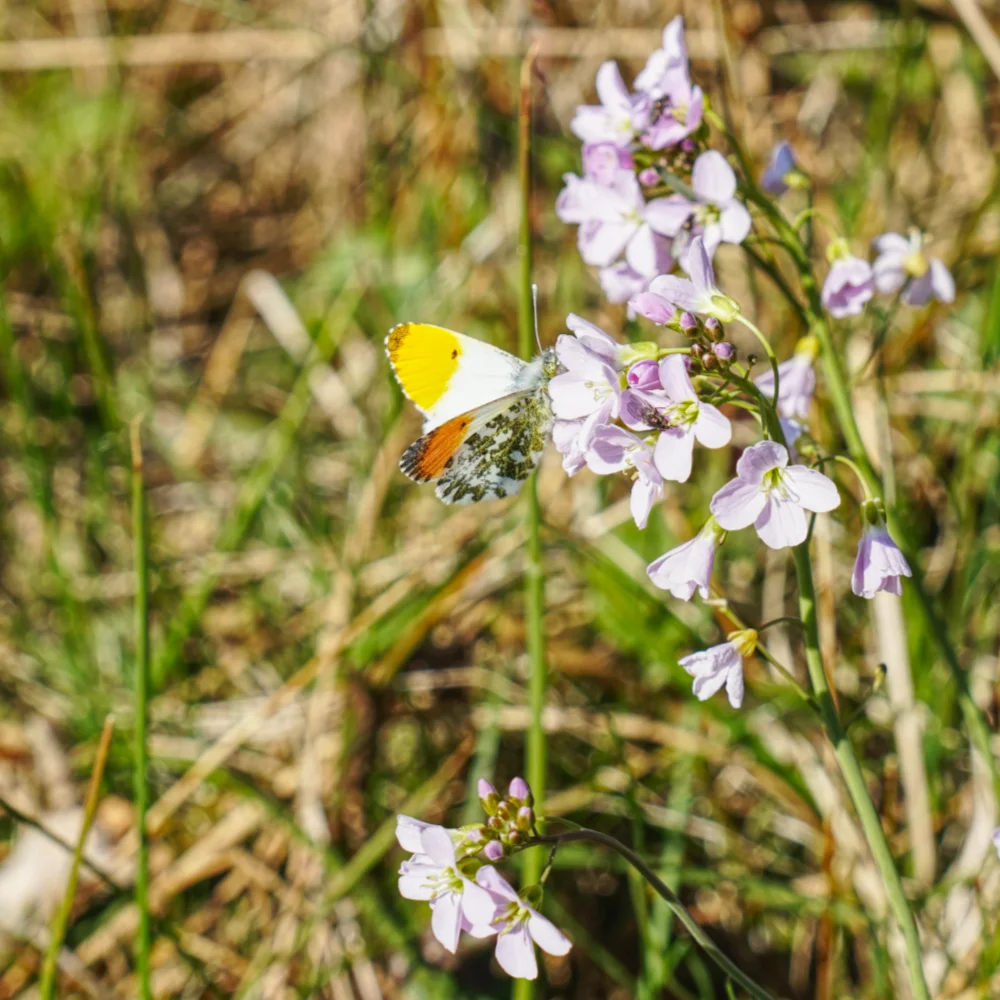
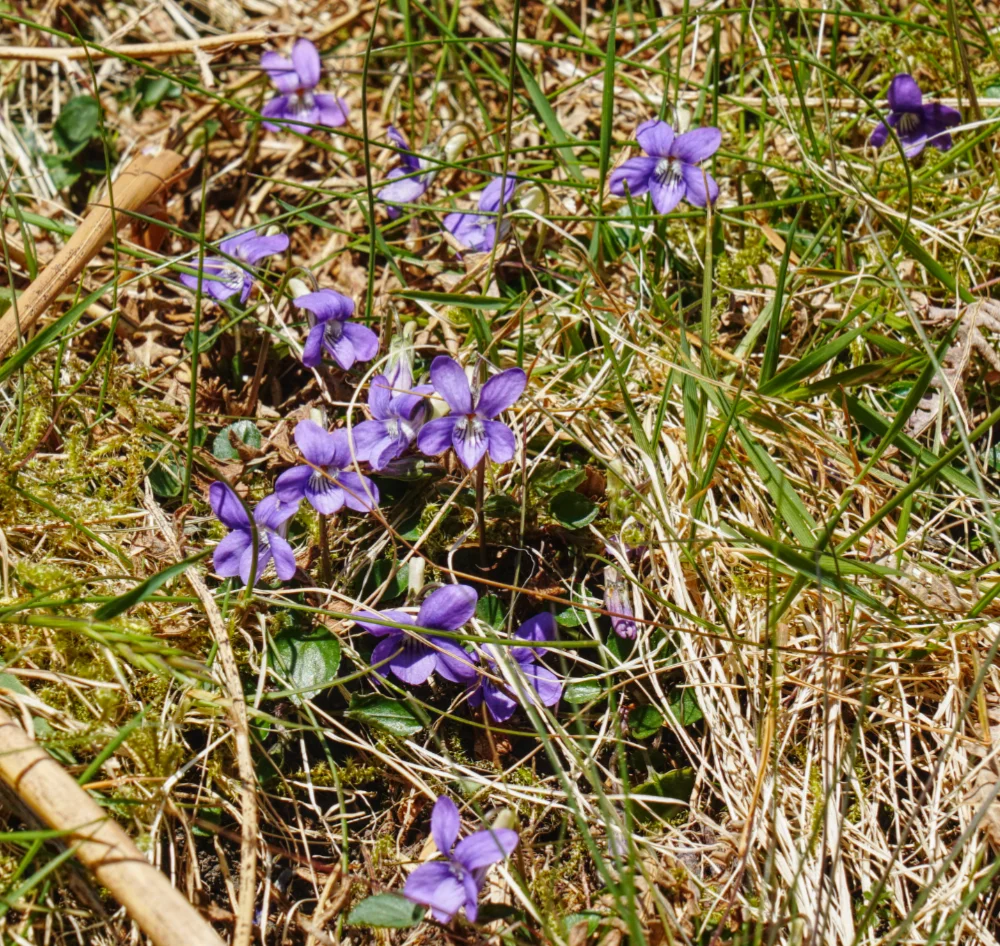
After many trips to the Lakes, I’d discovered that whenever you’re there, one plant species tends to capture the attention. This week, it was the Violet, I’d spotted it several times this week, but the path beside Fishercrag Plantation had it in abundance.

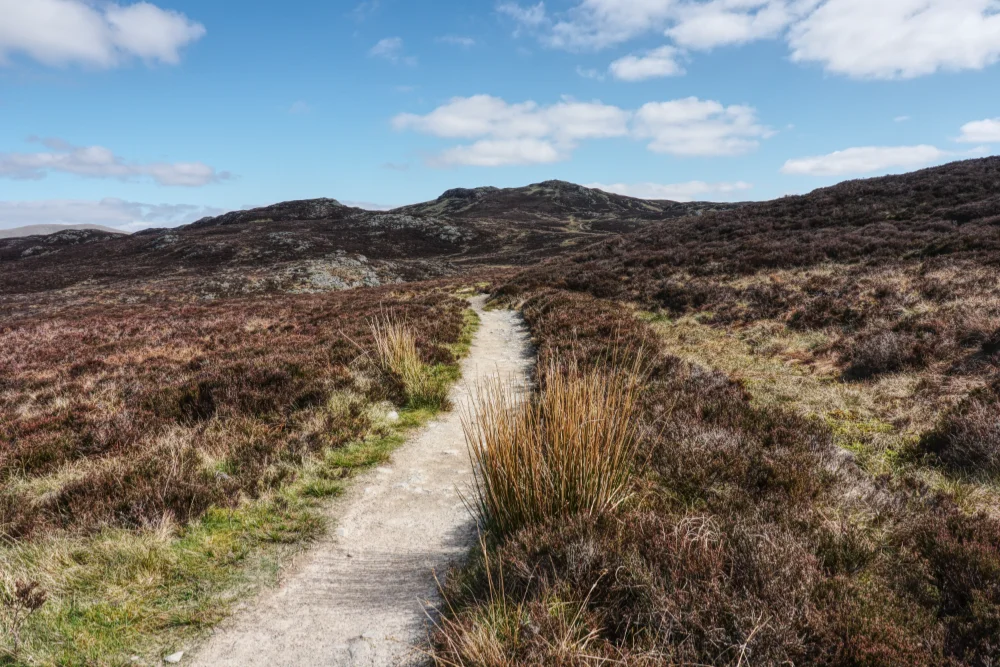
Above the plantation, the landscape opens out and the route continues over humocky grassland with only traces of footpath. Fortunately, the target is rarely in doubt and I was soon at the summit. The climb from Thirlmere had taken exactly one hour.
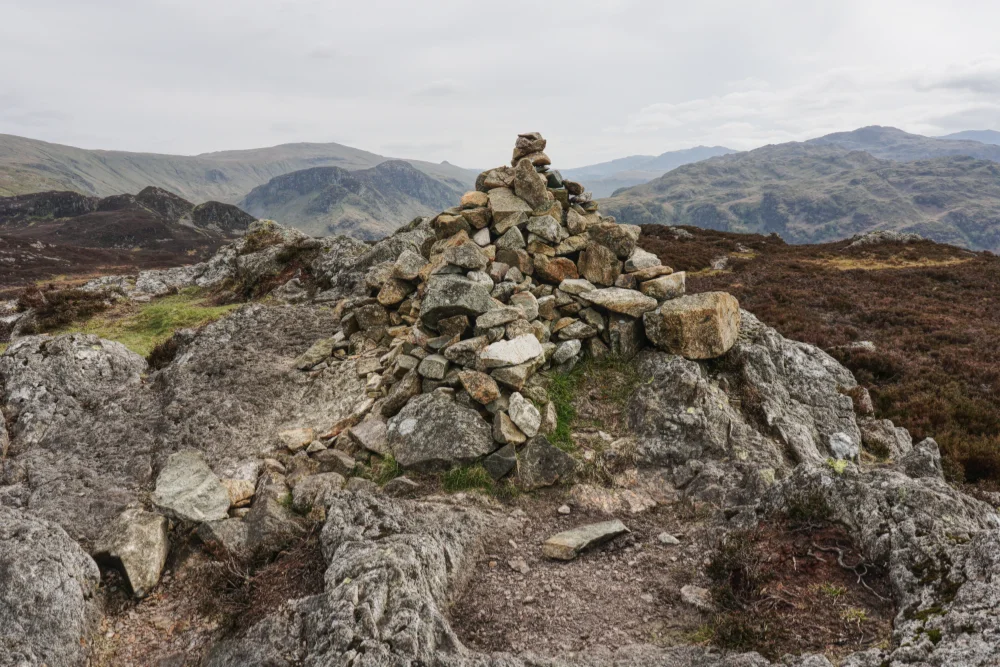
A large cairn marks the eastern edge of the summit, but it isn’t the highest point. A hand-gate in the ridgeline fence is on higher ground. Naturally, I passed through the gate to claim the summit and then returned to the cairn for a well-earned rest.
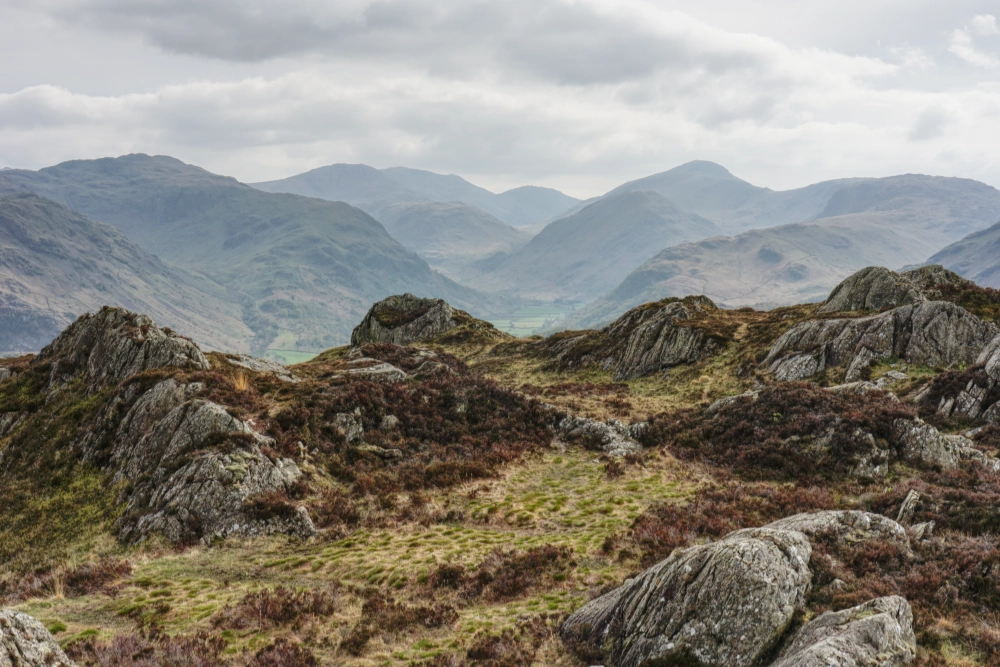
From High Tove, I could see Armboth Fell and could just about make out the path. I set off downhill and half an hour later was sitting atop the stone dome of Armboth Fell summit. A tiny pile of stones had been arranged to mark the spot but it could easily have been swept away with a single flick of the wrist.
I looked south to Bell Crags and wondered whether I should continue my walk to take in the Fellranger top. After some contemplation, I decided against that plan. I had a long drive home and didn’t want to risk spoiling the day.
After the usual dallying – not wanting to leave the final summit of an excellent visit – I returned to Thirlmere and walked back along the closed road to the car, arriving at 2.30pm.
So I’d now completed the Central Fells for the second time and was already planning walks in The Far Eastern Fells for August. There must be a natural order to walking the fells that runs contrary to the order of Wainwright’s guides. On both this round and the first, I’d completed book three before book two.∗
24th April 2022
The Uldale Fells
Longlands Fell
Brea Fell
Great Sca Fell
Knott
Great Calva
Meal Fell
Great Cockup
25th April 2022
The Langdale Pikes
Pavey Ark
Thunacar Knott
Harrison Stickle
Pike o’Stickle*
Loft Crag*
26th April 2022
Sour Howes
Sallows
27th April 2022
Walla Crag
Bleaberry Fell
High Seat
28th April 2022
Great Crag
Grange Fell
29th April 2022
High Tove
Armboth Fell
* Previously bagged on the second round
Kit notes
It’s some time since I last wrote about my walking kit and that is largely because it hasn’t really changed for the last few years. I’m still loving my Darn Tough socks and my walking gear is very comfortable and versatile. I changed my boots (again) a year or so back and am now wearing Keen Pyrenees, which seem to be perfect for what I need and don’t cause me any pain. I even bought a second pair that I’ll wear only when the first pair have worn out because I don’t know whether Keen will continue making them.
So, what’s different this time? Well, in January 2022 I upgraded my camera. I have been very happy with my (almost) 10 year old NEX-6, but since upgrading my main lens last year, I’ve realised that the NEX isn’t making best use of it. So, I now have a Sony A6500 to go with the Sony E 16-55mm f/2.8 G. I bought the lens new but the camera was an eBay purchase. I did consider a new A6600, but for half the price I got a “like new” A6500, which is all I need for landscape photography. So, all the photos in this post are taken with the new camera and lens combination and that should do me for another 10 years. I’m keeping my lovely NEX-6 as a fall-back camera. Frankly, it’s not worth anything second-hand and I still love it to bits. In fact, I love it about as much as my Pentax MX film camera, the one I used for 25 years before moving to digital. Fingers crossed I’ll feel the same way about the A6500 in 10 years’ time.